")
Okay, let’s talk about this side lighting thing. It’s funny, when I first started messing around with lights, I didn’t really get it. My instinct was just, you know, point the light at the thing. Simple.

My First Clueless Attempts
So that’s what I did. I’d set up whatever I was shooting, maybe a person, maybe just some object on my table, and I’d stick a lamp right in front. Bam. Bright, right? Yeah, but also… flat. Everything looked kinda washed out, like a deer in headlights. There were no interesting shadows, no real sense of shape. It just looked… lit. Not very exciting.
I remember trying to take a picture of this old wooden box I had. Put the light straight on, and all the cool grain and texture just vanished. It looked like a smooth, boring brown box. I was pretty disappointed, honestly. I knew photos could look better, but I wasn’t sure how.
Moving Things Around
Then, just messing around one afternoon, I moved the lamp. I didn’t even mean to do anything fancy, I think I just needed space on the table. But the lamp ended up off to the side of the box. And suddenly, whoa. One side of the box was bright, sure, but the other side fell into shadow. More importantly, all that wood grain? It popped! You could see the little bumps and textures because the light was scraping across the surface from the side.
That was the lightbulb moment for me (pun intended, I guess). Putting the light source to the side totally changed the look.
Experimenting and Seeing the Difference
So I started playing with it more deliberately. What happens if the light is exactly 90 degrees to the side? What if it’s slightly more forward, or slightly behind?
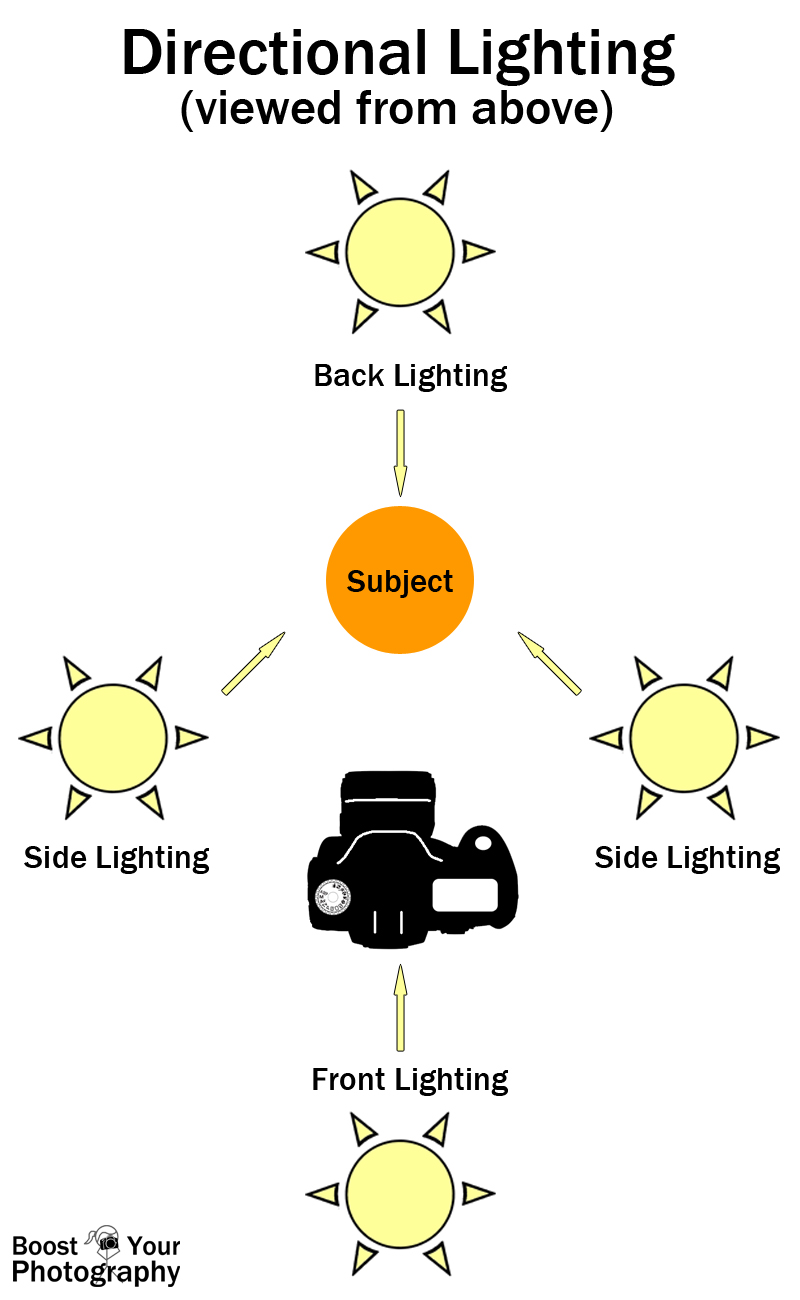
- Light directly to the side (90 degrees): This gave a really dramatic split look. Half bright, half shadow. Super moody, great for showing texture.
- Light slightly forward (around 45 degrees): This seemed like a nice balance. Still got good shape and texture, but the shadows weren’t quite as harsh. It felt more natural for faces sometimes.
- Light slightly behind: This was interesting too. It created this rim of light around the edge, really separating the subject from whatever was behind it. Kinda cool effect.
I also realized I didn’t always need a super dark shadow side. I grabbed a piece of white foam board, just cheap stuff, and held it on the shadow side. It bounced some light back, softening the shadows without killing the shape. It was like having a dimmer switch for the shadows.
So, Why Do It? My Takeaways
After all that fiddling and experimenting, here’s why I think side lighting is so useful, based on what I saw myself:
It Creates Shape and Dimension: This is the big one for me. Light from the side casts shadows that reveal the form of an object or a person’s face. It stops things looking flat and gives them a 3D feel. You actually see the curves and edges.
It Shows Texture: Like with my wooden box, light skimming across a surface from the side makes textures stand out. Wood grain, fabric weave, skin texture, bumpy surfaces – side light brings all that detail to life.
It Adds Mood and Drama: Those shadows aren’t just about shape; they create feeling. Deeper shadows can feel mysterious, dramatic, or intense. Softer side lighting can feel gentle and shaping. You control the mood with where you put the light and how you handle the shadows.
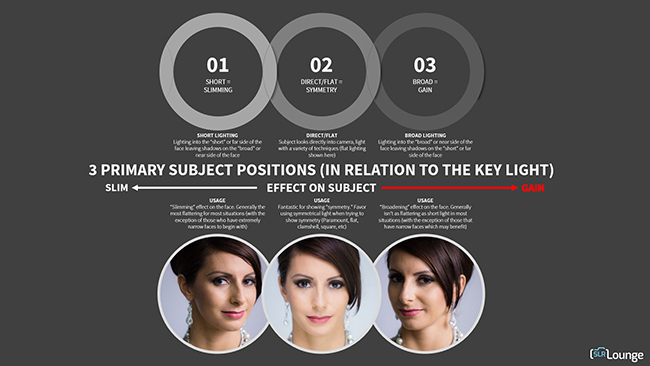
It Separates the Subject: Especially when the light is slightly behind the subject, that edge light (rim light) really helps lift the subject away from the background. Makes them pop.
So yeah, that’s my journey with side lighting. Started clueless, just pointed light straight on. Then, by accident and then by trying stuff out, I figured out moving that light to the side makes a world of difference. It’s not about just making things bright; it’s about using light and shadow to show shape, texture, and mood. It’s a fundamental tool now in how I approach almost any shot.
")


")


