
You know, for the longest time, I was all about color. Bright, punchy, vibrant – the whole nine yards. Every photo I took, I was thinking about how the colors would pop. And honestly, a lot of it ended up looking… well, a bit much. Like I was trying too hard, you know? It just felt like I was chasing something that wasn’t really there half the time.
Then, I kind of hit a wall. I was looking through my pictures, and everything started to feel samey. Loud, but not really saying much. I remember thinking, there’s gotta be more to this photography thing. I needed a reset, a way to see things differently. So, I figured, why not give black and white a serious shot? Not just as an afterthought, like “oh, this color photo didn’t work, let’s try B&W,” but to actually go out and shoot for black and white.
My First Dumb Attempts
So, I started. And let me tell you, my first attempts were pretty awful. I thought, “Easy, just desaturate the color photos in my editing software, right?” Wrong. So wrong. Everything looked flat, muddy, and just plain boring. Like a cheap photocopy of a good idea. It was a real slap in the face. I almost gave up, thinking maybe B&W just wasn’t my thing. I realized pretty quick that taking out color isn’t what black and white photography is about. It’s a whole different ball game.
Figuring Out What Actually Matters
That’s when I started to really dig in. I wasn’t just going to click a “black and white” filter and call it a day. No sir. I had to retrain my eye. I started looking for stuff I’d normally ignore when I was chasing colors.
Here’s what I started doing:
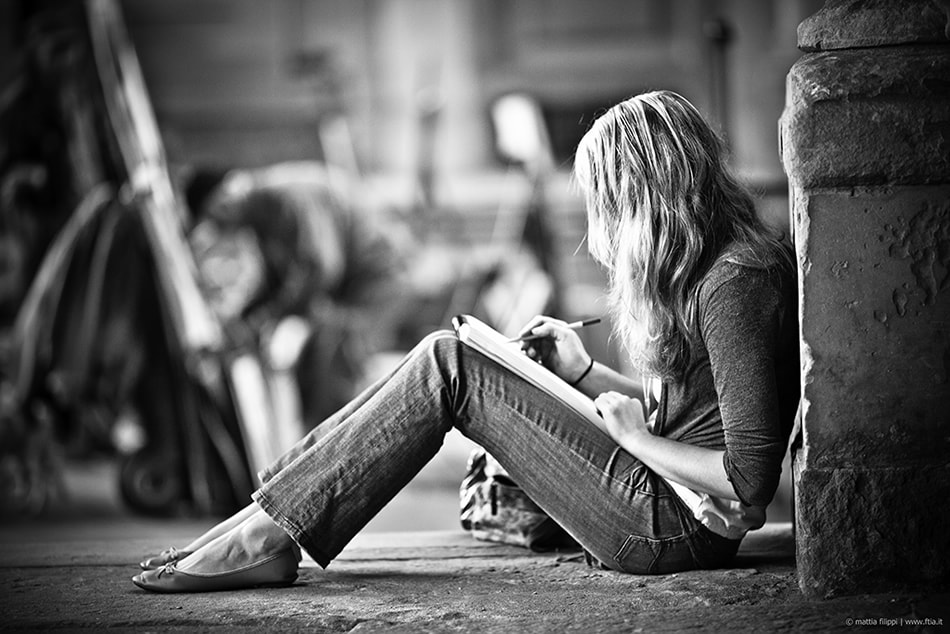
- Chasing Light and Shadow: This became my number one thing. Seriously. How the light hits something, the deep shadows it creates, the subtle shifts in between. That’s where the drama is in B&W. Bright, sunny days could be harsh, but overcast days? Oh man, the light was soft and beautiful for textures.
- Hunting for Textures and Patterns: Rough wood, peeling paint, the lines on someone’s face, clouds – anything with a distinct texture just sings in black and white. Colors can sometimes distract from these, but in B&W, they’re front and center.
- Focusing on Shapes and Forms: Without color, the actual shape of things becomes way more important. Silhouettes, strong lines, geometric patterns – these really stand out. I started composing my shots thinking about these elements much more deliberately.
- Looking for Contrast, Big Time: Not just light and dark, but also contrast in textures, or contrasting subjects. This is what gives a B&W photo its punch, its depth. A lot of my early B&W shots were just a sea of grey because there was no real contrast.
The Actual “Going Out and Doing It” Part
So, with this new checklist in my head, I’d go out. I even set my camera to its monochrome picture style sometimes, not for the final image (I always shoot RAW, always!), but just to help me see the world in black and white through the viewfinder. It’s like a little preview. It forced me to ignore the colors and focus on the tones, the light. I’d walk around, specifically looking for scenes that had strong bones – good structure, interesting light. I’d take way more time composing. I realized that B&W is less forgiving of sloppy composition than color sometimes.
Then Came the Editing Grind
Getting the shot in-camera was just half of it. The other half, and it’s a big half, was the editing. And no, not just hitting “convert to grayscale.” I’d pull the RAW file into my software and really start working it. This is where you bring out what you saw or what you felt. I’d spend ages on:
- Adjusting Contrast: Global contrast, local contrast, playing with the tone curve like it was a musical instrument. Making sure the blacks were black and the whites were white, with all those lovely greys in between.
- Dodging and Burning: Old school techniques, but man, they work. Lightening some areas, darkening others, to guide the viewer’s eye and add depth. It’s like sculpting with light. This takes time, it’s not a quick fix.
- Playing with Color Channels (even in B&W): When you convert from a color RAW file, you can tweak how different colors translate into shades of grey. Want a dramatic sky? Play with the blue channel. Want skin tones to look a certain way? Mess with the red and orange. This is super powerful.
It’s a process, not just a preset. Anyone who tells you otherwise is probably trying to sell you presets. It’s about making deliberate choices to enhance the mood and the story of the image.
So, Was It Worth It?
Absolutely. My black and white photos now have a feel to them that my color stuff often lacked. There’s a certain timelessness, a focus on the emotion or the essence of the subject. It’s not always “best” in an objective sense, because what even is that? But for me, going through this whole rigmarole, this practice, has made my photos feel more intentional, more me. It forced me to become a better photographer, to see beyond the surface. And that, I reckon, is what getting the “best” photos is all about, whatever color they are, or aren’t.
")


")


