")
Alright, let’s talk about this whole light modifier thing. I remember when I first started messing around with lights, mostly for some small product shots and a few portraits of friends. I had this one cheap flash, and boy, everything looked harsh. Like, deer-in-headlights harsh. Shadows were super sharp, and highlights were blown out. Not a good look, you know?
My First Awful Attempts
So, my first “modifier,” if you can even call it that, was just pointing the flash at the ceiling. Yeah, basic bounce flash. It kinda worked, softened things up a bit, spread the light around. But it wasn’t always practical. Sometimes the ceiling was too high, or a weird color, and that messed with the light. I even tried taping a piece of white paper over the flash head. Looked ridiculous, but hey, I was experimenting.
I quickly realized that the bare light source, whether it was that flash or a simple bulb for some video stuff I was attempting, was just too small. And a small light source, I was learning, means hard light. That was the enemy back then for the look I wanted.
Discovering Umbrellas – The Gateway Modifier
Then someone mentioned umbrellas. I picked up a cheap white shoot-through umbrella. It was a revelation, kinda. I’d fire the flash through it, and boom, the light source became much bigger, effectively. The light was way softer, shadows weren’t as aggressive. It was a huge step up. For a while, that umbrella was my go-to. I also got a silver reflective one, which gave a bit more punch and contrast, but still softer than a bare flash.
But umbrellas have their downsides, as I found out. They throw light everywhere. It’s like a light explosion. Good for generally lighting up a room or a large area softly, but not so great if you want to control where the light doesn’t go. Spill was a big issue.
Stepping Up to Softboxes
That’s when I started looking into softboxes. These seemed more serious, more “pro.” I got a small one at first, maybe a 24×24 inch one. Putting it together was a bit of a pain, all those rods. But once it was set up, the difference in control was noticeable. The light was still soft, similar to the umbrella in some ways, but it was more contained. The box shape naturally directed the light forward more.

I learned that the size of the softbox mattered a lot relative to the subject. Bigger softbox, softer light. And the distance too. Closer softbox, softer light. It started to click – it’s all about the apparent size of the light source from the subject’s perspective.
Then I found out about grids for softboxes. Man, grids were a game-changer for me. Slap a grid on the front of the softbox, and suddenly the light beam is much tighter. It reduces that spill significantly, letting me focus the light exactly where I wanted it, without it bouncing off every wall and messing up the background.
Other Bits and Pieces I Tried
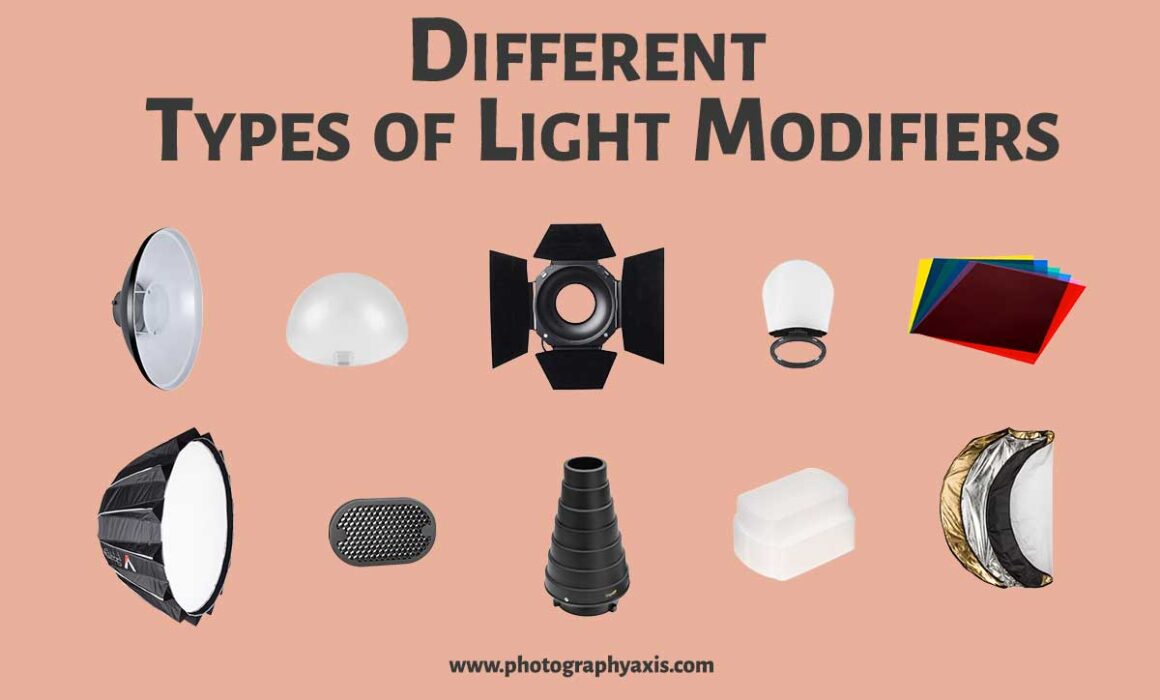
Over time, I played with other things too:
- Reflectors: Simple, cheap. A white foam board, a silver car sunshade, even a big piece of cardboard painted white. Great for bouncing existing light back into shadows, adding a little fill. Super handy.
- Snoots: These things that look like cones. They make a really tight, focused beam of light. Good for hair lights or highlighting a tiny specific part of a scene. I made a DIY one out of black cardboard at first.
- Barn Doors: Those flap things you see on theater lights. They help shape the light beam, cutting it off from certain areas. More for harder light sources, but useful for control.
- Gels: Colored plastic sheets. Not strictly a “modifier” in the shaping sense, but they modify the color, which is super important for mood or correcting mixed lighting.
What I Figured Out
So, what I eventually figured out is that these “light modifiers” aren’t just about making light “better” in one specific way. They’re tools for shaping and controlling light to achieve a specific look or solve a problem. Sometimes you want soft, wrapping light. Sometimes you need a hard, dramatic pinpoint. Sometimes you need to keep light off something as much as you need to put it on something else.
It wasn’t just about buying gear; it was about understanding how light behaves and then picking the right tool – or sometimes just using a bit of tape and cardboard – to make it do what I wanted. It’s a constant learning process, really. You see a look you like, and then you try to deconstruct how the light was shaped to create it. That’s the fun part, the practice of it all.
")


")


