
Okay, so you want to go to Italy? Awesome! It’s a fantastic place. I recently went through the whole visa process myself, and let me tell you, it can be a bit of a headache if you’re not prepared. So, I’m going to walk you through exactly what I did, step-by-step, to get my tourist visa. Hopefully, this helps you out!
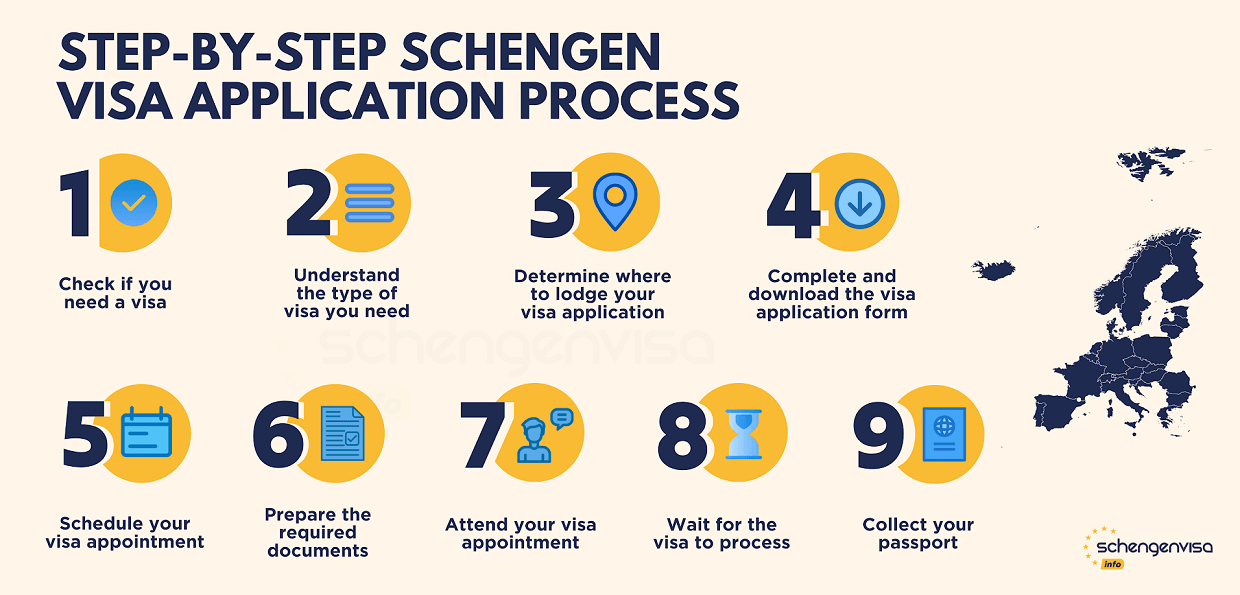
Figure Out If You Even Need a Visa
First things first, I checked if I even needed a visa. Turns out, it depends on your nationality and how long you plan to stay. Because I’m from [My Country, example: the USA] and planning to stay for fewer than 90 days, I fall under the Schengen Agreement. This means I need the Schengen Visa.
Gathering All the Documents
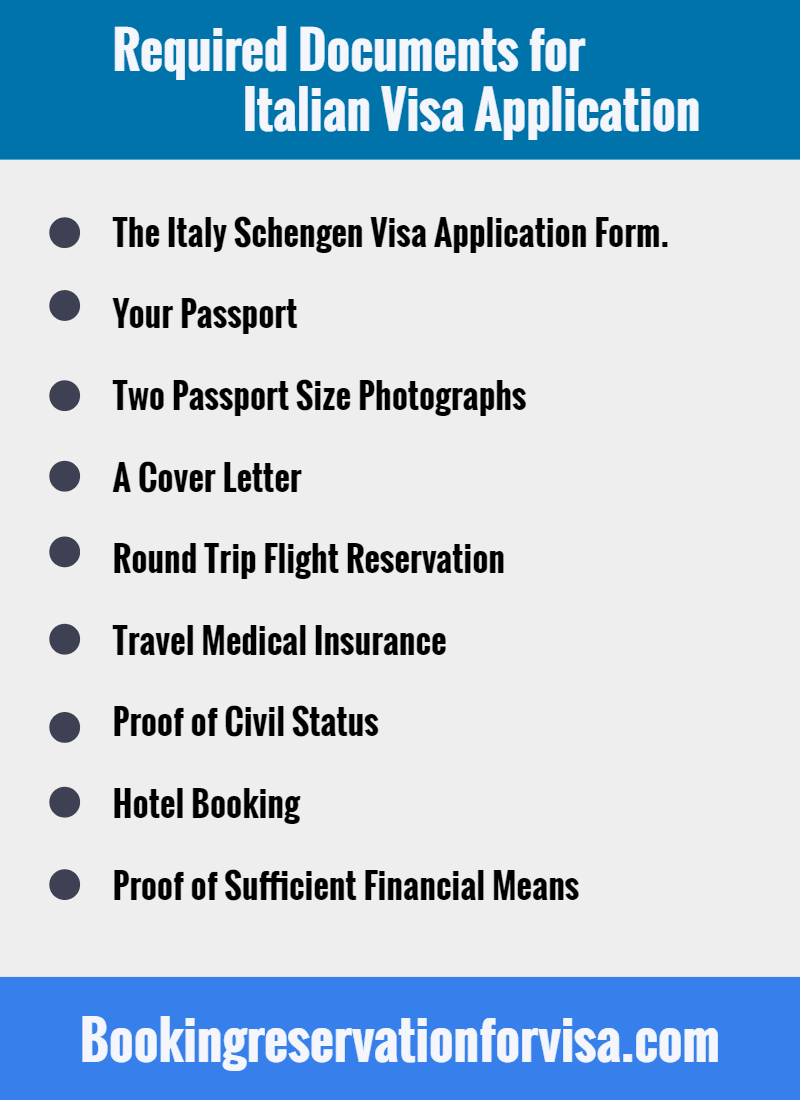
This is where the real fun began. Seriously, get organized early! Here’s a list of what I needed, you should double-check the requirements from Italy Government website:
- My Passport: Obvious, right? It had to be valid for at least three months beyond my planned stay in Italy.
- Passport Photo: I went to a local pharmacy that takes passport photos. Made sure I got the right size and specifications.
- Visa Application Form: I downloaded this from the Italian consulate’s website. Filling it out was a bit tedious, make sure it is correct and up-to-date.
- Flight Itinerary: I didn’t actually buy my flight yet, but I had a detailed itinerary showing my planned entry and exit dates.
- Proof of Accommodation: I booked a refundable hotel reservation for my entire stay. Just in case my plans changed.
- Proof of Funds: Bank statements, baby! I printed out my last three months of statements to show I could actually afford this trip.
- Travel Insurance: I had to get travel insurance that covered medical expenses and repatriation. Found a decent policy online.
- Cover Letter: I typed up a short, sweet letter explaining the purpose of my trip, my itinerary, and that I had zero intention of overstaying.
Scheduling an Appointment
Once I had all my documents in a nice, neat pile, I went online to the Italian consulate’s website that served my area. I found the section for scheduling visa appointments and booked the earliest available slot. Tip: These slots can fill up fast, so book well in advance!
The Dreaded Appointment
Okay, the appointment wasn’t that bad. I arrived early, dressed respectfully, and had all my documents organized in a folder. I handed everything over, answered a few questions about my trip (mostly about what I planned to do and see), and paid the visa fee.
Waiting Game
After the appointment, it was just a waiting game. The consulate said it would take about 15 business days to process, but it actually came back a little sooner. I got an email notification that my passport was ready for pickup.
Picking Up My Passport (with Visa!)
Went back to the consulate, showed my ID, and they handed me my passport. And there it was, a shiny new Italian tourist visa! All that work paid off. I could not start to prepare my travel plan in Italy!
My biggest piece of advice? Start early, be organized, and double-check everything. The process can seem daunting, but if you follow the steps and have all your ducks in a row, you’ll be enjoying pasta and gelato in Italy in no time! Good luck!


")


