
Okay, so the other day I needed to clean up some space on my SD card. You know, the usual – too many photos and videos, not enough room for anything new. I figured it would be a simple drag-and-drop, but it turned out to be a bit more involved than I initially thought. Here’s how I did it:
Get Started
First, I took the SD card out of my camera (or phone, whatever device you’re using). Gotta be careful with these little guys, they’re easy to lose or damage. I found my SD card reader, the one that plugs into my computer. Some computers have a built-in slot, but mine doesn’t, so the reader is a must-have.
Plug It In
I inserted the SD card into the reader, making sure it went in the right way. It only fits one way, so don’t force it. Then, I plugged the reader into a USB port on my computer. I waited a few seconds for the computer to recognize the card. Usually, a window pops up automatically showing the contents of the card, like it’s just another folder on your computer.
Find and Delete
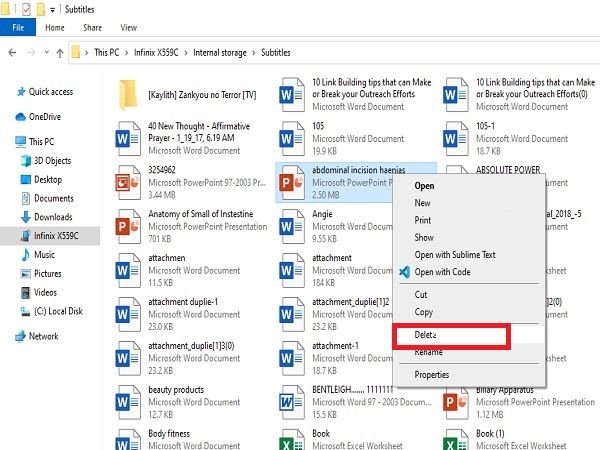
If a window doesn’t pop up, I opened File Explorer (that’s what it’s called on Windows, might be different on a Mac) and looked for the SD card under “This PC” or “Devices and drives.” It usually has a name like “SD Card” or “Removable Disk.”
Once I found it, I double-clicked to open it. I saw all my photos and videos, usually organized into folders (like “DCIM” is a common one for cameras). Then, I just started browsing through the files.
- To delete a single photo, I right-clicked on it and selected “Delete.” Simple as that.
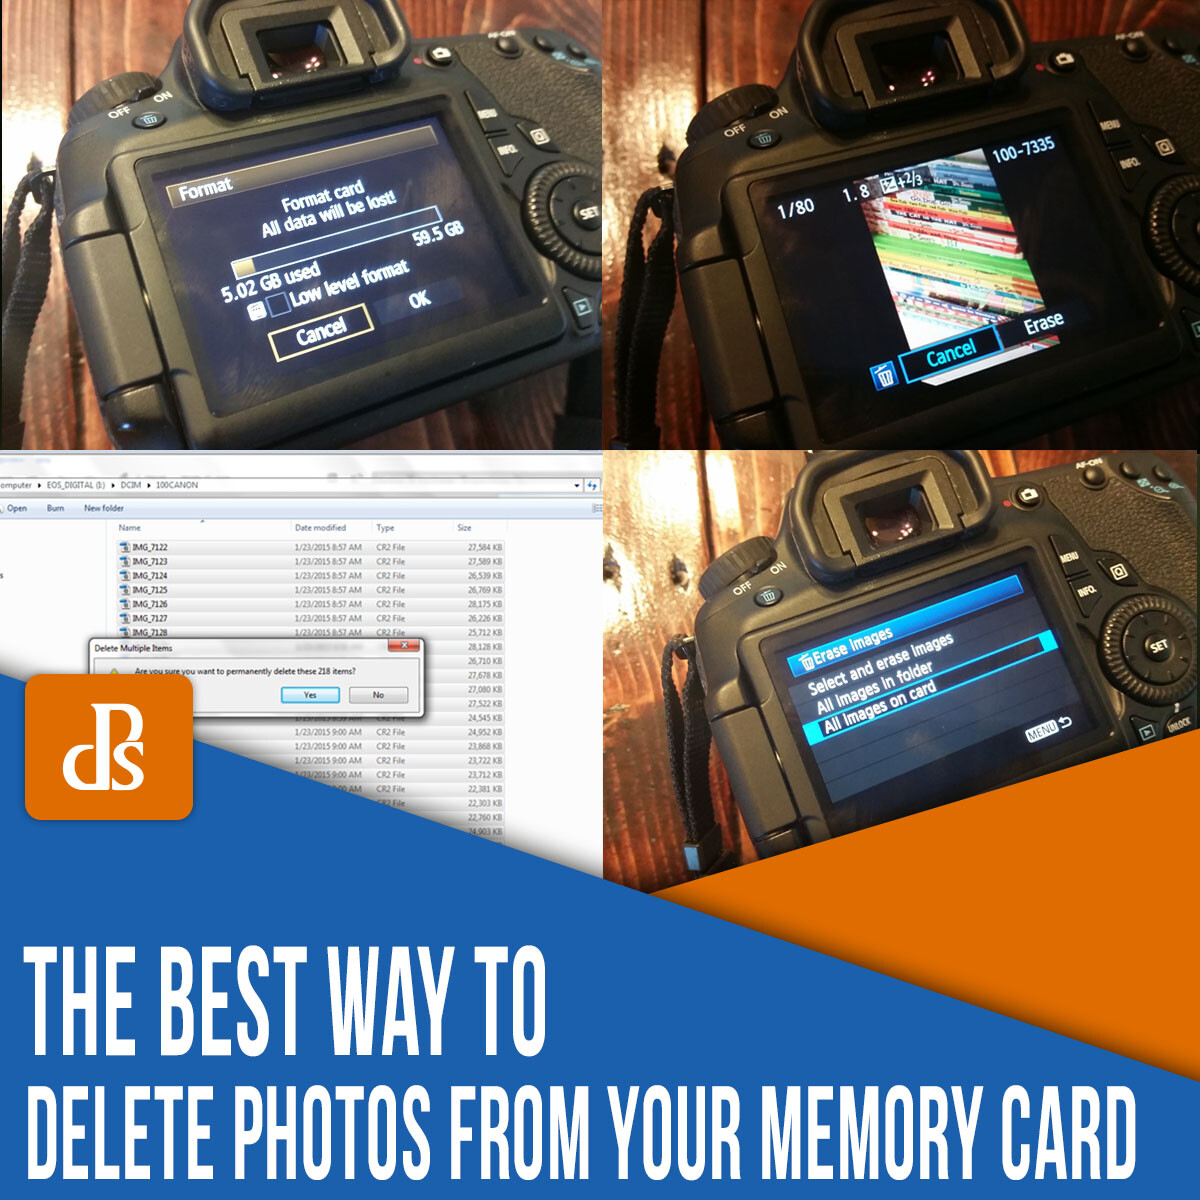
- To delete multiple photos, I can do this with a few clicks.
I held down the Ctrl key (or Command key on a Mac) and clicked on each photo I wanted to get rid of. Once I had selected all the ones I wanted, I right-clicked on any of the selected photos and chose “Delete.”
- I have a lot photos to be deleted, so I clicked the first photo,held down the Shift key, and clicked the last photo. It would select all. Then right-clicked on any of the selected photos and chose “Delete.”
- To delete an entire folder, I just right-clicked on the folder and selected “Delete”.
Double Check & Eject
After I deleted everything I wanted to, I always double-check to make sure I didn’t accidentally delete something important. Better safe than sorry!
Once I’m sure, and before unplugging anything, I looked for the “Safely Remove Hardware” icon in the system tray (usually in the bottom-right corner of the screen). I clicked on that, selected my SD card, and waited for the message that says it’s safe to remove. Then, and only then, I unplugged the reader and took out the SD card. Done!
That’s it. It’s not rocket science, but sometimes it’s the little things that can trip you up. Hopefully, my little walkthrough helps you out next time you need to clear some space on your SD card!
")


")


