
Okay, so the other day I was trying to book a hotel for my vacation, and man, it was a headache! Prices were all over the place. Then, I remembered those booking search engines. I decided to give them a try and document how it went. Here’s what I did:
Started with the Big Names
First, I opened my browser and went to a couple of the big-name travel sites. I’m talking about the ones everyone knows. You know the ones, the ones that are always on the TV
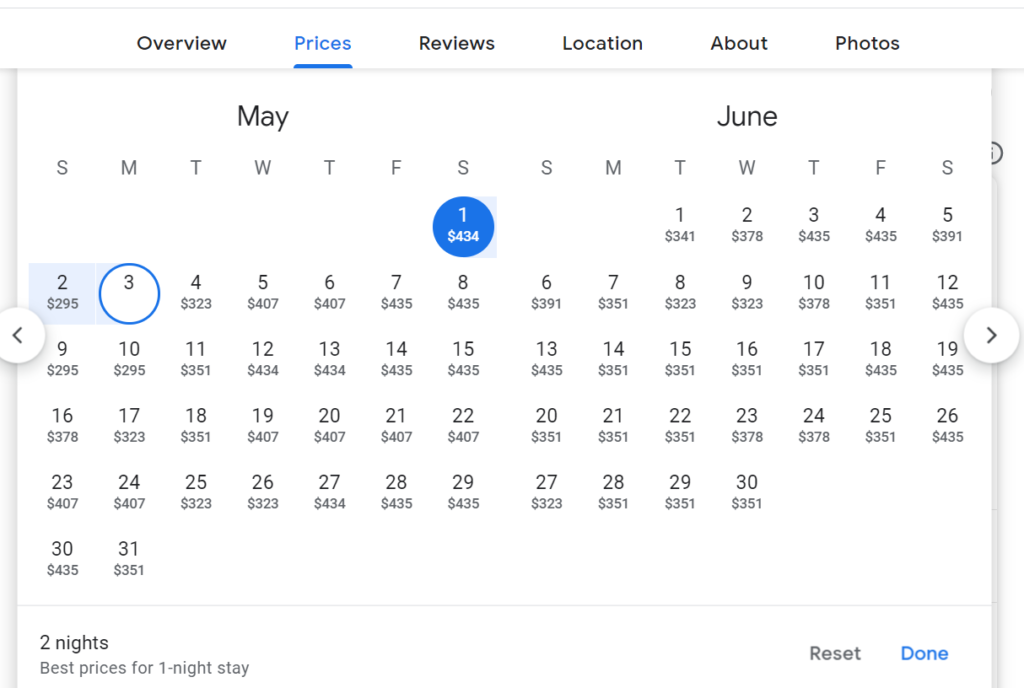
I typed in my destination, dates, and the number of people. Hit “search,” and boom – a massive list of hotels appeared.
Filtered Like Crazy
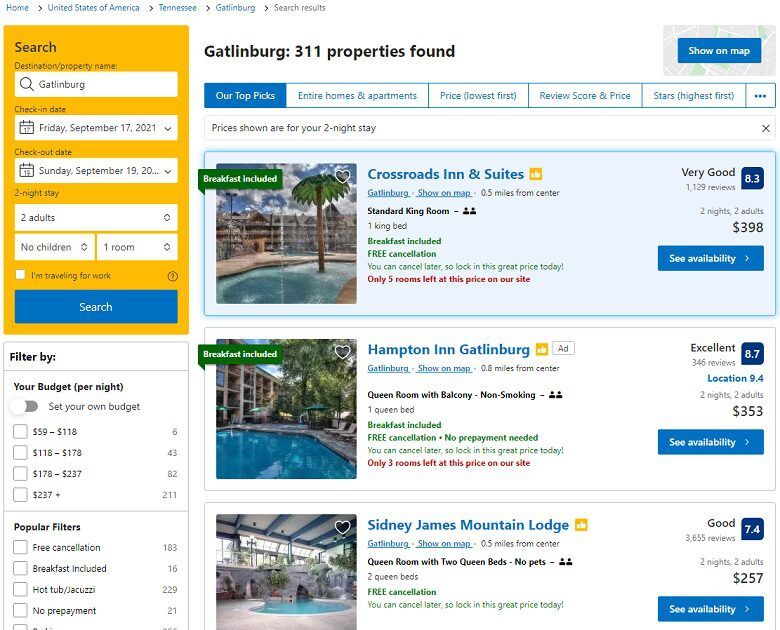
The initial list was way too long. So, I started using the filters. I set a price range that I was comfortable with. Then, I filtered by amenities – I definitely wanted a pool and free breakfast. You gotta have free breakfast!
- Price Range: This was the most important. Stayed within my budget!
- Amenities: Pool, free breakfast, and sometimes free Wi-Fi.
- Star Rating: Usually stuck to 3 stars and above.
- Guest Ratings: Read a few reviews to get a feel for the place.
Compared on Multiple Sites
Here’s the key: I didn’t just stick to one site. I opened the same search on a few different search engines. I noticed that the prices for the same hotel could vary quite a bit between sites! Sometimes one site had a special deal, or another had a “member price.”

Read the Fine Print
Before actually booking, I made sure to read the cancellation policies. Some were super strict, while others were more flexible. I also double-checked for any hidden fees, like resort fees or taxes that weren’t included in the initial price.
Booked and Confirmed
Once I found the best deal with the right conditions, I clicked through and booked the hotel. I made sure to get a confirmation email and saved it, just in case.
Honestly, using these search engines saved me a bunch of time and probably some money too. It’s way easier than going to each hotel’s website individually. Give it a shot next time you’re planning a trip!


")


