Getting into Swirling Bokeh
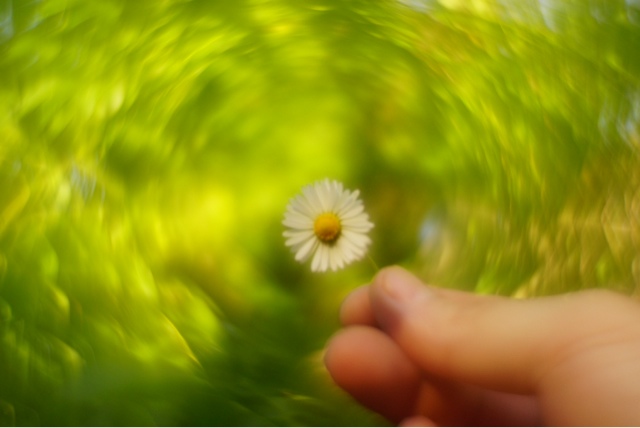
So, I kept seeing these cool photos online, you know, where the background looks like it’s spinning? They called it ‘swirling bokeh’. Looked pretty neat, different from the usual blurry background stuff. I thought, hey, I gotta try making pictures like that myself. Seemed like a fun little project to get my hands dirty with.

Figuring Out the Gear
First thing, I did some digging. Found out you usually need some specific old lenses to get that effect. Lots of talk about old Russian lenses, like the Helios 44-2. Sounded interesting. Didn’t have one, obviously. So, I went looking around online, found a used one that wasn’t too expensive. Had to get an adapter too, to make it fit my digital camera. That took a few days to arrive.
First Tries and Fails
Okay, lens arrived, adapter fit. I screwed it onto my camera and went outside. Felt kinda clunky, all manual focus and aperture. Pointed it at some flowers in the garden. The background was just trees. Took a bunch of shots. Looked at them on the camera screen.
Nothing. Just regular blurry background. A bit fuzzy, maybe, but definitely not swirling.
Tried focusing closer, then further away. Changed the aperture ring back and forth. Still nothing. It was a bit frustrating, not gonna lie. The background needs to be further away, I guessed? And maybe not just plain trees?
Chasing the Swirl
Went back inside, looked up more examples. People said you need some distance between your main subject and the background. And the background should have some texture or little points of light, like sunlight coming through leaves or distant city lights at night. Okay, new plan.

Next day, I went to a park. Found a spot with some flowers up close and trees way in the back, with the sun poking through the leaves. Set the aperture wide open – that seemed to be key. Focused real careful on the flower. Took a shot. Looked again.
Hey!
A little bit of twist in the background blur! Not a crazy swirl, but it was there. I tried moving around a bit, changing the distance to the flower, reframing the background. It started working better when the background lights were more defined.
- Focused on something close.
- Made sure the background was far away.
- Needed small light sources or busy texture back there.
- Aperture had to be wide open (like f/2 on that Helios).
Getting the Hang of It
Took a while, honestly. Lots of shooting. Manual focus is tricky, especially wide open. Missed focus a lot at first. But I kept trying different spots, different subjects. Tried shooting some portraits too. The swirl effect really makes the person pop, but you gotta nail the focus on their eyes. Learned that the swirl is strongest near the edges of the picture, the center stays more normal. It’s a weird, old lens thing. Kinda cool once you accept it won’t be perfect edge-to-edge.
Finally Nailing a Good One
One evening, I was out just as the streetlights were coming on. Found this old metal bench. Focused on the texture of the rusty metal up close. Behind it, across the street, were some trees and distant building lights. Wide open aperture, careful focus. Took the shot.

Boom.
That time, it really worked. The lights in the background turned into stretched, spinning ovals. Looked exactly like those pictures I saw. Felt pretty good to finally get it right after all the messing around.
Worth the Trouble?
Yeah, I’d say so. It’s not an effect you use all the time, makes pictures look kinda vintage or dreamy. But it was fun learning how to do it, figuring out the quirks of that old lens. It’s satisfying to create something a bit different just by using specific gear and techniques. Definitely a cool trick to have in the bag, even if it took some patience and a lot of blurry, non-swirling photos to get there.


