
Alright, today was seriously all about playing with camera tricks. Saw folks online doing these wild photos and figured, “Yeah, I can probably mess that up myself.” Grabbed my basic DSLR and the kit lens that came with it, plus my seriously cheap little tripod. Let’s dive in.
The Basic Setup & Plan
First things first, I needed a spot. My apartment living room after dark is usually just chaos, so I pushed some furniture around. Table cleared? Good enough. Main goal? Learn like, seven fancy-looking tricks people do, but skip the super expensive gear. Had this rough list in mind:
- Making things look frozen mid-air
- Weird light trails (like cars, but indoors)
- Getting that fake miniature city look
- Making smoke look cool and spooky
- Making water droplets splatter nicely
- Making it look like someone has a tiny twin
- Pulling off that “levitating chair” illusion
The Trial, Error, and Mostly Error Phase
Started with freezing stuff. Thought I was clever using water drops. Spoiler: My first try? Pure blur. Just blobs. Turns out my shutter was way too slow. Camera kept going “Nope, too dark!” Had to crank the ISO up way higher than I wanted, made it look grainy as sandpaper. Still messy, but kinda saw a drop shape finally. Progress?
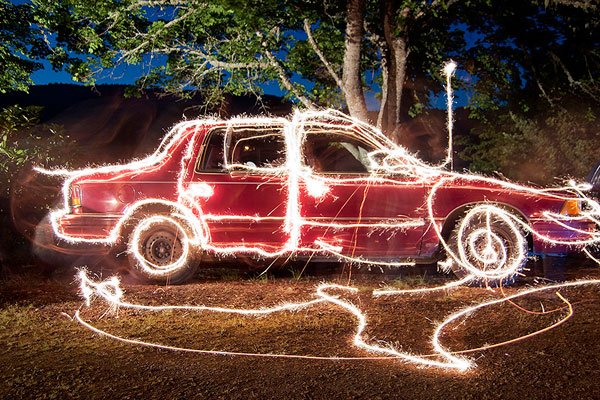
Okay, light trails. No cars handy, so flashlight it is! Taped it to a piece of cardboard, felt super ghetto. Set the camera to this “bulb” mode where you hold the button. Waved the flashlight around like crazy. First picture? Absolute nonsense lines. Couldn’t figure out how long to hold the button. Tried shorter bursts… bam! Finally got a squiggle that looked kinda cool. “Writing” with light? Not bad for duct tape engineering.
The miniature city trick… wow. That one confused me. You need special lenses, and I don’t have one. Remembered reading about faking it. Messed with the aperture settings, tried blurring the top and bottom of a picture of my kid’s toy cars on a towel. Looked… fuzzy. Not tiny-city. Then I tilted the camera down weirdly, blurred the background extra hard, suddenly it clicked! The towels looked like mountains. Mind blown by simple angles.
Smoke was next. Lit an incense stick. Nice and smoky, sure. Pointed my camera. Nothing. Pitch black. More ISO? Nope. Needed light from the side to catch the smoke. Rearranged the lamp. Finally saw wisps! The smoke kept moving faster than my focus though. Pics came out kinda soft, ghostly-looking. Close enough for my spooky goal.

A Couple That Actually Worked Quick
The tiny twin trick? Super easy! Took a picture of myself standing left. Took another picture, same spot, standing right. Stuck ’em together in free software. Boom! Instant clone. Easiest “trick” all day.
Levitation chair was surprisingly fun. Used a stool. Took one shot with me standing on it. Took another shot just the empty stool. Masked the stool out where my legs should be. Suddenly, I’m floating! Well, my cheap shoes are floating. Satisfying!
What Actually Survived the Day
Honestly? Learned about five tricks kinda-sorta properly outta seven. The frozen water drops and the smoke shots still look kinda ugly as sin if I’m honest. But you know what? The process was fun. Messing with settings, moving stuff around, taping flashlights to cardboard… it’s all part of the ridiculousness.
Quick Gear Mention (Nothing Fancy)
- My old DSLR (any camera with manual mode works)
- The cheapest tripod I found online
- A basic flashlight
- Incense stick (cheap air freshener works too)
- Lots of sticky tape
- My kid’s toy cars
- Ordinary stool
- Some free photo editing app
Total cost? Practically zero, besides what I already own. Point is, you can get messy and figure out this stuff without dropping loads of cash. Will I do the blurry smoke shot again? Probably not. But the light writing and levitation tricks? Totally adding those to my bag. Practice makes… well, slightly better than the first attempt, anyway.


