
Alright folks, let me tell you how I actually got those killer mountain top shots yesterday. Woke up way too early – like, 4 AM kind of early – groaned, but rolled outta bed. Coffee first, always coffee first. Packed my backpack the night before, but still double-checked: camera body, my trusty 16-35mm wide lens, the sturdy tripod (it gets windy up there!), extra batteries (cold drains ’em fast), filters, lens cloths, and way more snacks than I needed. Don’t forget water!
Hiking Up In The Dark Like A Mummy
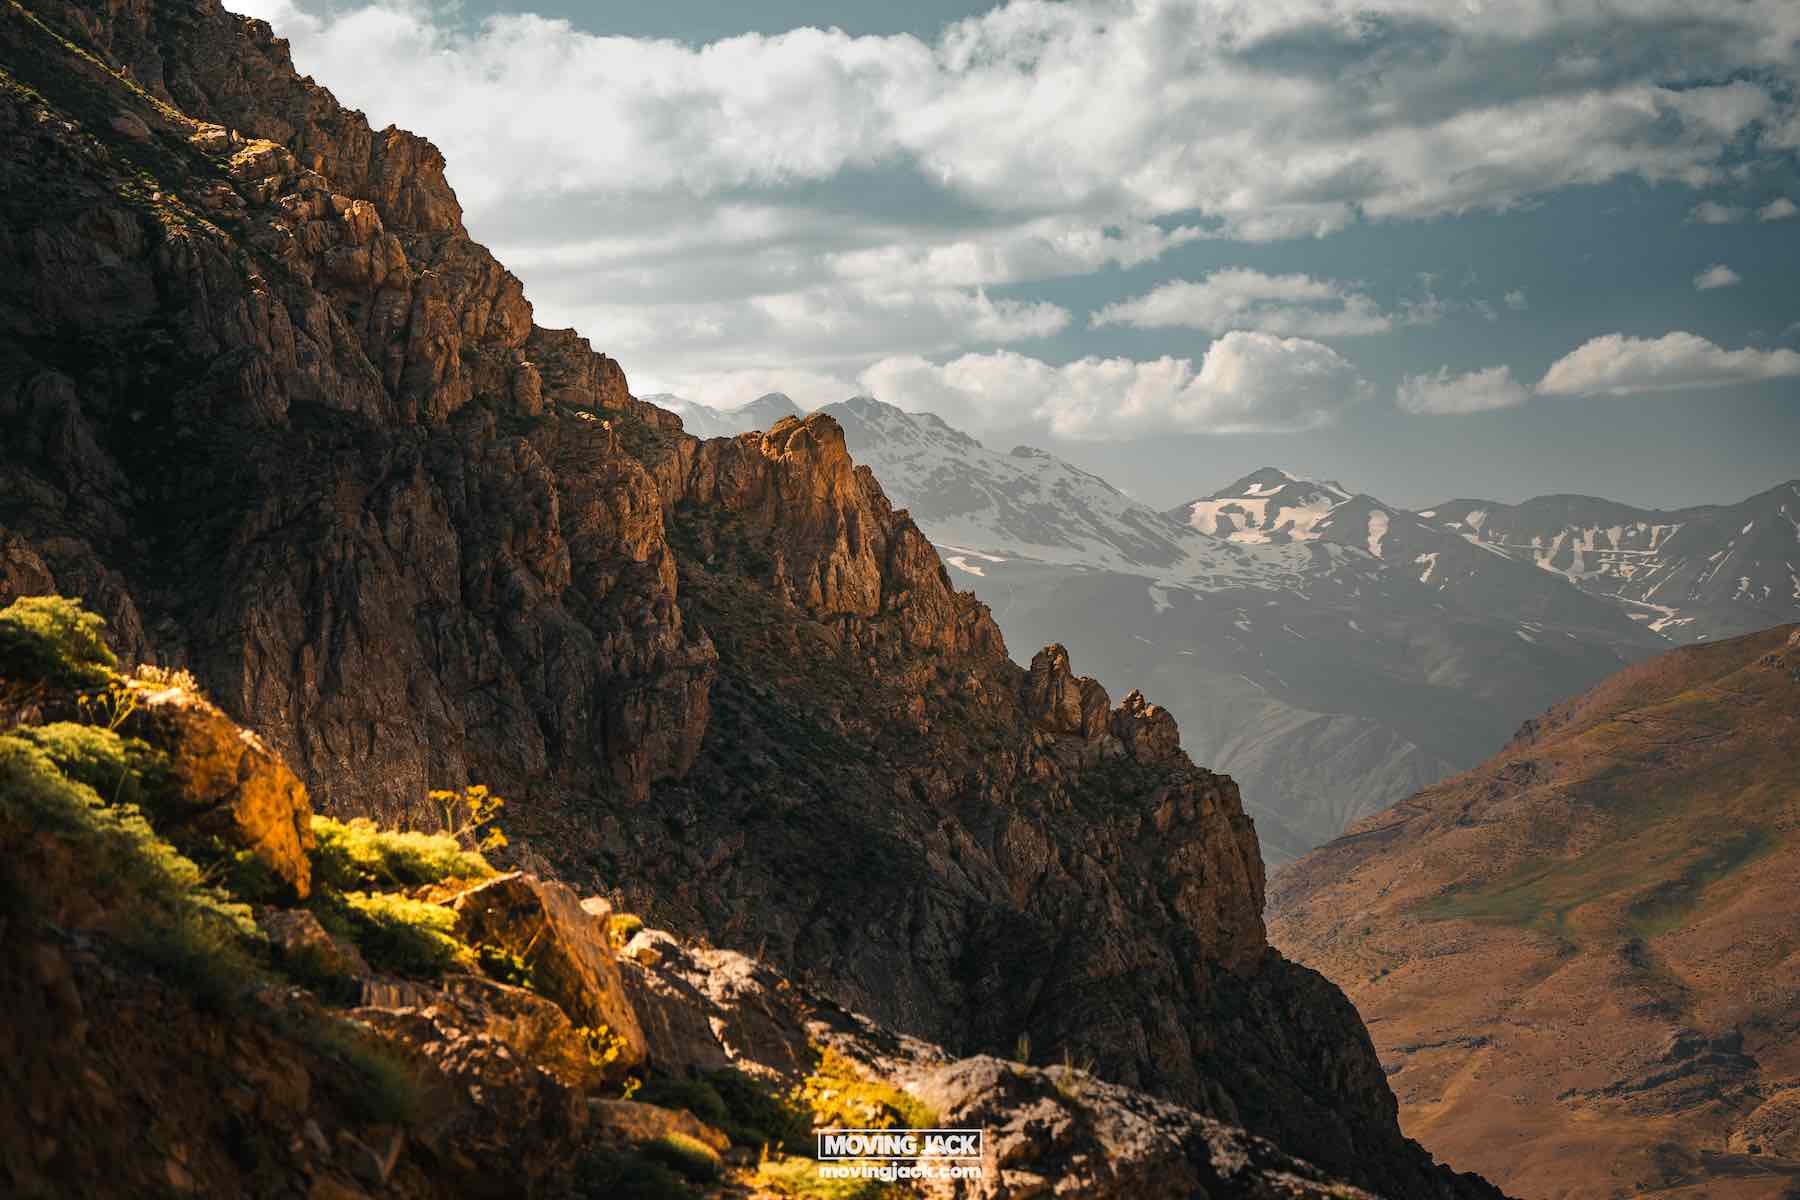
Headlamp on, hit the trail while it was still pitch black. Legs felt heavy right from the start, gotta be honest. It wasn’t exactly Everest, but the trail was steep and rocky in places. Took my time, stopped to catch my breath and sip water. Couldn’t see much beyond my little light bubble. Kept going, just putting one foot in front of the other. Watched the sky slowly shift from black to deep blue. That’s the sign!
Finding The Spot As The Light Show Began
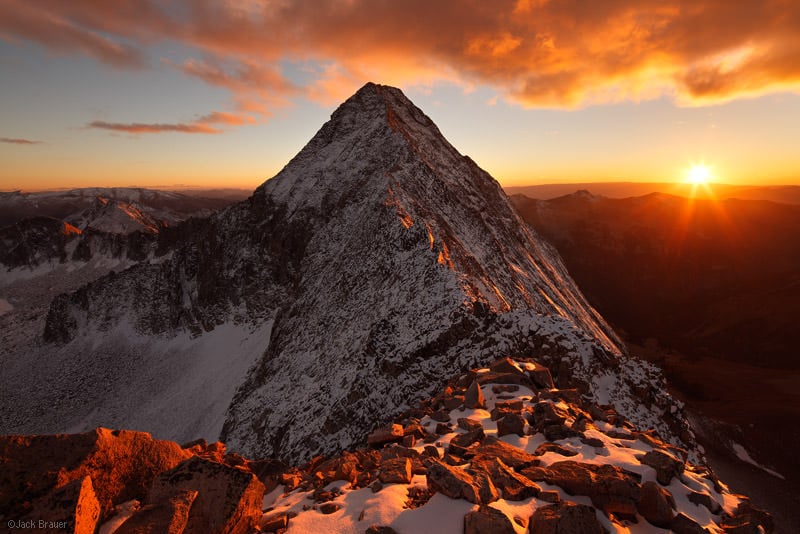
Reached the summit lookout maybe 30 minutes before sunrise. Panting like a dog, yeah. Then… bam. The colours. Oh man, the colours. Knew I had to work fast. Looked around quickly for the best angle. Wanted those layers of peaks fading into the distance. Found a flatish rock for the tripod, scrambled over. Set up:
- Secured the tripod: Legs dug in a bit into the gravelly dirt. Tightened every knob.
- Clicked on the lens: That satisfying little snick.
- Screw on the circular polarizer: Helps cut haze and makes those blues pop.
- Live View mode: For precise focusing. Zooms in, fiddled till the distant peak looked sharp.
- Filters? Just a basic Neutral Density Grad: Held it manually in front of the lens. Why? To darken the crazy bright sky just a touch compared to the dark mountains.
Composition was key. Framed it so:
- Foreground rock texture on the lower edge.
- Leading line from the ridge pointing towards the tallest peak.
- That beautiful sky filling the top third.
Clicking And Fiddling Like Mad
The light was changing crazy fast. Sunrise doesn’t wait! Took test shots, chimping (checking the screen constantly). Saw the sky was blown out? Adjusted my exposure compensation down a stop (-1). Mountains getting lost in shadow? Kicked it back up (+0.5). Wanted that silky water effect on a little mountain lake? Slapped on the actual heavy ND filter, slowed the shutter way down to 5 seconds.
Also played with height. Got low, nearly lying on the cold ground, for one shot to emphasize the foreground rocks. Stood up tall for another to get more sky. Took loads. Bracketed a few sequences just in case (different exposures for the same shot). Fingers started getting numb – damn mountain air.
Packing Up And Feeling Smug
The intense glow faded into proper daylight. Knew the magic window was closing. Took a few more shots, but mainly started packing carefully. Everything back in the backpack, zipped up pockets, tripod collapsed. Slung the pack on, legs felt jelly-like already. Looked back at the view one last time. Felt tired but pumped. Hiked down feeling way better than hiking up. Got back to the car, dumped my gear, inhaled more snacks.
Loaded the shots onto the computer later that afternoon. And yep! There they were. The payoff. Crisp peaks bathed in golden light, perfect sky colours. Got a few gems without needing any fancy HDR trickery, just me, my gear, and being there at the right time. Took work, sucked waking up, totally worth it. That’s how it actually went down.
")


")


