
So, yesterday, I decided to mess around with the “manual mode” on my camera. You know, that “M” setting on the dial that’s always felt a bit intimidating? Yeah, that one. I’ve always stuck to the automatic modes, letting the camera do all the heavy lifting. But I figured, “Hey, I wanna learn something new,” and dived in.

First off, I grabbed my camera and switched that dial to “M.” It felt a little weird, to be honest, like I was about to take control of some spaceship or something. Then came the tricky part – understanding what to actually do next. I vaguely remembered reading something about “aperture,” “shutter speed,” and “ISO” but they sounded like those tough words you learn in physics class.
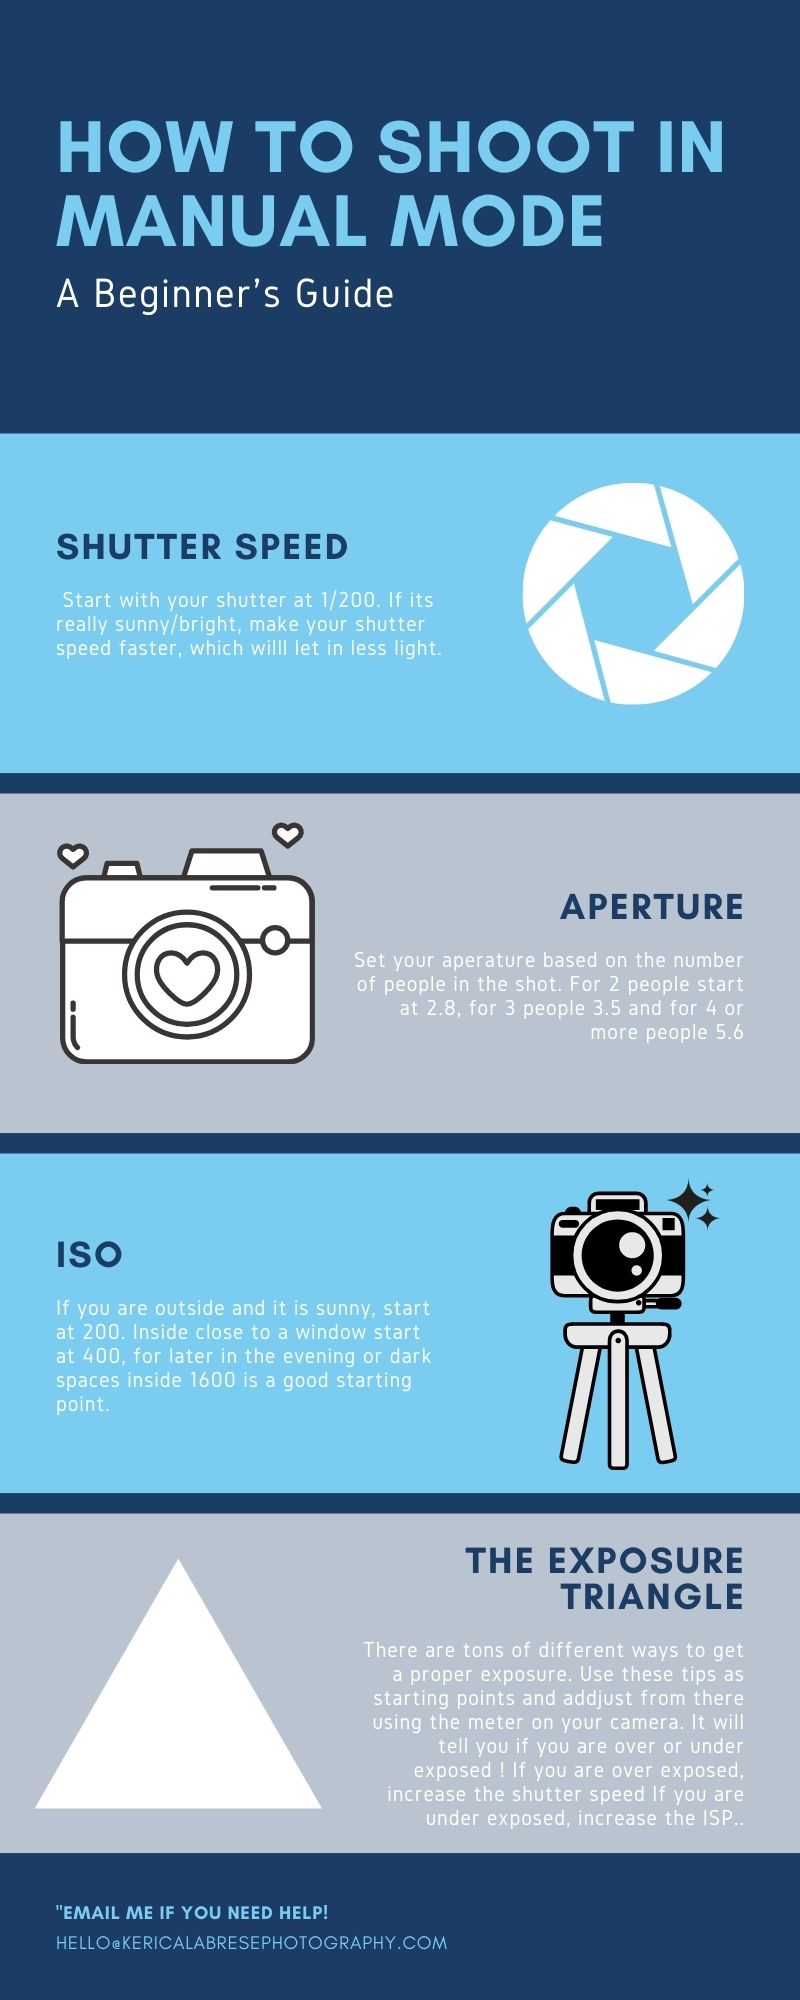
I started fiddling with the buttons and dials. My camera has a couple of wheels and a bunch of buttons, and honestly, I was just randomly pressing things at first. But then, I noticed that as I turned one of the wheels, the numbers on the little screen at the back were changing. Turns out, that was the “aperture” setting. I played around with it and saw that the background of my shots was getting more or less blurry. It was like magic!
- Aperture: This is like the camera’s eye. I played with it to make the background blurry or clear.
Next up was “shutter speed.” I found another dial that controlled this. When I made the shutter speed number bigger, my photos were getting darker, and with smaller numbers they were getting brighter. I took a few shots of my ceiling fan with different settings, and it was kind of cool to see how the blades were captured in motion at faster speeds, then started getting blurry with slower ones. It looked like an adventure, but I’m pretty sure it’s just me.
- Shutter Speed: I messed with this to take pictures that were either super clear or blurry, depending on how fast things were moving.
Then there was “ISO.” I remembered reading something about it being related to how sensitive the camera is to light. I found a button labeled “ISO” and started playing with it. The higher I set the ISO, the brighter my pictures got, but they also started to look a bit grainy, like those old photos you find in your grandparents’ attic. So I got it, it was like choosing how much light I wanted the camera to see.
- ISO: I used this to make my photos brighter, but if I went too high, they looked all grainy.
It was a bit of a struggle at first. I took a ton of bad photos – some were too dark, some were too bright, and some were just a blurry mess. I had to keep looking things up on my phone, trying to figure out what I was doing wrong. But slowly, I started to get the hang of it. I realized that it’s all about finding the right balance between these three settings, like a recipe for a good photo. You must find the right match, or you’ll mess it up.
I spent the whole afternoon taking pictures of random stuff around my house – my cat, a vase of flowers, even my own feet. It was actually pretty fun, like I was discovering a whole new world through my camera lens. And you know what? Some of the photos actually turned out pretty good! I felt like a real photographer, even though I was just a beginner messing around. It seems like a great start, right?
What I learned:
Manual mode is not as scary as it seems. It’s all about understanding how aperture, shutter speed, and ISO work together. It takes some practice, but it’s totally worth it. I can’t wait to keep experimenting and see what other cool stuff I can do with my camera. Maybe one day I’ll even be able to take those fancy photos you see on the internet. Who knows? The sky’s the limit!
If you’ve been thinking about trying out manual mode, just do it. Don’t be afraid to make mistakes. That’s how you learn. And who knows, you might just surprise yourself with what you can create!
")


")


