")
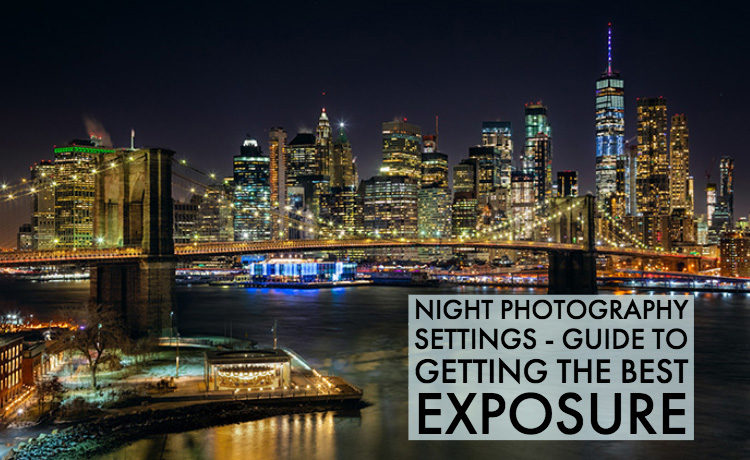
Alright, so I’d been seeing all these super cool photos online, you know, the ones with the car lights streaking across the frame, or those silky smooth waterfalls. Looked dead easy, I thought. Just point your camera, leave the shutter open for a bit, and boom, magic. Boy, was I in for a surprise when I actually tried my hand at this whole long night exposure photography thing.
My First Clueless Attempt
So, the first night, I grabbed my trusty camera, a tripod I hadn’t used in ages, and headed out. My grand plan? Capture some epic light trails from the local bypass. Sounds simple, right? Wrong. First off, finding a good spot was a nightmare. Either it was too dark to see anything, or there were streetlights messing up the whole scene. Then, the tripod. Oh, that tripod. It was wobbly, and I swear I spent a solid ten minutes just trying to get the legs even. Then, the real kicker: I realized I’d forgotten the little plate that screws onto the camera to attach it to the tripod. Classic me. So, night one? A total bust. Packed up, went home, feeling like a proper idiot.
Getting Slightly More Serious (or trying to)
Okay, round two. This time, I made a checklist. Tripod plate? Check. Charged battery? Check. Empty memory card? Check. I even vaguely remembered reading something about needing a remote shutter release, so I dug out the cheap one I bought years ago. Found a slightly better spot on an overpass. It was still a bit sketchy, but hey, dedication.
Now, the settings. This is where my brain started to melt. I switched my camera to Manual mode, ’cause that’s what all the pros say, right? Then I stared at the shutter speed, ISO, and aperture. I remembered something about a low ISO for less noise, so I whacked that down to 100. Aperture? I dunno, f/8 sounded like a decent middle ground. Shutter speed… this was the mystery. I started with like, 2 seconds. Took a shot. Pretty much black. Okay, 5 seconds. Still dark, but hey, a faint red streak! Progress!
The Endless Fiddling and Waiting Game
This is where the “long” part of long exposure really hits you. I must have stood there for over an hour, trying different combinations.
- 10 seconds: Getting there, but a bit blurry. My breathing was probably shaking the camera.
- 15 seconds, using the remote: Better! The streaks were longer. But some cars were just blown-out white blobs.
- 20 seconds, maybe a smaller aperture like f/11? Now we’re talking!
Focusing was another beast altogether. Autofocus just gave up in the dark. So, manual focus it was, squinting at the tiny screen, trying to get the distant lights sharp. My eyes were watering. And it got cold. I hadn’t dressed warmly enough, rookie mistake number two for the night.
I also learned that not all light trails are created equal. Sometimes a bus would go by and totally overexpose one side of the frame. Or a car would stop at a red light I hadn’t noticed, leaving a bright, static blob. Patience, I discovered, is not just a virtue; it’s a freaking necessity for this stuff. You take a shot, wait 20-30 seconds, check it, curse a bit, adjust, and repeat. Over and over.
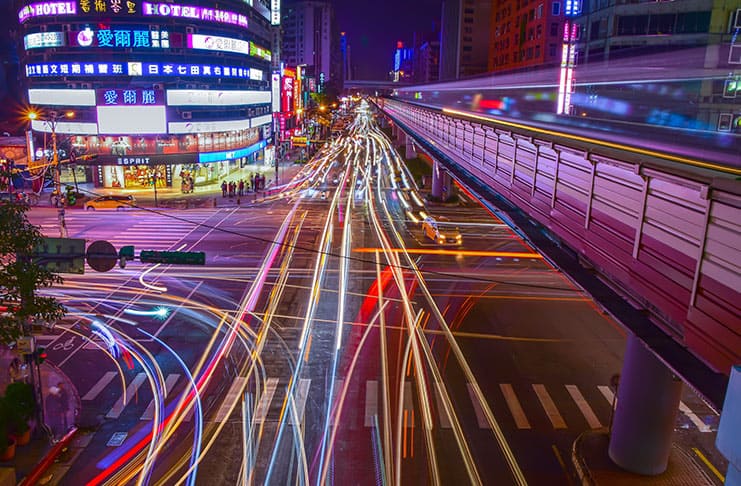
Finally, Something Decent!
After what felt like an eternity, and probably about 50 near-identical shots of blurry or boring darkness, I got one. Just one, mind you, that made me go “Ooh, that’s not half bad!” The light trails were smooth, the background was actually visible, and it wasn’t a complete mess. It wasn’t going to win any awards, but it was mine. I made that. The feeling was pretty awesome, I won’t lie.
I packed up, my fingers numb, but with a silly grin on my face. It wasn’t easy, and it definitely wasn’t the “point and shoot” magic I’d initially imagined. There was a lot of trial, a lot of error, and a whole heap of just standing around. But seeing that one decent image on the back of my camera made it all worthwhile. I learned a ton – mostly about what not to do, but also a bit about how aperture, shutter speed, and ISO actually work together in the real world, not just in a textbook. Next time, I’m bringing gloves. And maybe a flask of something warm. And definitely more patience.
")


")


