")
Okay, so today I wanted to mess around with my camera and really get the hang of manual settings. I’ve always shot in auto, but I figured it was time to take the plunge and see what all the fuss was about. I grabbed my camera, a trusty old DSLR that I’ve had for years, and headed outside.
Facing the Settings
First things first, I switched the dial to “M” for manual. I stared at the back of the camera, and to be totally honest, I felt a little intimidated. ISO, aperture, shutter speed…it was all a bit much.
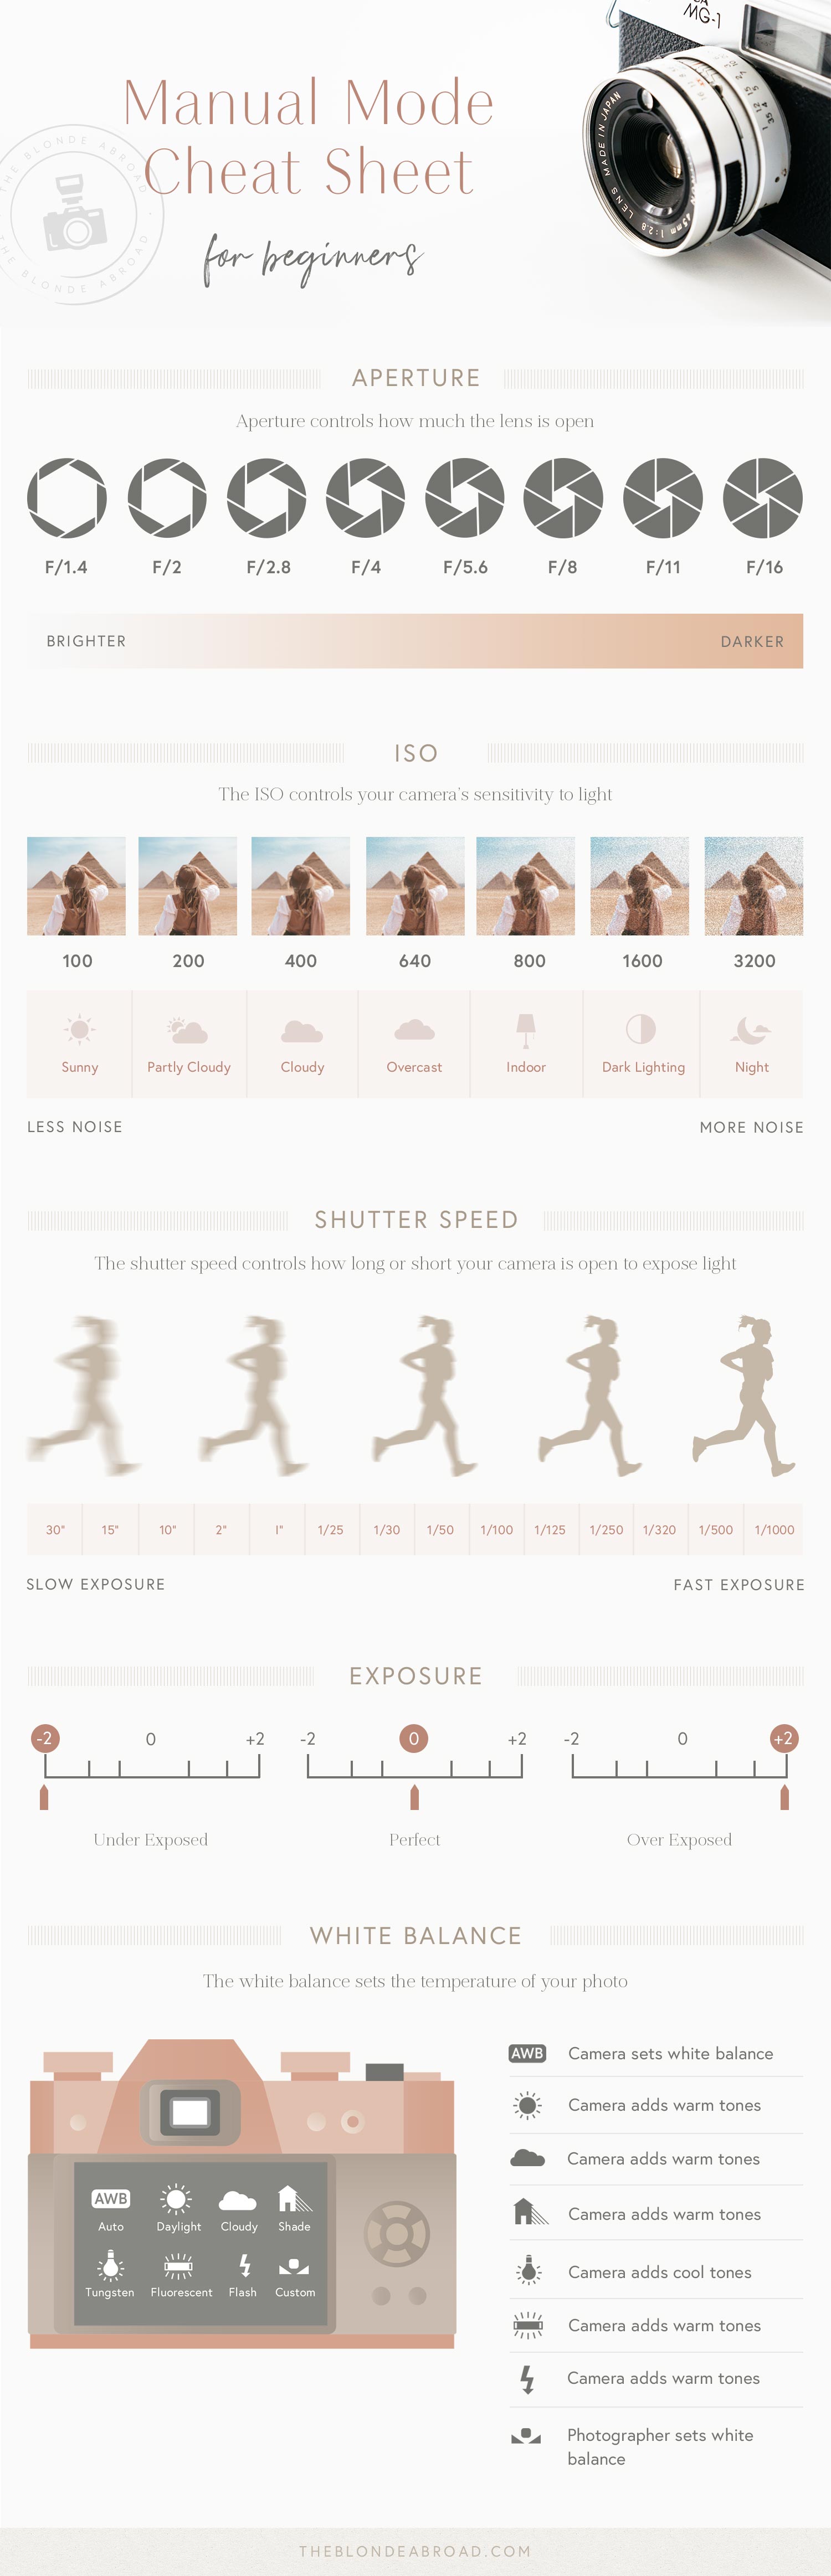
I started with the ISO. The sun was shining bright, so I figured I’d keep it low, around 100. I remember reading somewhere that lower ISO is better for bright light to avoid that grainy look.
- ISO: Set to 100 (because it was sunny).
Adjusting the Aperture
Next up, aperture. This one always confuses me. I know it controls how much light gets in, and it also affects that blurry background effect (which the pros call “bokeh”). I decided to try a wide aperture, so I set it to f/4. I thought this might be good for getting some close-up shots of flowers with that nice, blurred background.
- Aperture: Set to f/4 (for a potentially blurry background).
Setting Shutter Speed
Finally, shutter speed. This is how long the camera’s sensor is exposed to light. I played around with this one quite a bit. I started with 1/125 of a second, took a shot, and checked the result on the camera’s screen.
- Shutter Speed: Started at 1/125 second.
Adjusting and Shooting
The first few pictures were way too bright. So, I adjusted the shutter speed, making it faster, to 1/250 of a second. Took another shot. Still too bright! I kept tweaking the shutter speed, making it faster and faster, until the picture looked decent on the camera screen. I ended up somewhere around 1/500 of a second.
I spent a good hour walking around, taking pictures of everything – flowers, trees, my dog, even a random squirrel. I kept adjusting the settings, trying different combinations of aperture and shutter speed to see what would happen. Some pictures were terrible, some were okay, and a few were actually pretty good!
Reviewing the Result
I put the photos on computer, the real test, I’ll admit a lot of them weren’t great. Blurry, too dark, too bright…you name it. But there were a few that I was actually proud of! The ones where I’d managed to get the settings right, and the subject was in focus, and the lighting was good, it all came together.
It was definitely a learning experience. I realized that manual settings aren’t magic, It takes practice, and a lot of trial and error. It’s about understanding how each setting affects the others and how to adjust them to get the look you want. I’m not a pro by any means, but I feel like I’ve taken a small step towards understanding how my camera actually works. Definitely going to keep practicing!
")


")


