
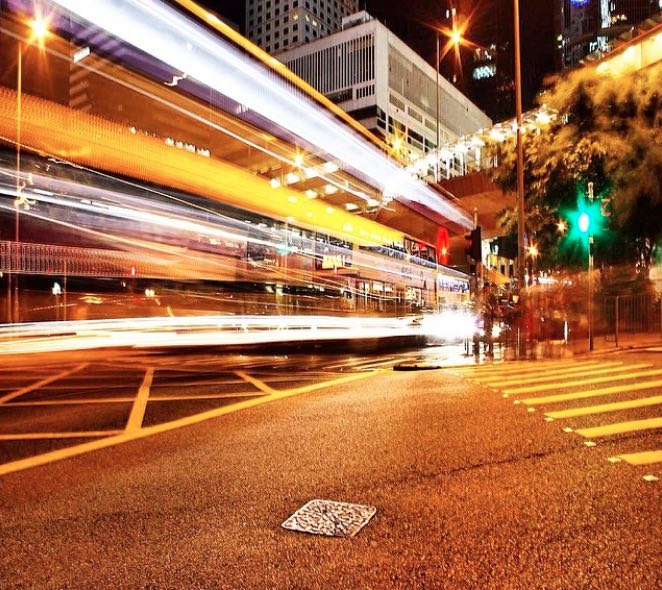
Alright, let me tell you about the night I finally got those cool car light streak shots. I kept seeing them online, all smooth red lines whizzing by, and mine? Total hot mess. Blurry chaos. Nothing like those silky trails. So yesterday evening, I grabbed my camera, tripod, and just stubbornly parked myself on that bridge over the highway downtown. Figured I’d wrestle with it until I got it.
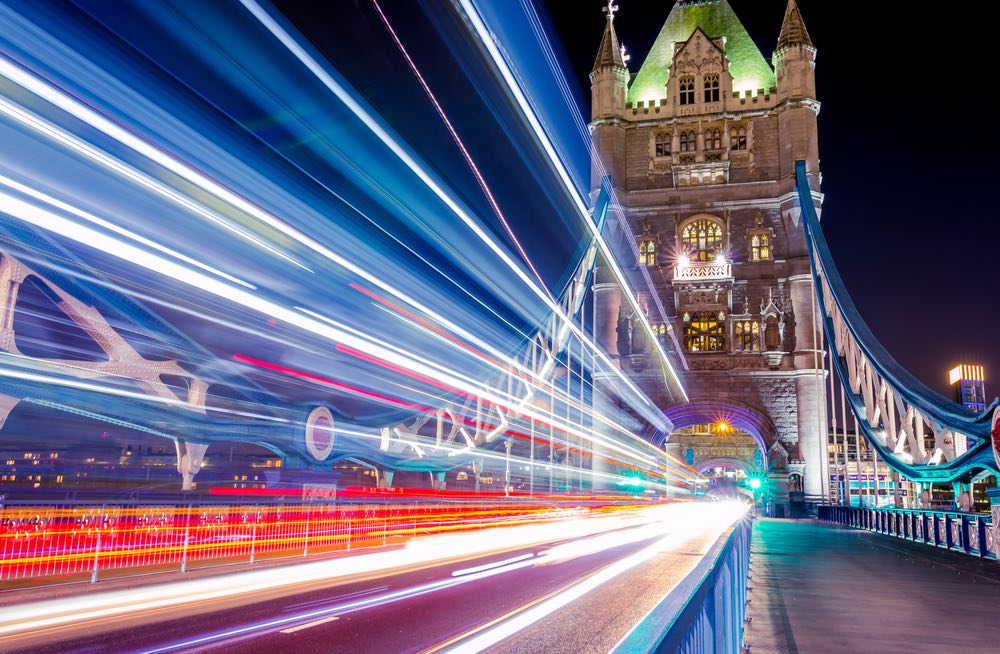
First thing, complete darkness wasn’t working. Just black soup with blurry dots. Needed some light, but not too much. So I waited for that sweet spot – sky still kinda blue-ish after sunset, but the streetlights and car headlights were strong. That twilight hour, you know?
My First Attempts Were Pretty Bad
I slapped the camera on the tripod – gotta be rock solid, no wiggling. Put it on Manual Mode. Didn’t even touch Auto. Started trying numbers. At first, I set the shutter speed super fast, like 1/100th of a second. Snap! Cars looked frozen. No streaks. Just stopped dead. Useless.
Then I went super slow. 30 seconds. Snap! Woah. Now it was all streaks, melted together. Like paint smeared everywhere. Couldn’t make out a single car or lane. Way too long. Had to find a middle ground.
Playing With The Three Key Settings
This is where I stumbled through trial and error. Kept changing three things:
- Shutter Speed: Slowed way down, bit by bit. Tried 10 seconds… still messy. 5 seconds… getting warmer. Finally landed around 2 to 4 seconds. That gave me nice, defined streaks without turning into goo.
- Aperture (F-stop): Forgot this thing! Left it wide open (f/2.8) first. Streaks were kinda soft. Closed it down to f/8 or f/11. Bang! Sharper light trails, like crisp neon tubes. Found that f/8 sweet spot.
- ISO: My old enemy. Set it high (3200) at first because it was getting dark. But whoa, the whole picture looked like it was covered in sand. Grainy nasty mess. Slammed that ISO back down to 100. Much cleaner.
Had a couple of moments where I forgot to turn Auto-ISO off. Nightmare. Settings changed randomly. Grain everywhere. Lesson learned: KILL Auto-ISO.
Almost Gave Up, Then It Clicked
After probably 30 garbage shots, I had it dialed in: Manual Mode, f/8, ISO 100, Shutter Speed around 3 seconds. Used the 2-second timer so my finger didn’t shake the camera when hitting the button. Focused manually on the road because autofocus couldn’t lock in the dark.
Took a shot. Held my breath. Looked at the screen… YES! Crisp white and red light trails, car bodies just kinda melted away leaving pure color streaks snaking down the lanes. Background city lights added some glow without wrecking it. Perfect.
Turns out it wasn’t that complicated. Just forcing myself to control those three things: Slow shutter, Small aperture, Low ISO. Tripod mandatory. Forget Auto. Play with the shutter length depending how fast the cars are moving. And pray you don’t accidentally kick the tripod! Now I just need to find a cool roundabout… Go nuts!
")


")


