
Alright, so you wanna know how I get my portraits looking the way they do in Lightroom, huh? Lemme tell ya, it wasn’t always pretty. When I first started, my edits were all over the place. Sometimes too bright, sometimes the skin looked kinda… alien. It took a while, a whole lot of messing around, but I think I’ve finally got a system that works for me, and it’s mostly about keeping things simple and making the person in the photo really shine.
My First Steps – Getting Things In Order
So, first things first, I get my photos into Lightroom. I don’t do anything fancy here, just import them from my memory card. I usually try to do a quick once-over and pick out the ones that have potential. You know, good focus, decent expression. No point polishing a photo that’s fundamentally blurry, right?
Once I’ve got a shot I like, I head over to the “Develop” module. That’s where all the magic happens, or at least, where I start to make things happen.
The Basic Tune-Up – Laying the Groundwork
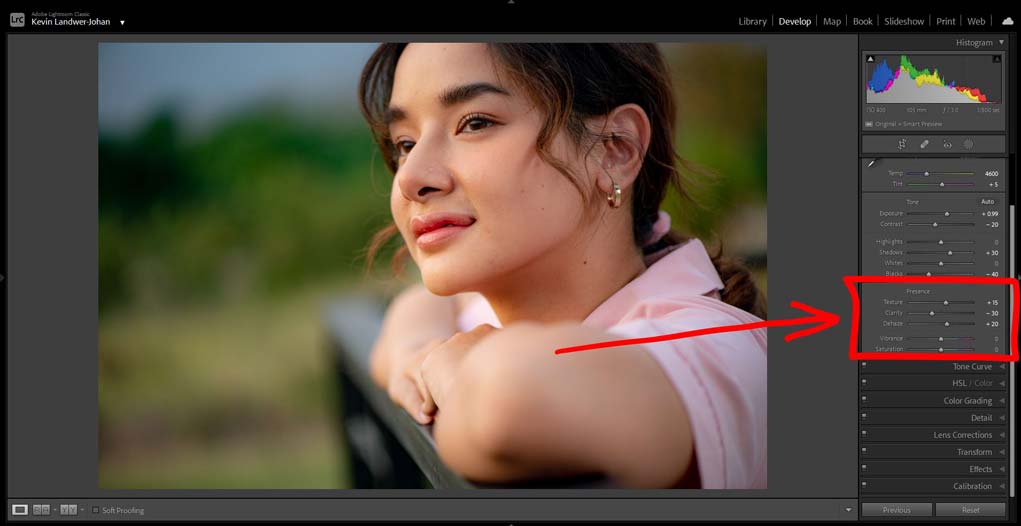
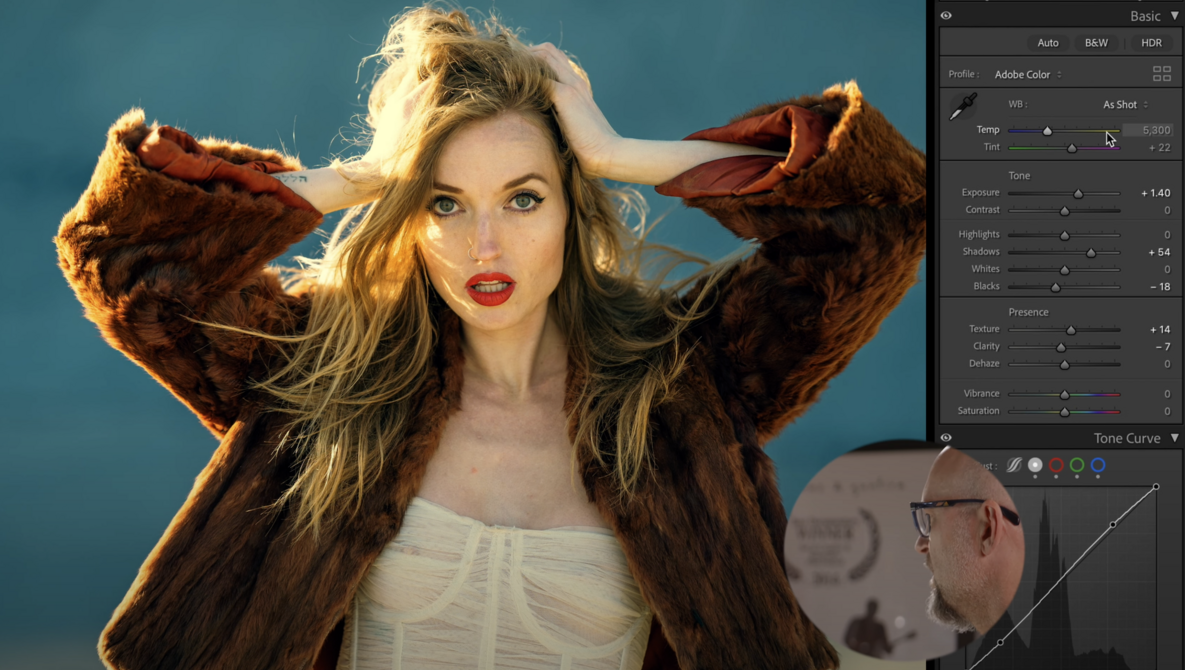
The very first thing I tackle is the “Basic” panel. Seriously, this panel is my best friend. I’ll start by checking the white balance. If the colors look a bit off – too blue, too yellow – I’ll use the eyedropper tool and click on something that should be neutral gray or white in the photo. Or sometimes I just slide the “Temp” and “Tint” sliders around until it looks right to my eye. You develop a feel for it.
Then, I play with the exposure. If it’s too dark, I bump it up. Too bright, I bring it down. Simple. Highlights and Shadows are next. If the sky is blown out, I’ll pull down the Highlights. If the face is too dark, I’ll lift the Shadows. I’m careful not to go too extreme, though. You still want it to look natural. Same for Whites and Blacks – these set the overall contrast. I nudge them until the image has a good bit of punch but isn’t crushed or washed out.
I also almost always add a little bit of “Clarity” and “Texture.” Not too much, mind you, or people start looking like they’re made of sandpaper. Just a touch to make the details pop a bit, especially in the eyes.
Making the Subject Shine – The Finer Details
Okay, so the overall tone is looking decent. Now I move onto the person. This is where you gotta be a bit more delicate.
Eyes are super important. I often use the “Adjustment Brush” for this. I’ll select it, maybe bump up the exposure just a tiny bit, add a little sharpness, and then paint over the irises. Sometimes I’ll also lighten the whites of the eyes a smidge, but again, not too much or they look like a cartoon character. If there are any distracting veins, I might use the “Healing Brush” to gently remove them.
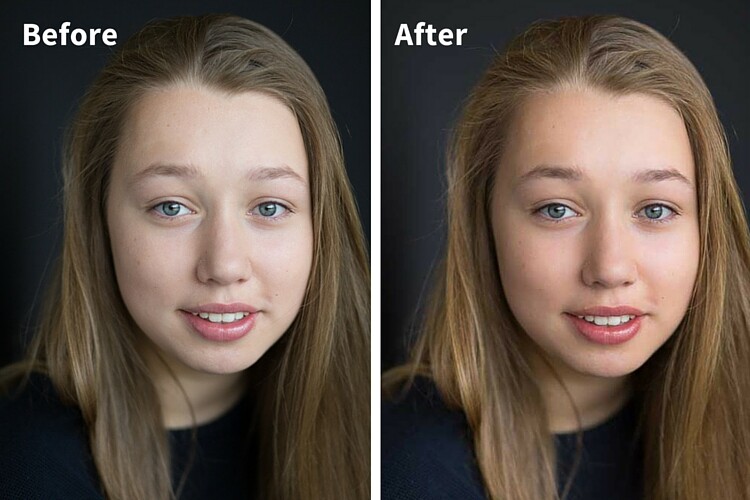
Skin is the next big one. Everyone wants smooth skin, but nobody wants to look like a plastic doll. I used to make this mistake a lot! Now, I’m much more subtle. Sometimes, if the lighting was good, I don’t need to do much. If there are a few blemishes, the “Healing Brush” or “Spot Removal” tool is perfect. I just click on the spot, and Lightroom usually does a pretty good job of making it disappear. For overall skin smoothing, I might use the Adjustment Brush again with a slightly negative “Texture” or “Clarity” setting, and very gently paint over the skin, avoiding edges like the nose and lips. The key is lowering the “Flow” or “Density” of the brush so the effect is built up slowly.
Sometimes I’ll also give the teeth a little attention if they’re looking a bit yellow. Again, Adjustment Brush, desaturate a tiny bit, maybe up the exposure a touch. Subtlety is your friend here!
Color Tweaks and Final Touches
I might dip into the “HSL/Color” panel if specific colors are bugging me. Like, if a red shirt is too overpowering, I can tone down the saturation or luminance of just the reds. It’s pretty powerful once you get the hang of it.
Then, I’ll do a final crop if needed. Maybe straighten the horizon if it’s a bit wonky. I always ask myself if the crop helps focus attention on the subject. Sometimes a tighter crop makes a huge difference.
And sharpening! I usually apply some sharpening, but I always zoom in to 100% to see what I’m doing. Lightroom’s masking tool in the sharpening panel is great – you can hold down the Alt (or Option) key while dragging the “Masking” slider, and it’ll show you what parts of the image are being sharpened. I try to make sure it’s only sharpening edges and details, not smooth areas like skin.
What I Learned the Hard Way
Looking back, my biggest mistakes were usually:
- Overdoing everything. Too much saturation, too much clarity, too much smoothing. It just looks fake.
- Relying on presets without understanding them. Presets can be a good starting point, but I found I had to learn why they worked and then tweak them myself. Now, I mostly build from scratch.
- Not taking breaks. Sometimes you stare at an image for too long and lose perspective. Stepping away for a few minutes and coming back with fresh eyes helps a ton.
So yeah, that’s pretty much my routine. It’s not a magic formula, just a series of steps I go through, and I tweak things based on each individual photo. Every portrait is different. The main thing is to practice, look at what others are doing, and slowly, you’ll find your own style. It’s a journey, for sure, but it’s pretty satisfying when you nail an edit and the person in the photo really comes to life.
")


")


