")
So today I finally sat down to figure out this vignette thing in Photoshop. Always loved that faded edge look on photos but had zero clue how to do it right. Remembered some tutorial mentioning layers, so let’s try that!

The Struggle with Old Methods
First I tried that garbage Select & Feather thing – total disaster. Got jagged edges everywhere and ruined my sunset photo. Then attempted some weird brush tool method where I smudged black around the corners like a kindergartener. Looked awful. Nearly threw my laptop.
Discovering the Layer Trick
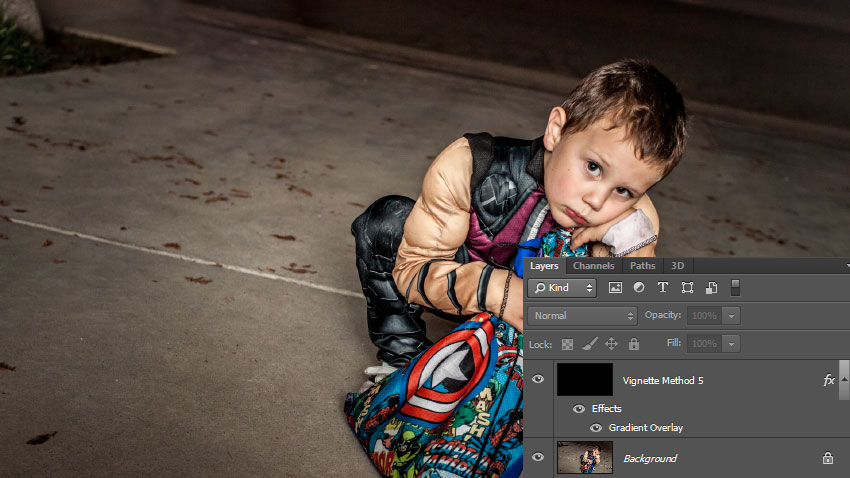
Opened a fresh copy of my photo, then stared at the Layers panel like it owed me money. Here’s what worked:
- Clicked Layer > New Fill Layer > Solid Color
- Picked black from the color picker – felt wrong but rolled with it
- Gloriously saw that new layer appear above my photo!
Mask Magic Happened
Now the fun part:
- Grabbed the Elliptical Marquee Tool and drew an oval around my main subject
- Clicked the Mask button at the bottom of Layers panel (looks like a camera icon)
- Boom! Black layer vanished except around my oval – already looking decent!
Making It Subtle & Natural
Looked too harsh though. Fixed it:
- Selected the mask thumbnail while holding Alt
- Went to Filter > Blur > Gaussian Blur and slid that baby up to 150px
- Tweaked layer opacity down to 60% – finally that soft fade appeared!
- Noticed the effect was too even, so lowered Fill to 70% for better blending
The Final Tweaks
Zoomed out and realized it still looked fake. Last adjustments:
- Clicked Layer Style > Blend If on the black layer
- Dragged the “Underlying Layer” sliders slightly to preserve highlight details
- Added gradient to the mask for smoother transition at the edges
And damn – my boring landscape suddenly looked pro! Took three failed attempts and 20 minutes, but layers made it stupid simple once I got the flow. Now my Instagram feed’s gonna be all moody vignettes!


