
Alright, so I’ve been meaning to share this little project of mine. For ages, my photos for, well, pretty much anything I wanted to show off, looked a bit… messy. You know, cluttered backgrounds, distracting stuff everywhere. I kept seeing these super clean, professional-looking product shots online, and the common thread? A crisp white backdrop. So, I figured, I gotta try that.
My First Go – Not So Great
My initial thought was, “Easy! I’ll just use a white bedsheet.” So, I grabbed one, tried to hang it up. Seemed simple enough. Wrong. It was a nightmare of wrinkles. I even tried ironing the darn thing, which, let me tell you, ironing a giant bedsheet perfectly smooth is a task I wouldn’t wish on my worst enemy. The photos? Still looked amateurish, with all those faint crease lines showing up. Total fail.
Thinking Smarter, Not Harder (or Pricier)
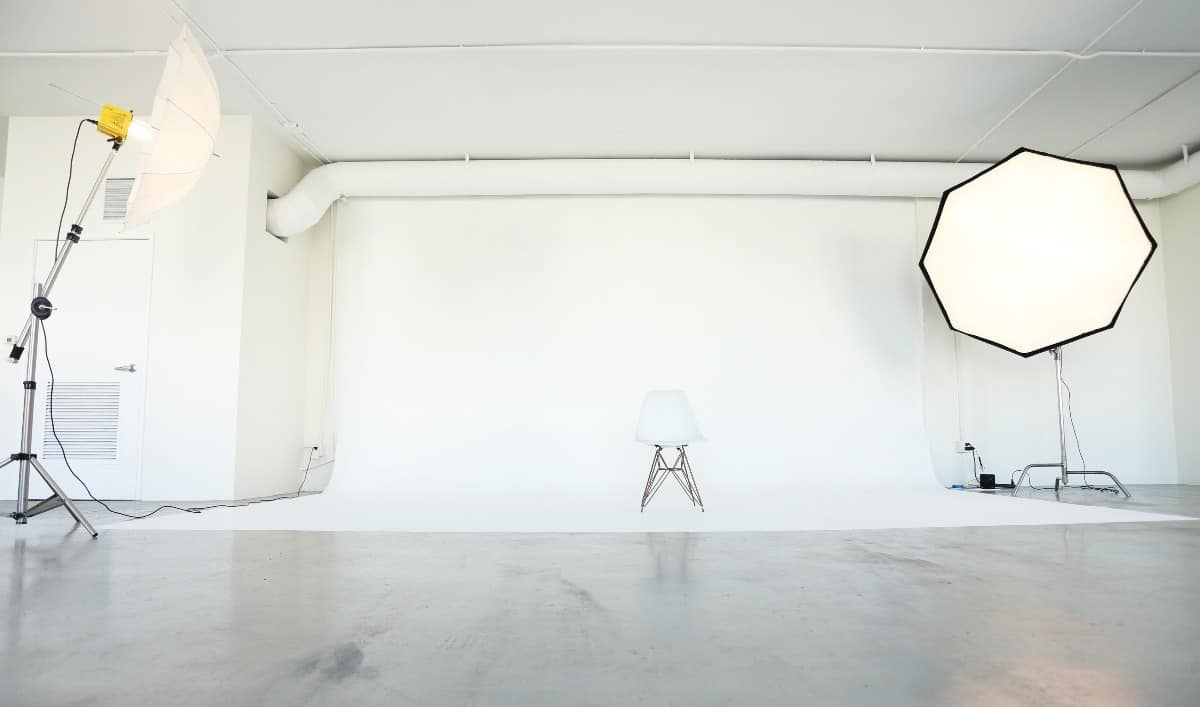
Okay, so the bedsheet was a bust. I wasn’t about to shell out big bucks for a professional studio setup. That’s just not me, especially for the kind of small things I shoot. I started looking around for cheaper alternatives. I remembered seeing people use poster board, but I wanted something a bit bigger and more flexible, something that could give me that nice seamless curve from the vertical to the horizontal surface.
The Winning Idea: Paper Rolls!
Then it hit me – a big roll of white paper! Like the kind artists or schools might use. I figured it would be smooth, cheap, and I could just roll out a fresh piece if it got dirty. So, I trotted off to a local art supply store. Found a decent-sized roll of plain white paper, not too glossy, not too matte. Just right. I also picked up a couple of cheap spring clamps while I was there. I already had a couple of basic desk lamps at home, nothing fancy.
Setting Up My “Studio”
Back home, I cleared a space on my dining table. My plan was to drape the paper. I unrolled a good length of it, maybe five or six feet. I let one end hang down behind the table, then curved the paper up onto the table surface itself, creating a nice, smooth sweep. This is key, folks – that curve means no harsh line where the wall meets the floor (or in my case, where the backdrop meets the table). I used the clamps to secure the top edge of the paper to the backs of a couple of chairs I placed behind the table. It wasn’t exactly high-tech, but it held!
Then came the lighting. This is where you can spend hours fiddling. I started with one desk lamp on one side, then added the other on the opposite side.

- Moved them closer.
- Moved them further away.
- Tried raising them.
- Tried lowering them.
The goal was to get even lighting on my subject (I think the first thing I tried was a new coffee mug) and minimize harsh shadows on the white background. Patience is your friend here.
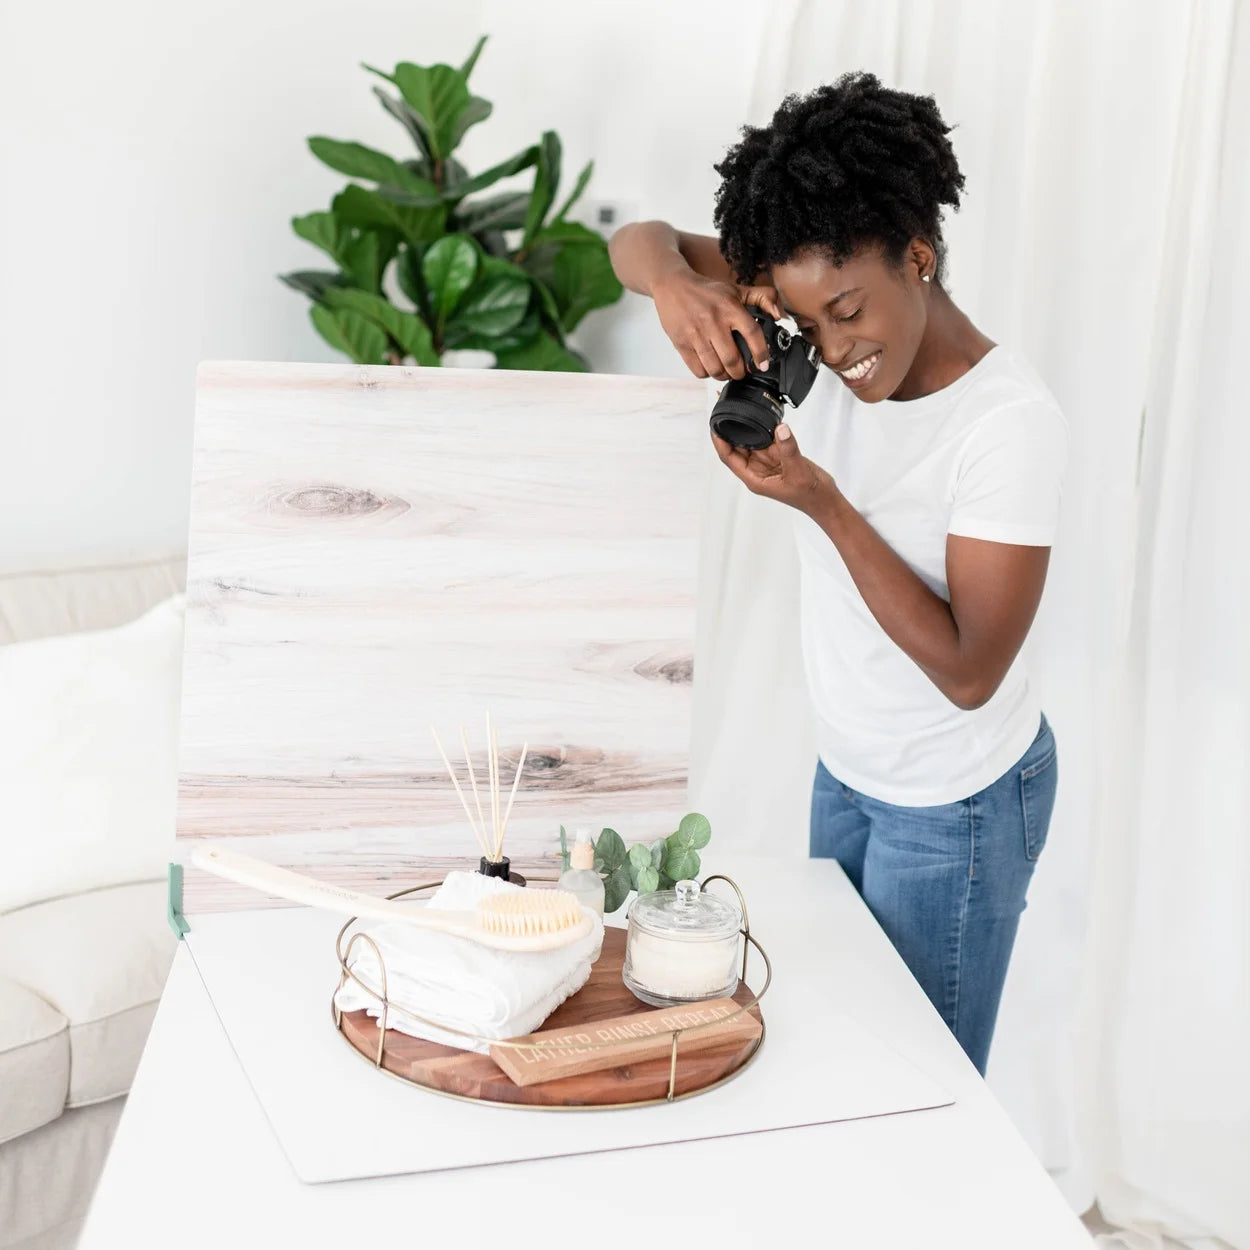
The Moment of Truth: Taking the Shots
I placed my mug on the paper, framed it up in my camera (just my phone, mostly!), and started snapping. And you know what? It looked pretty good! Way, way better than the bedsheet disaster. The white paper reflected the light nicely, the background was smooth and distraction-free. The mug really popped.
It’s funny, isn’t it? We get so caught up in needing the latest, greatest gear. I see folks online with thousands of dollars in camera equipment, and sometimes their basic setup for simple shots is overlooked. It reminds me of when I tried to learn to bake sourdough bread during that whole craze a while back. Everyone was obsessed with getting the perfect Dutch oven, the special scoring lames, the fancy flour. I just used a regular pot with a lid and whatever flour I could find, and you know what? My bread was still pretty decent. Sometimes the simple, fundamental things make the biggest difference. A clean background is like the good flour of photography, I guess.
What I Learned and My Takeaways
So, what did I take away from this?
- Keep it simple: You don’t need expensive gear for a good white backdrop. A roll of paper and some clamps can do wonders.
- The sweep is crucial: That seamless curve from vertical to horizontal is what makes it look pro.
- Lighting is everything: Even cheap lights work if you play around with them. Diffuse light is generally better. Sometimes I just bounce my lamp off a white piece of cardboard.
- Fresh paper is your friend: If it gets scuffed or dirty, just roll out a new section. Easy peasy.
Now, my photos look so much cleaner. Whether it’s something I’m trying to sell, or just a little something I want to share on my blog, that white backdrop makes a huge difference. It just elevates the whole look. Took a bit of trial and error, but definitely worth the small effort and cost!
")


")


