
Alright, let’s talk about getting up close with cameras without breaking the bank. Dedicated macro lenses? They cost a pretty penny. When I first started wanting to shoot tiny things, bugs and flower details, I just didn’t have the cash for one of those fancy lenses. So, I started messing around, trying to find cheaper ways.

First thing I tried: Extension Tubes
I remember picking up a set of extension tubes online. They were just simple, hollow rings, no glass in them at all. You stick one, or stack a few, between your camera body and your regular lens. I popped my standard 50mm lens on the end of one tube and attached it to my camera.
What happens? Well, the lens suddenly focuses much, much closer. Like, way closer than it normally could. That was cool! But, the viewfinder got noticeably darker, especially if I stacked multiple tubes. And autofocus? Forget about it with the cheap manual tubes I got first. Focusing meant physically moving the camera back and forth, tiny amounts, until the subject popped into focus. It was fiddly, super fiddly. Got some blurry shots, got frustrated, but eventually, I nailed a few sharp ones of some coins and textures. It worked, kinda.
Next up: Reversing Rings
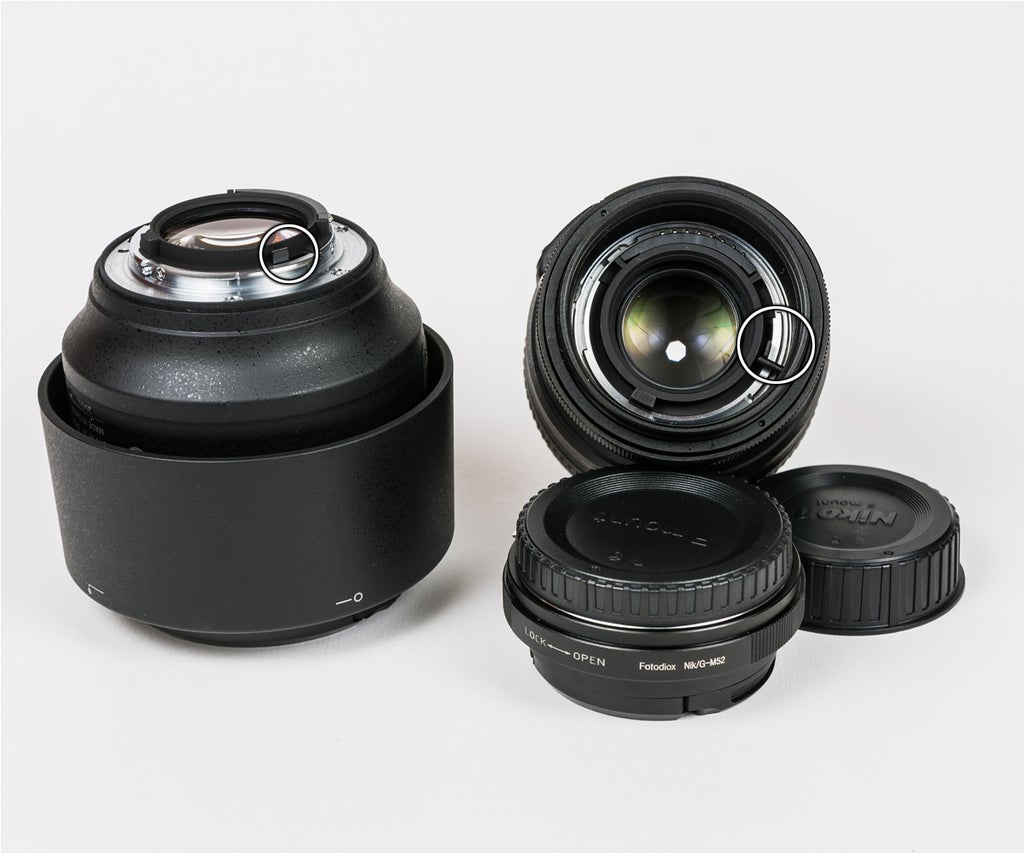
Then I heard about this weird trick: flipping your lens around backward. Seemed nuts. But I found a reversing ring adapter for my camera mount for just a few bucks. It lets you screw the filter thread of your lens onto the camera body.
So, I took my trusty 50mm lens again, unscrewed it the normal way, and then mounted it backward using the adapter. Holy moly! The magnification was HUGE. Way more than the extension tubes gave me. It was like having a cheap microscope. But the depth of field – the zone that’s actually in focus – was razor thin. Like, paper thin. Trying to shoot a moving ant was basically impossible at first. Just breathing seemed to shift the focus point. Also, controlling the aperture was a pain. On my modern lens with no aperture ring, it was stuck wide open unless your adapter had some fancy mechanism, which mine didn’t. Meant it was bright, but that super shallow focus was even harder to manage. Older manual lenses with aperture rings are way better for this trick.
Combining the madness: Tubes + Reversed Lens
Naturally, I thought, what if I combined these? Put the extension tubes on the camera, then put the reversing ring on the tubes, then mount the lens backward onto that? Yep, I tried it.
Magnification went through the roof! Seriously intense close-ups. But everything got harder by a factor of ten. It was incredibly dark through the viewfinder. The depth of field was practically non-existent. Camera shake was amplified like crazy. You absolutely needed a sturdy tripod, lots of bright light (like direct sunlight or a flash), and tons of patience. It was more like a science experiment than practical photography half the time, but pretty amazing when you actually got a shot.
Easier approach: Close-up Filters
After wrestling with tubes and reversed lenses, I looked into close-up filters, sometimes called diopters. These look just like regular filters, but they have curved glass. You just screw them onto the front of your existing lens, like a UV filter.
I got a cheap set with different strengths (+1, +2, +4, +10). Screwed one onto my telephoto zoom lens. Instantly, the lens could focus closer. Easy peasy! No dark viewfinder, autofocus usually still worked (though maybe slower), and it was super simple to put on and take off. This became my go-to for casual macro shots out on walks. The downside? Image quality, especially with the cheaper filters and stronger magnifications. Things could get a bit soft, especially around the edges, and sometimes I saw weird color fringing. But for ease of use? Can’t beat ’em for the price.
Teleconverters too?
One more thing I played with was using a teleconverter. I already had a 1.4x teleconverter for my zoom lens. Normally, it just makes the lens ‘longer’. But I found if you put it between the camera and a lens (even a macro lens, or just a regular lens with extension tubes), it increases the magnification further while keeping the working distance (how far the lens is from the subject). It does make the lens ‘slower’ (less light gets through), and can reduce sharpness a bit depending on the quality of the converter and lens, but it was another tool in the box for getting closer.
So yeah, that’s my journey through cheap macro hacks. Honestly, a dedicated macro lens is usually the best tool for the job – better image quality, easier handling. But these combinations? They’re fun! They force you to learn about light, depth of field, and patience. Great way to experiment and see if macro photography is really your thing without spending a fortune right away. It’s all about trying things out and seeing what works for you.
")


")


