
So I saw this title about best camera angles for shoe photos and thought, hey I should try that. Always messing up my product shots for the blog, right? Got some new kicks that looked fire in person but came out trash in my pics. Figured it was time to fix that. Grabbed my phone – yeah, no fancy DSLR rig here yet, just my regular phone camera and an old ring light I dusted off.
Starting Off Way Too Cocky
Figured how hard could pointing a camera at shoes be? Slapped the shoes down on my makeshift “studio” – basically my wooden coffee table – kicked on the ring light, and started clicking away from above. Straight down, like I always did. Pictures came out flat, boring, lifeless. The details? Gone. The shape? Looked weirdly long and warped. Total fail. Instantly realized why that top-down angle everyone defaults to is trash for actually showing off a cool shoe.
Okay, fine. Time to actually, you know, try different angles like the article probably suggested. Started angling the phone. Held it lower, maybe chest height, pointing slightly down. First few tries… blur city. Forgot my shaky hands were a thing. Propped the phone up awkwardly on books. Better, but the shoes looked stiff and unnatural just sitting there flat.
Getting Into The Weeds (Literally)
Took the shoes outside to the little garden patch I’ve got. Maybe natural light would help. Tried placing one shoe sorta upright against a plant pot. Got the angle better, maybe 45 degrees down. The details on the upper popped more! Finally seeing something decent. But the background was cluttered, messy roots and dirt piles. Focused too much on the angle and forgot the mess behind it. Lesson learned.
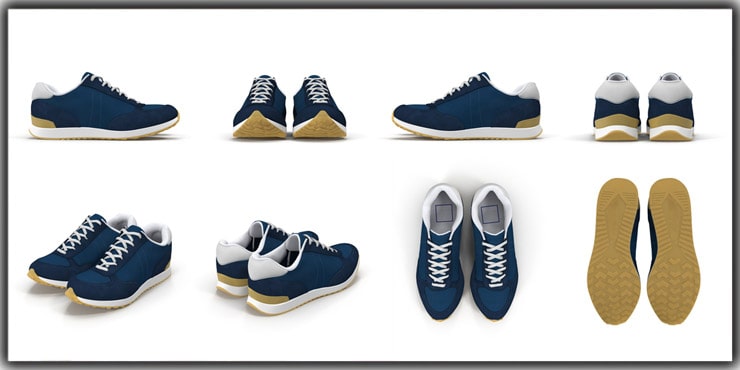
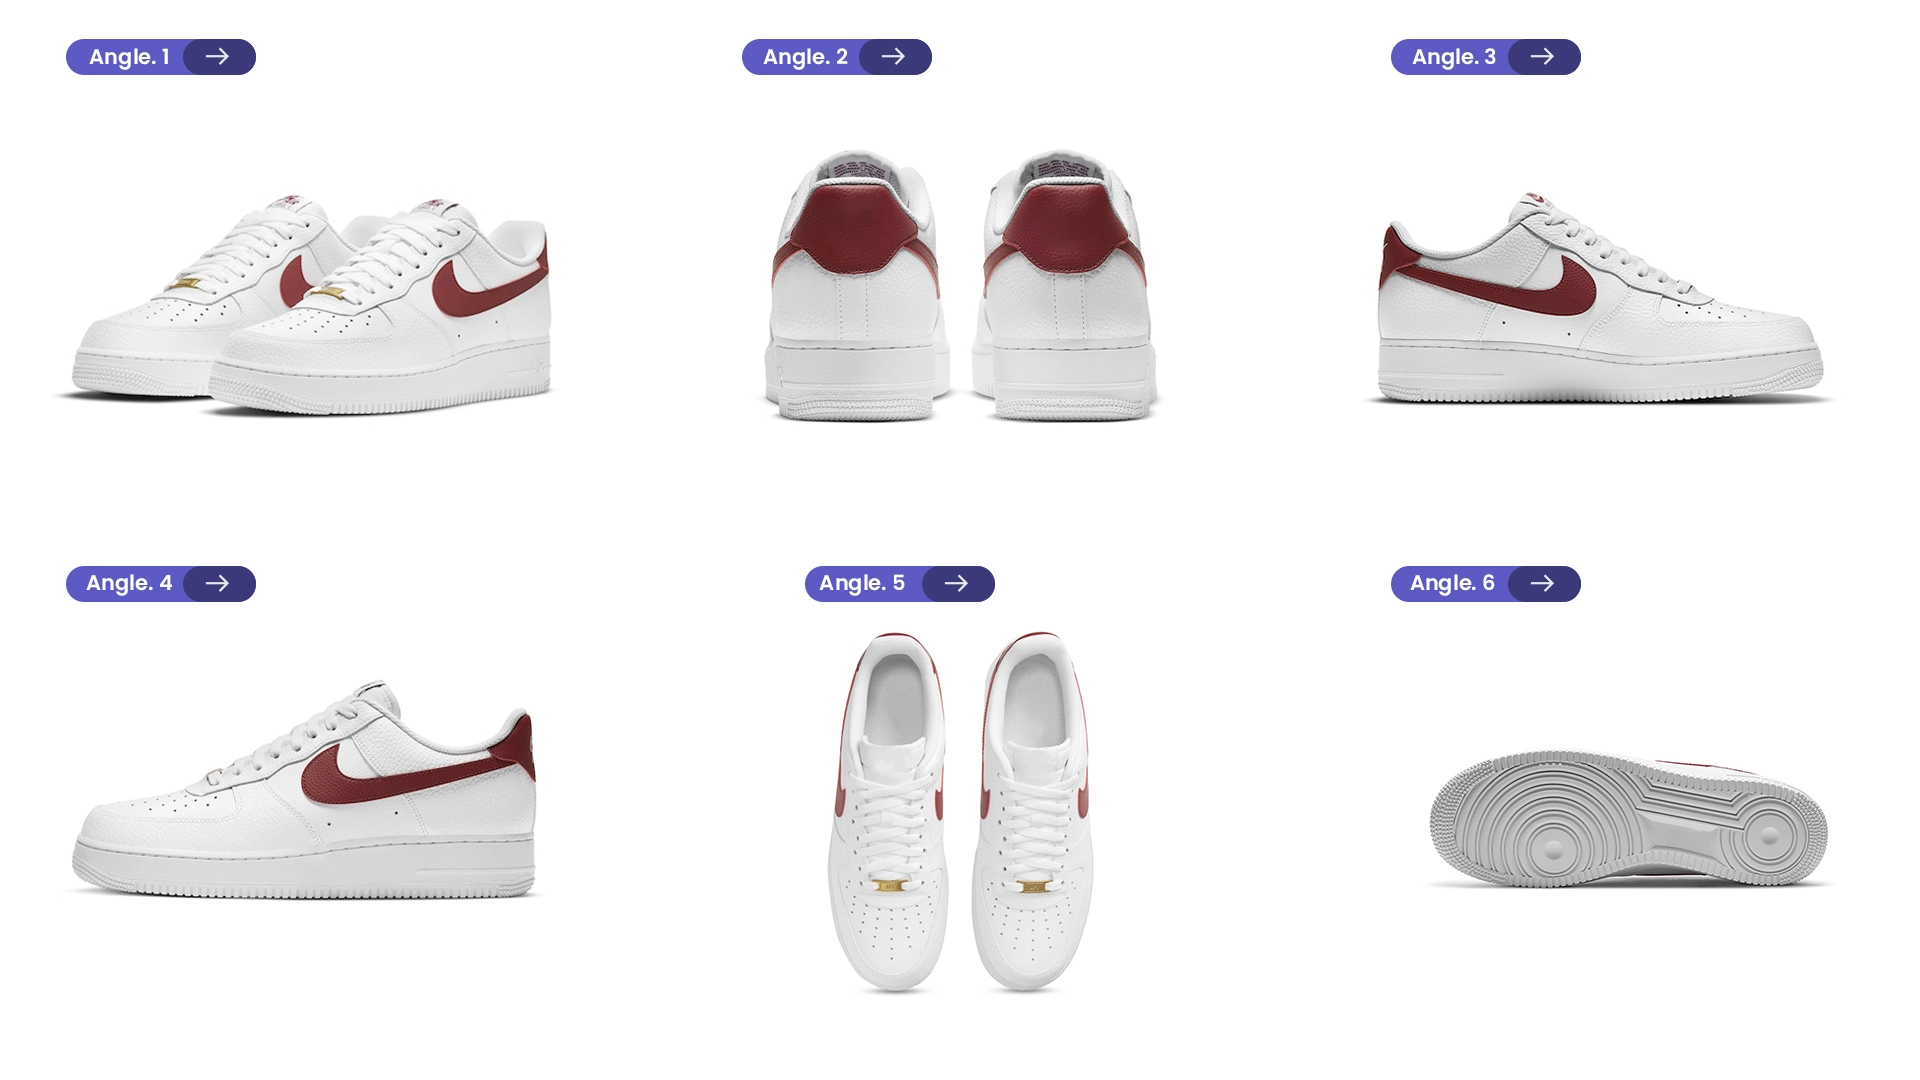
Next attempt: Placed the shoe on its side, sole facing the camera slightly. This is when it started clicking for me. That profile view? It showed off the curve of the heel, the texture of the sole so much better. Used the grass as a cleaner background this time. Way nicer. Snapped a bunch like that.
- Tried the “heel shot” – getting really low to the ground shooting up along the back of the shoe. Looked aggressive, cool.
- Tried the “toe shot” – low angle pointing at the front. Showed the toe box shape real nice.
- Tried propping one shoe over the other at an angle. Created a bit of depth and interest.
Fumbled around with the ring light back inside too. Moved it from directly overhead to the side or lower. Made a huge difference in creating shadows and highlights that defined the shoe’s shape instead of flattening it.
End Result? Less Suck, Still Learning
By the end, I probably took like 200 garbage shots for every 5 usable ones. My back hurt from crouching. My phone was covered in dirt. But man, forcing myself to actually move the camera all around the shoe – high, low, front, side, 3/4 views – instead of just lazily pointing down? Game changer.
The trick isn’t finding one magic angle, its using a bunch to tell the whole story of the shoe. Angles are everything, more than I thought, honestly. Lighting placement matters tons too. Sounds simple when you read it, but actually doing it physically? That’s the hard part. My shots aren’t pro level yet, but they finally look like the actual shoe in my hand, not a pancake. So yeah, guess I’ll be crawling around my floor and garden a lot more now. Pain in the butt, but worth it.


")


")


