Alright folks, lemme tell you about my journey into the world of manual mode photography. For the longest time, I was stuck in the land of Auto, letting my camera do all the thinking. Snapping pics felt more like pointing and shooting, and less like, well, creating something.
So, I decided to ditch the safety net and dive headfirst into manual mode. Scared? You betcha! My first attempts were…rough. Pictures were either blown out brighter than the sun or so dark you couldn’t see a thing. But I was determined to figure this thing out.
First things first: Understanding the exposure triangle. This was crucial. I spent hours watching videos and reading articles about aperture, shutter speed, and ISO. I scribbled notes, made little diagrams, and tried to wrap my head around how they all worked together.
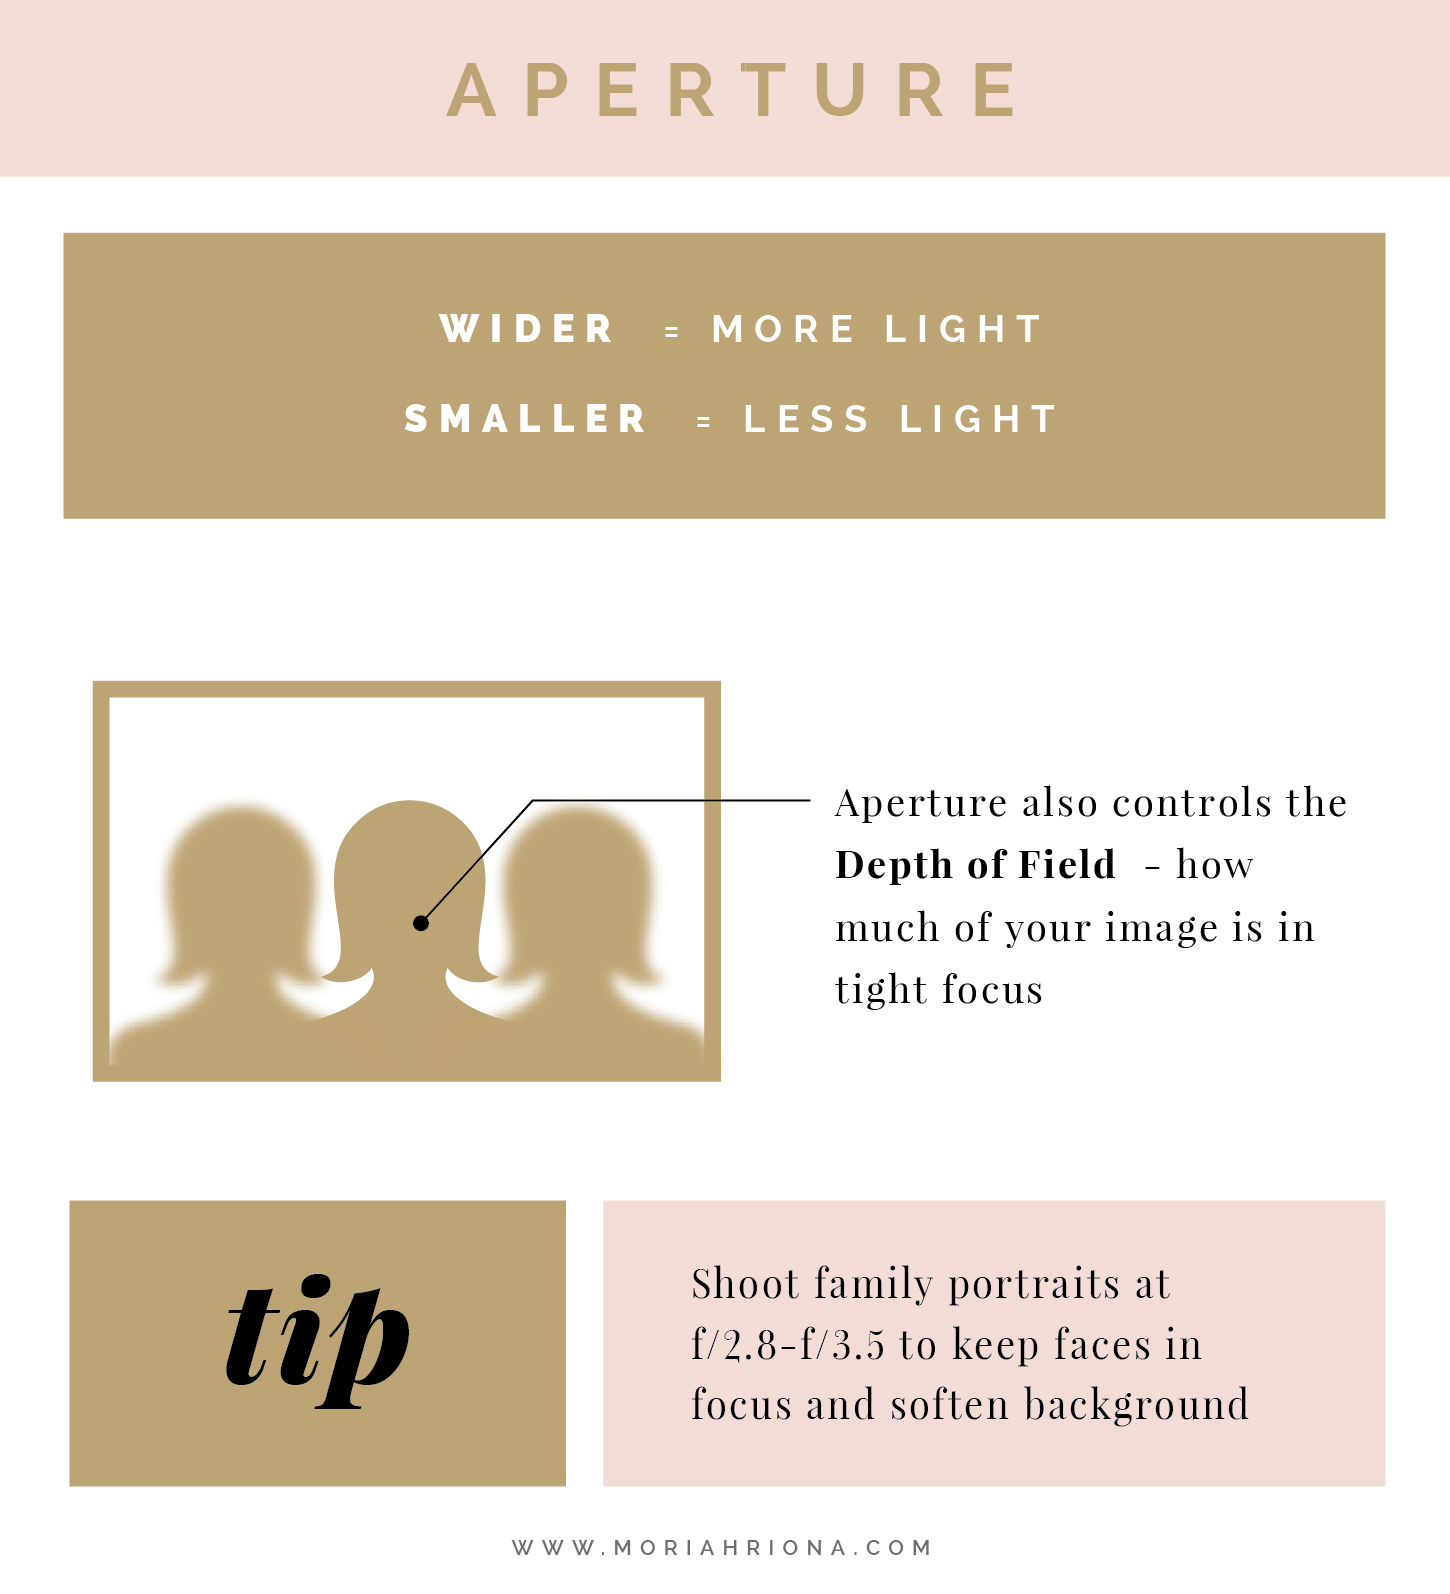
- Aperture: I started experimenting with different f-stops. Wide open (like f/1.8) for that blurry background effect (bokeh!), and stopped down (like f/8 or f/11) for landscapes where everything needed to be sharp.
- Shutter Speed: This was a tricky one at first. Fast shutter speeds to freeze motion (think kids running around), and slow shutter speeds for light trails or to blur water. I remember one time trying to photograph a waterfall with a slow shutter speed. My first few attempts were a blurry mess because I didn’t have a tripod! Lesson learned.
- ISO: This was my last frontier. I learned to keep it as low as possible to avoid grainy images, but bumping it up when shooting in low light was a necessary evil.
My practice routine went something like this: I’d find a subject (usually my dog, bless his patient soul), set my camera to manual, and start adjusting the settings. I’d take a shot, review it, and then tweak the settings again. Over and over. It was tedious at times, but slowly, very slowly, I started to see improvements.
One key thing that helped me was using my camera’s light meter. It’s not perfect, but it gave me a good starting point. I’d adjust my aperture and shutter speed until the meter was centered, and then fine-tune from there based on what I was seeing in the viewfinder.
I started carrying a little notebook with me. I’d jot down the settings I used for each shot, along with notes about the lighting conditions and what I liked or didn’t like about the image. This was invaluable for learning from my mistakes.
Another thing that helped was practicing in different lighting conditions. Shooting in bright sunlight is totally different than shooting indoors under artificial light. I made it a point to practice in all sorts of situations.
It took time, and there were definitely moments when I wanted to throw my camera against the wall, but pushing through those challenges was worth it. Now, shooting in manual mode feels natural. I have a much better understanding of how my camera works, and I have way more control over the final image.
The biggest takeaway? Don’t be afraid to experiment and make mistakes. That’s how you learn. And don’t get discouraged if your first attempts aren’t perfect. Just keep practicing, keep learning, and eventually, you’ll get there.
And hey, if an old dog like me can learn to shoot in manual mode, anyone can!
")


")


