
So, I’d been wrestling with my camera for a bit. You know, relying on those auto settings mostly. And sure, it got the job done, kinda. But I kept looking at my photos and thinking, something’s missing. They weren’t quite what I envisioned. I wanted more control, that feeling of really making the picture, not just pointing and shooting.
Figuring Out This Manual Stuff
I decided to take the plunge and switch that dial over to ‘M’ – manual mode. Boy, oh boy. My first few attempts were, let’s just say, a disaster. Pictures were either pitch black or completely blown out white. I was twisting dials, pushing buttons, getting more frustrated by the minute. I’d read a bit online, watched some videos, but when I was out there, with the camera in my hand, all that theory just flew out the window. It was like trying to juggle three balls when I’d only ever held one.
I realized I needed something to remind me, right there in the moment, what all those numbers and settings actually did. My memory isn’t a steel trap, especially when I’m trying to frame a shot and the light is changing.
The Birth of My Little Helper
That’s when I got the idea to make my own little cheat sheet. Nothing fancy, mind you. I wasn’t about to design a laminated masterpiece on day one. I started by just grabbing a small notebook, one that could fit in my camera bag, or even my pocket. I figured I’d jot down the basics, the stuff I kept forgetting.
First things I focused on were the big three:
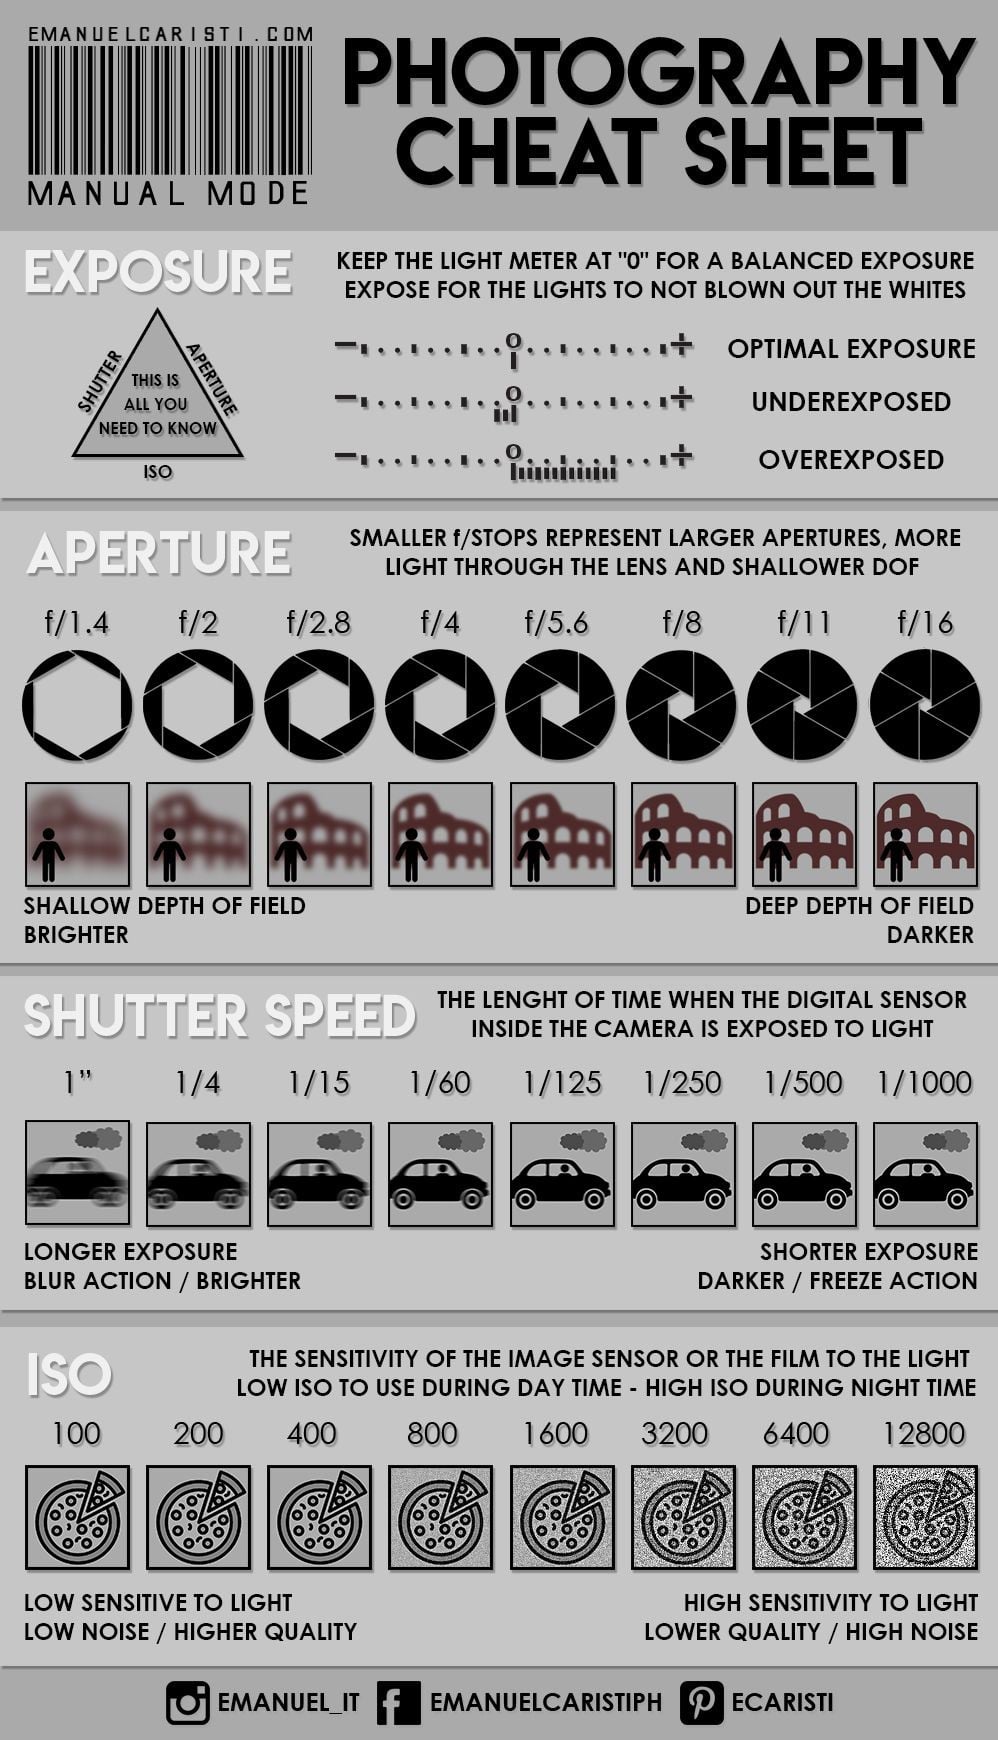
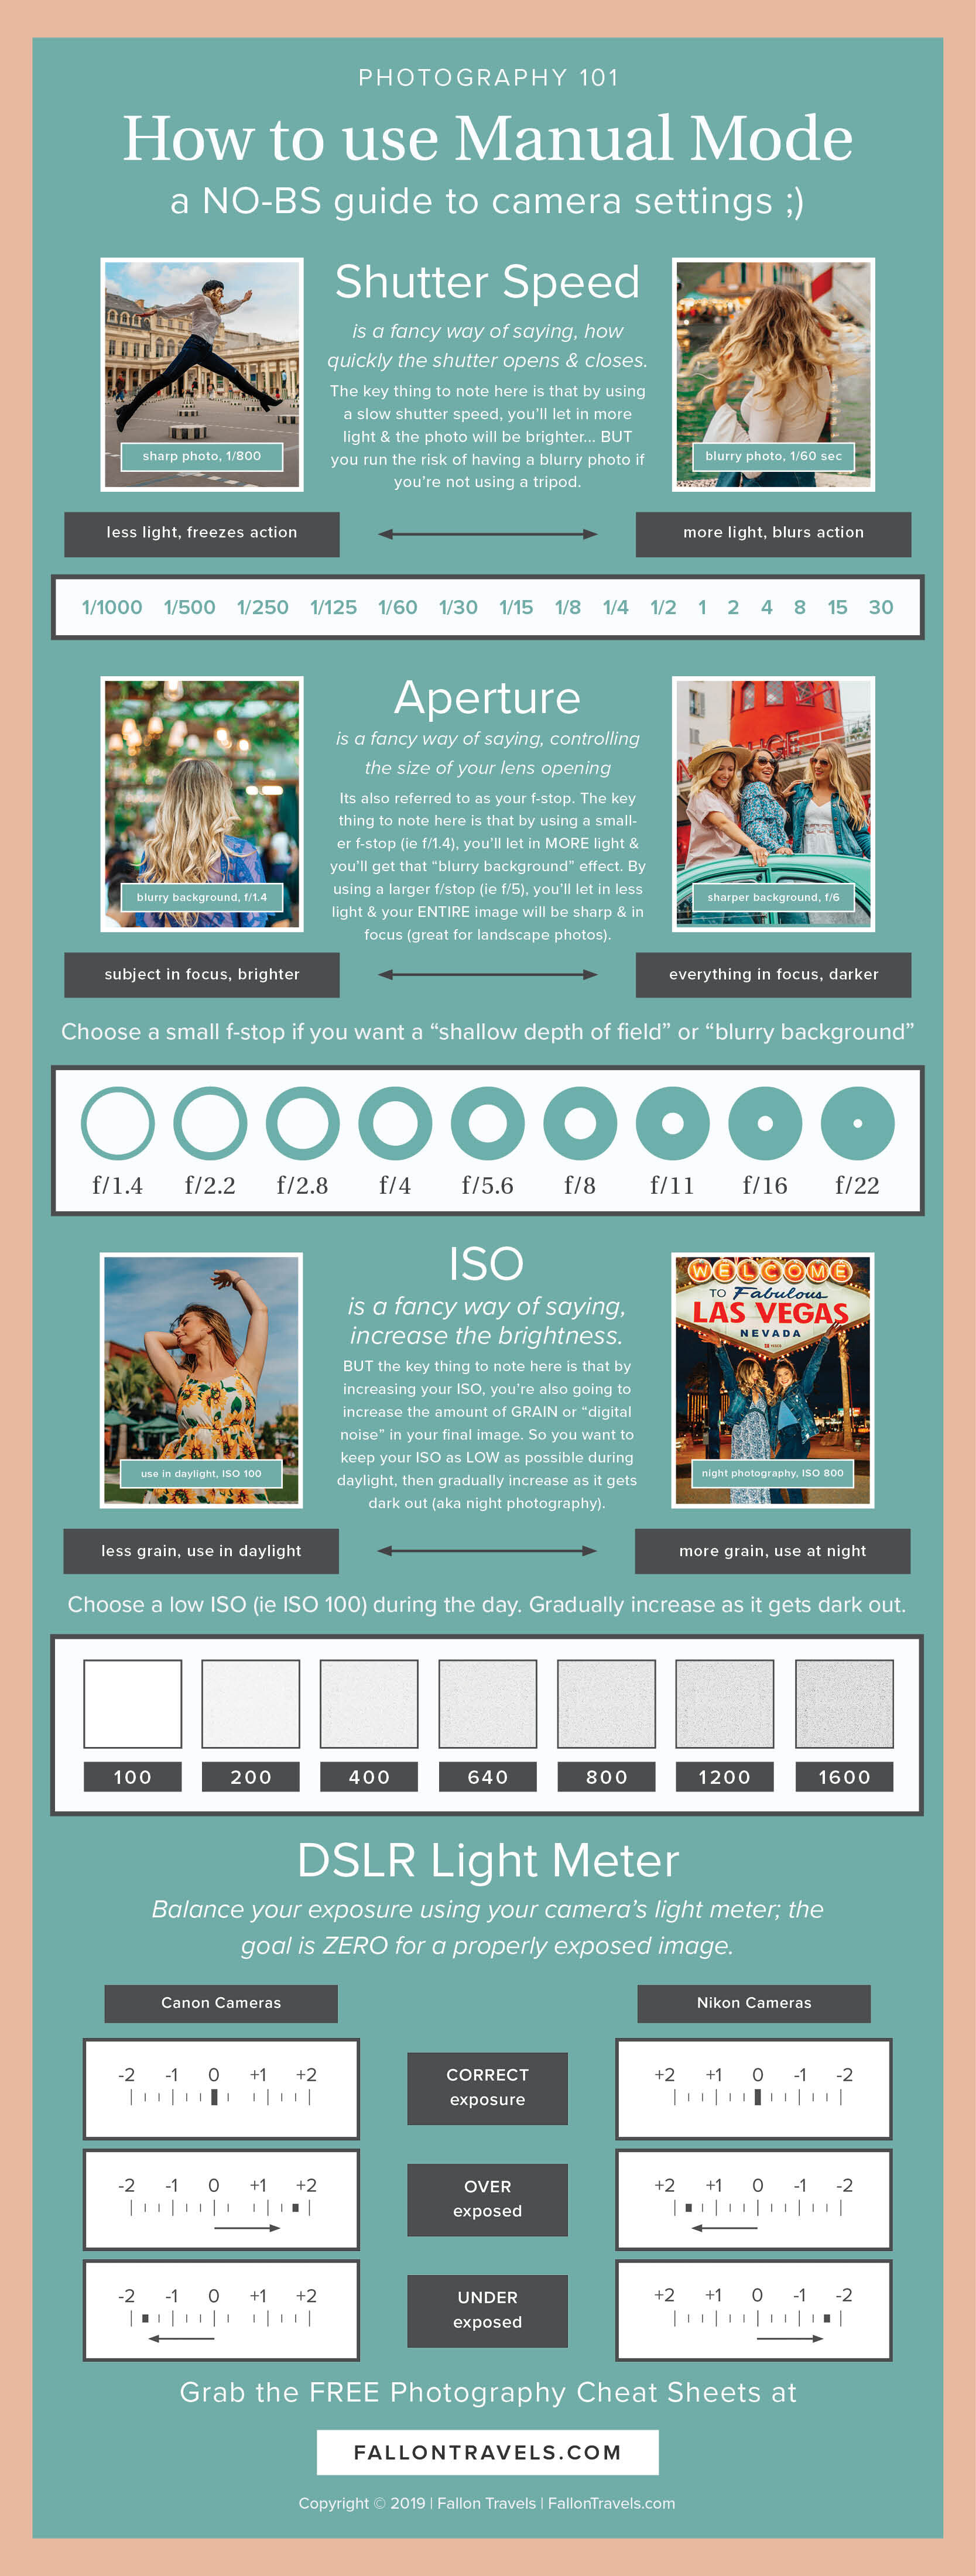
- Aperture: That f-stop thing. I needed a quick reminder of what f/2.8 meant for my background (blurry, nice!) versus f/16 (everything sharp). So I wrote down: “Low f-number = blurry background, more light. High f-number = sharp background, less light.” Simple.
- Shutter Speed: This was a big one for me. I kept getting blurry shots of anything that moved. So, I noted: “Fast shutter (like 1/500s) = freezes action, needs more light. Slow shutter (like 1/30s or slower) = motion blur, careful with camera shake, good for low light if still.” I even added a little note about using a tripod for really slow speeds.
- ISO: The light sensitivity. This one always felt a bit like black magic. My note became: “Low ISO (100-400) = best quality, less noise, needs good light. High ISO (800+) = more light sensitive, more ‘grain’ or noise, use when it’s dark.”
I didn’t just write down definitions. I tried to connect them to the why. Like, why would I choose a low f-number? For portraits. Why a fast shutter? For kids running around. I started making little scenarios next to the settings.

Putting it to the Test and Making it Better
Then, I actually took this scrappy notebook out with me. Every time I went to shoot, I’d pull it out. If I was unsure, I’d glance at my notes. It felt a bit clunky at first, like learning to ride a bike with training wheels. But slowly, it started to click. I’d see a scene, think about what I wanted, and my notes would give me a starting point. “Okay, bright day, want everything sharp for this landscape… right, higher f-number, lower ISO.”
Over time, I added more stuff. Little reminders about the exposure meter in the camera – how to read it, what “0” means. I even added a tiny section on white balance, because sometimes my colors were looking a bit funky. Nothing too complex, just “Cloudy day = ‘Cloudy’ setting,” that sort of thing. I also made a point to write down settings from photos I liked. If I got a shot that really worked, I’d check the settings and jot them down as a good example for that kind of situation.
My first version was just pencil on paper. It got smudged, a bit crumpled. So, I eventually re-wrote it more neatly on a couple of index cards. I even thought about laminating them, but honestly, the paper cards tucked into my bag work just fine. They’re easy to update if I learn something new or want to tweak a reminder.
What I Learned from Making It
The funny thing is, the act of making the cheat sheet was probably just as helpful as using it. Having to think about what each setting did, and how to explain it to myself in the simplest terms, really solidified it in my brain. It wasn’t just about having the answers; it was about understanding the questions my camera was asking me.
Now, I don’t need to look at it every single time. A lot of it has become second nature. But it’s still there, my little safety net. And on days when my brain feels a bit foggy, or I’m trying something new and a bit out of my comfort zone, it’s super reassuring to know I have those notes to fall back on. It’s made shooting in manual way less intimidating and a whole lot more fun. And my photos? Well, I think they’re finally starting to look like mine.
")


")


