
Okay, so I had this moon photo, right? And it was cool and all, but the sky around it was just…blah. Totally boring. I really wanted to make it pop, give it that dramatic, dreamy vibe. So, I decided to try adding a more interesting sky in Lightroom, and let me tell you, it was a bit of a journey.
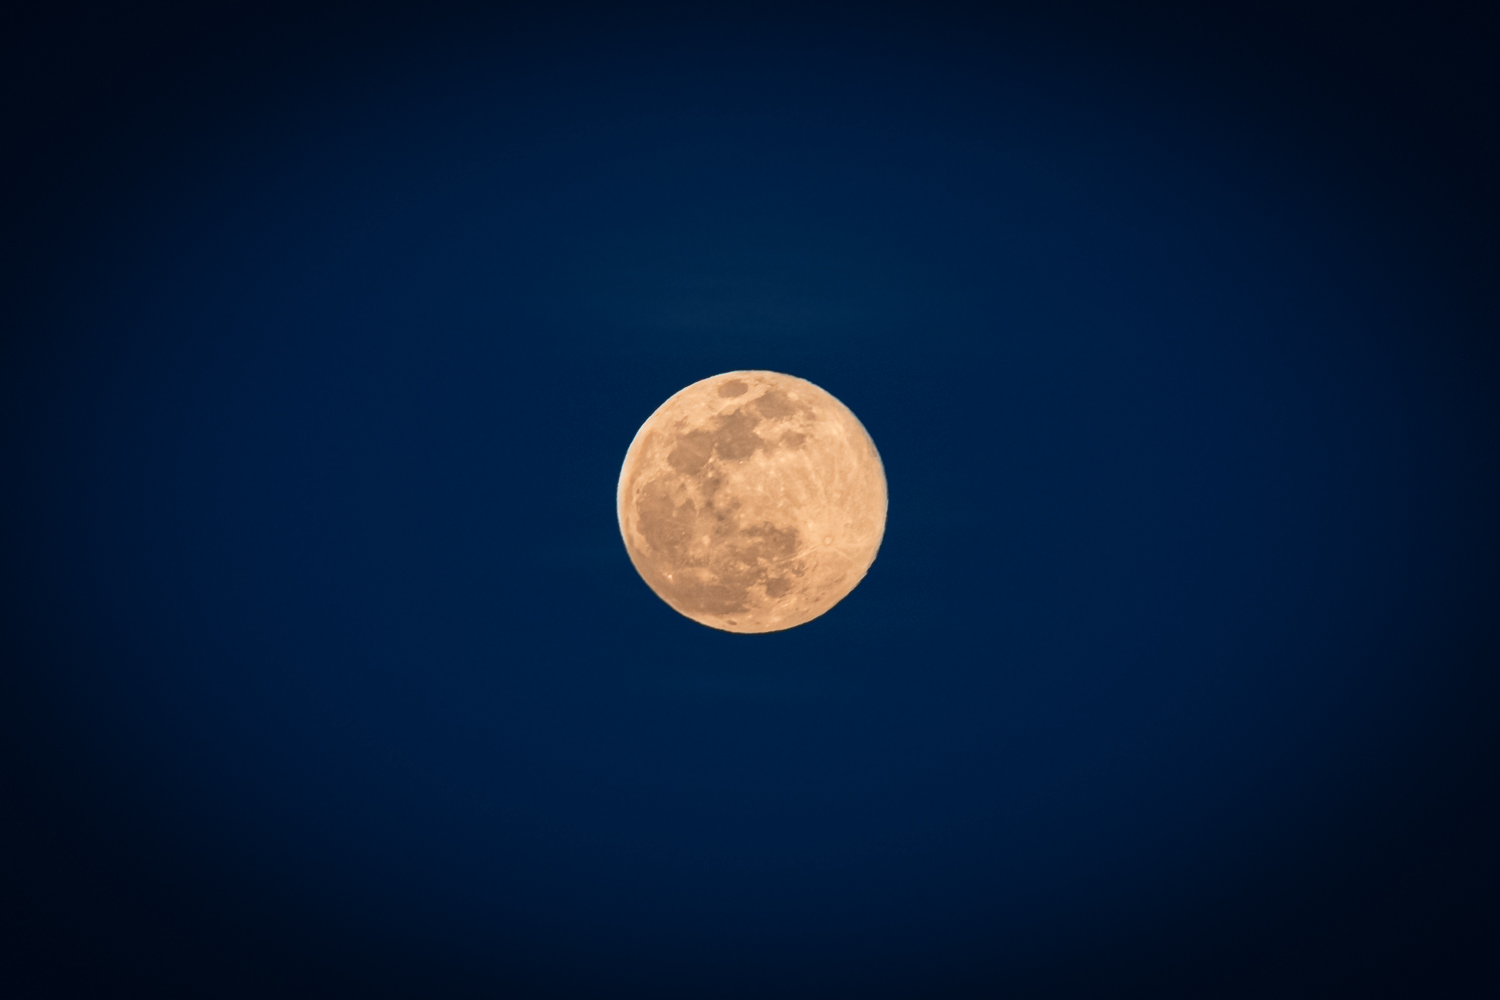
First things first, I opened up the photo in Lightroom. I’m not gonna lie, I fumbled around a bit. This wasn’t specifically about editing the moon in Lightroom, but adding a whole new sky. I messed with the basic adjustments, you know, exposure, contrast, the usual. But that didn’t really help with the sky situation. Then I remembered something about selective adjustments being the key to enhancing skies in Lightroom. That sounded promising.
- I opened my moon photo in Lightroom.
- I played with exposure and contrast, but it didn’t fix the sky.
- I recalled something about selective adjustments being useful.
I poked around and found the masking tools. That’s where the magic started to happen. I used the “Select Sky” option, and boom, Lightroom automatically selected the boring sky for me. It wasn’t perfect, though. There were some bits around the moon that it missed, so I had to manually refine the mask using the brush tool. It took some patience, but I got it pretty good in the end.
- I found the masking tools.
- I used “Select Sky” to automatically select the sky.
- I refined the mask with the brush tool to fix imperfections.
Adding the New Sky
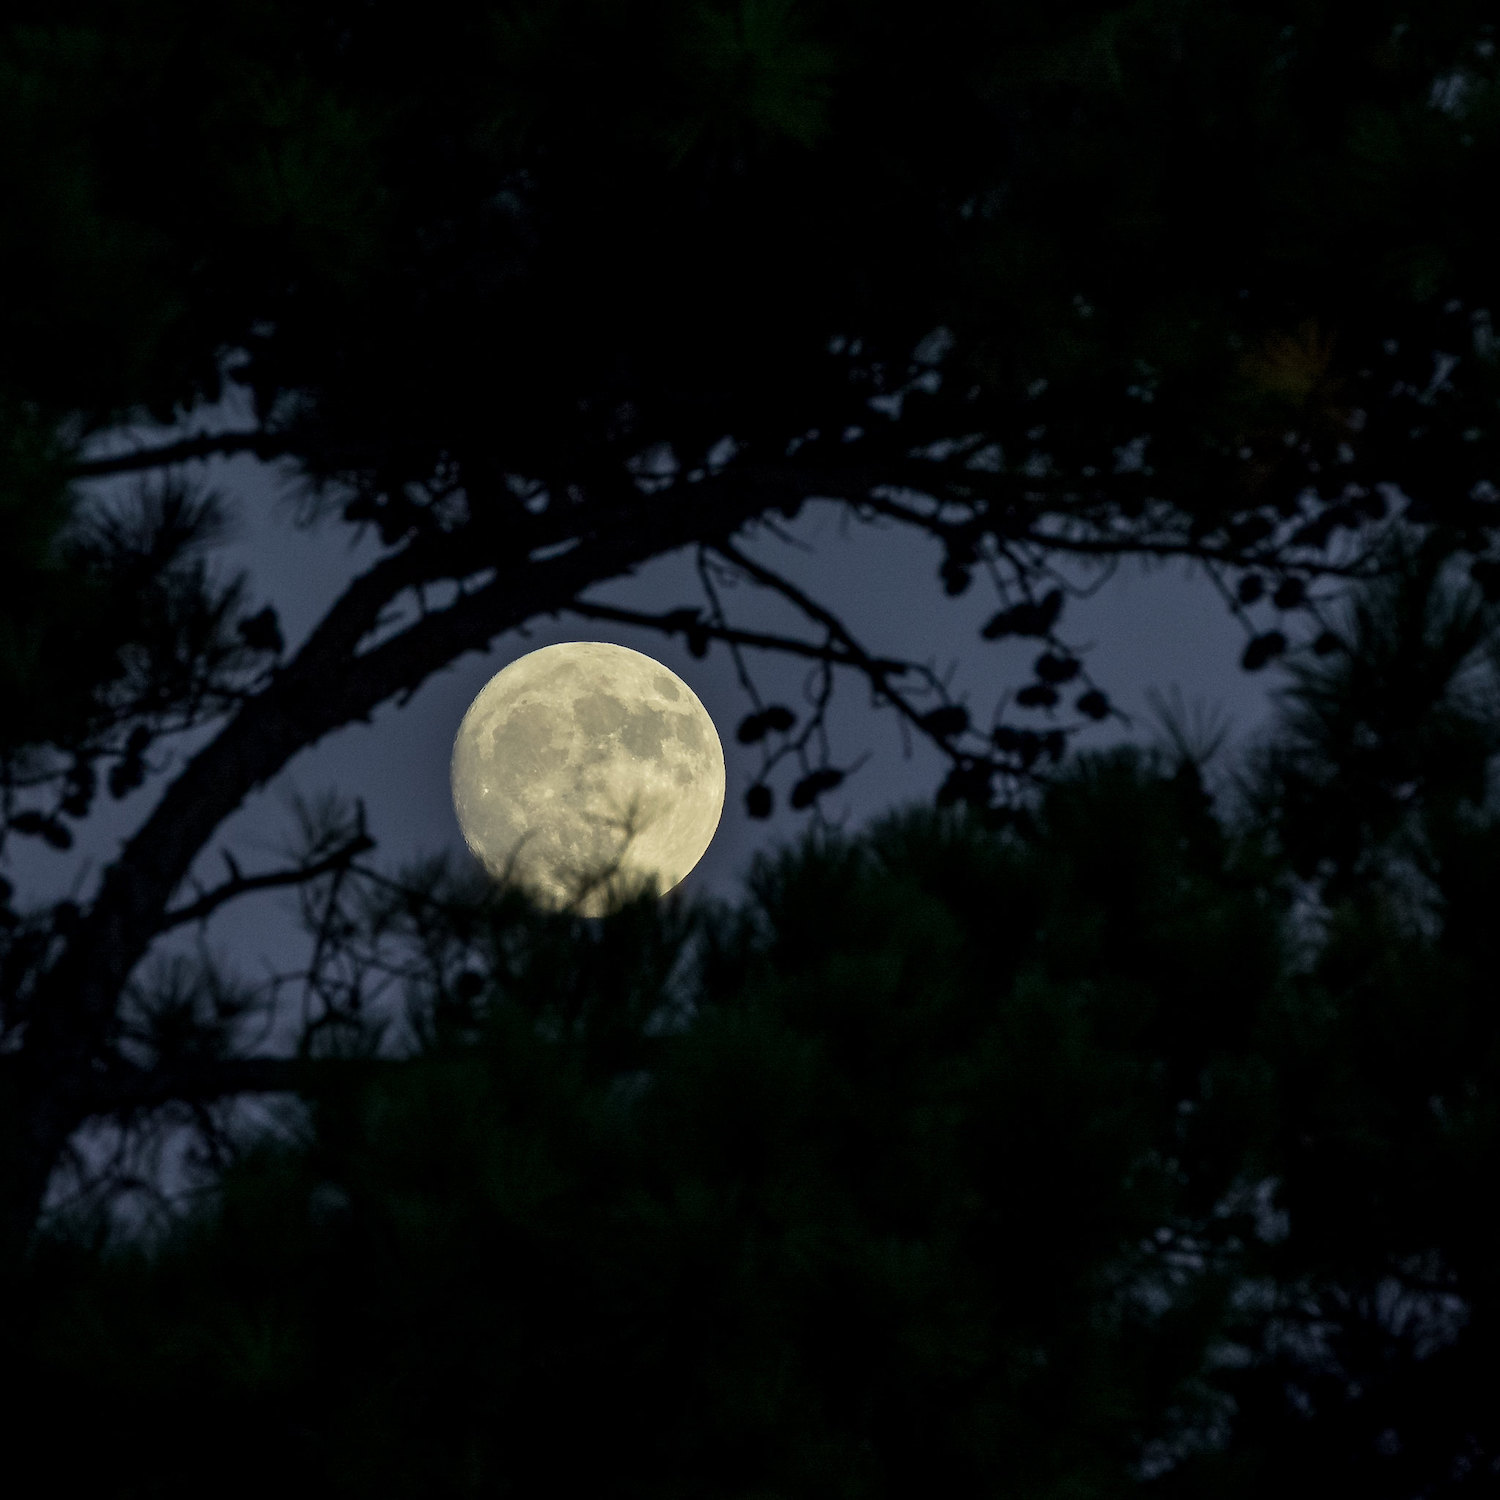
Now, here comes the fun part. With the old sky selected, I could do whatever I wanted to it without affecting the moon. I decided to go all out and completely replace it. It turns out I need Photoshop for this. So I quickly opened Photoshop. I found a cool picture of a starry night sky that I wanted to use. I copied that sky and then pasted it into my moon photo. Of course, it didn’t fit perfectly at first. I had to resize it, rotate it, and play with the blending modes to make it look somewhat natural. There is no one correct way to do this part, you need to use your own judgment and artistic vision.
- With the old sky selected, I could replace it without messing up the moon.
- I opened Photoshop, found a starry sky image, and copied it.
- I pasted the new sky into my moon photo and adjusted its size and position.
After a lot of tweaking, and I mean a lot, I finally got something I was happy with. The new sky looked way more dramatic and interesting than the original. I saved my work in Photoshop and went back to Lightroom. I could then use all the normal Lightroom tools to fine-tune my image. I played around with the colors, added a bit of a vignette, and sharpened things up. I could have also added presets at this stage. It is best to play around and see what works best for you. And there you have it! I had a moon photo with a brand-new, awesome-looking sky. It wasn’t the easiest process, but it was definitely worth it. I learned a ton about masking and blending, and I ended up with a pretty cool image.
- After lots of tweaking, I got the new sky looking good.
- I saved the changes and went back to Lightroom.
- I used Lightroom tools to fine-tune colors and sharpness.
Honestly, I’m no expert, but it was a fun experiment. I hope this helps some of you out there.
")


")


