
Okay, so I’ve been messing around with manual camera settings lately, trying to ditch the auto mode crutch. Thought I’d share my little “cheat sheet” journey, what worked, what totally bombed, and the stuff I’m still scratching my head about.
First things first: Why bother? Honestly, the pictures coming out of my phone were starting to look… blah. Everything felt same-y. I wanted that pop, that control, that “damn, I took that?” feeling. So, I grabbed my old DSLR (dusty but trusty) and decided to dive in.
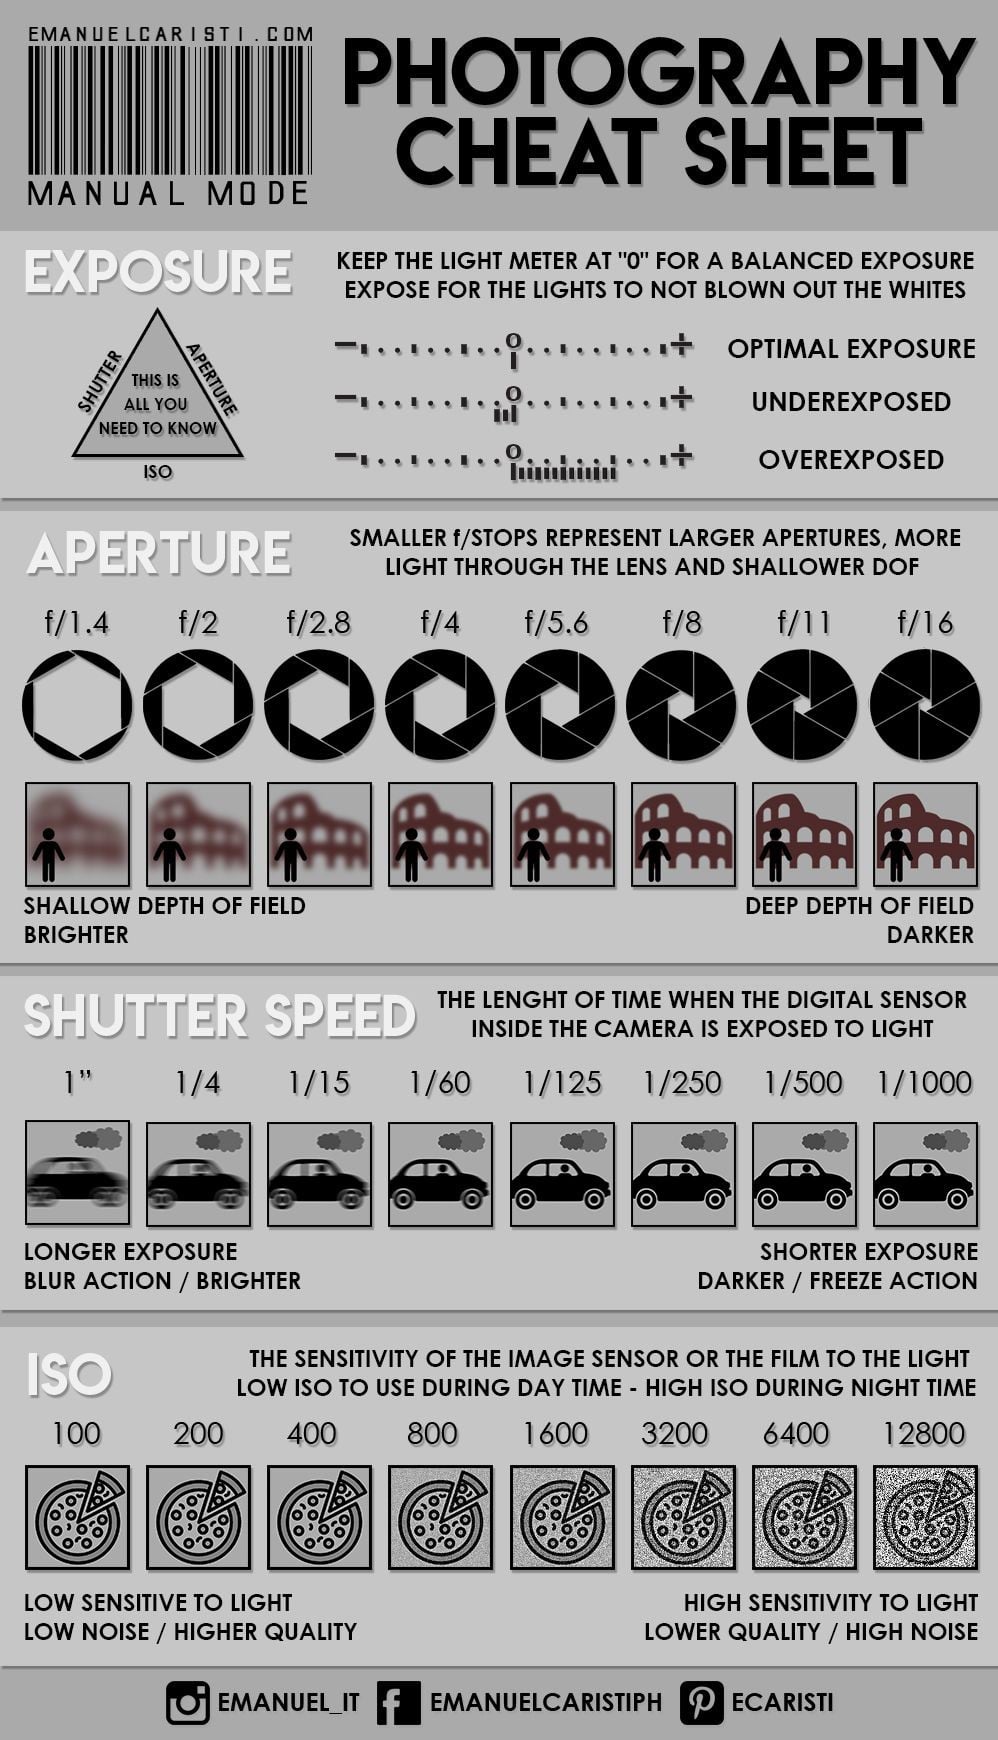
The Aperture Adventure: This was my initial focus. You know, trying to get that blurry background everyone loves. Started wide open, like f/2.8 on my 50mm. Took some portraits of my dog (he’s a patient model, bless him). Some came out great, others… well, let’s just say his nose was in perfect focus while his eyes were a blurry mess. Learned real quick about shallow depth of field and how crucial focus is at those apertures. Stepped it down to f/5.6, f/8 – much more forgiving. Landscape shots looked way sharper overall. Still figuring out the sweet spot for different situations, but progress!
Shutter Speed Shenanigans: Okay, this is where things got interesting (and sometimes frustrating). Initially, I was all about fast shutter speeds, thinking “sharper images!” Turns out, indoor shots became super dark, even with a wide aperture. Hello, ISO! But bumping the ISO introduced noise, which I definitely didn’t want. Experimented with slower shutter speeds, bracing myself, using a tripod whenever possible. Got some cool motion blur effects while photographing cars, but also a lot of blurry, unusable shots. Need more practice here, for sure.
ISO Investigations: This was the puzzle piece I kind of neglected at first. I just assumed “lower is better.” Which, yeah, technically it is for noise. But as I played with aperture and shutter speed, I realized ISO is the key to balancing everything. Pushing it higher than I wanted to get a properly exposed image, especially indoors, but then having to deal with the noise. Started experimenting with noise reduction in Lightroom, which helps, but it’s a trade-off. Still searching for that perfect balance between brightness and clarity.
Putting it All Together: The “Cheat Sheet” Attempt: So, after a few weeks of this, I started scribbling down notes – my “cheat sheet.” It’s not pretty, just a bunch of scribbles in a notebook, but it’s helping me internalize the relationships between aperture, shutter speed, and ISO. Here’s the gist:
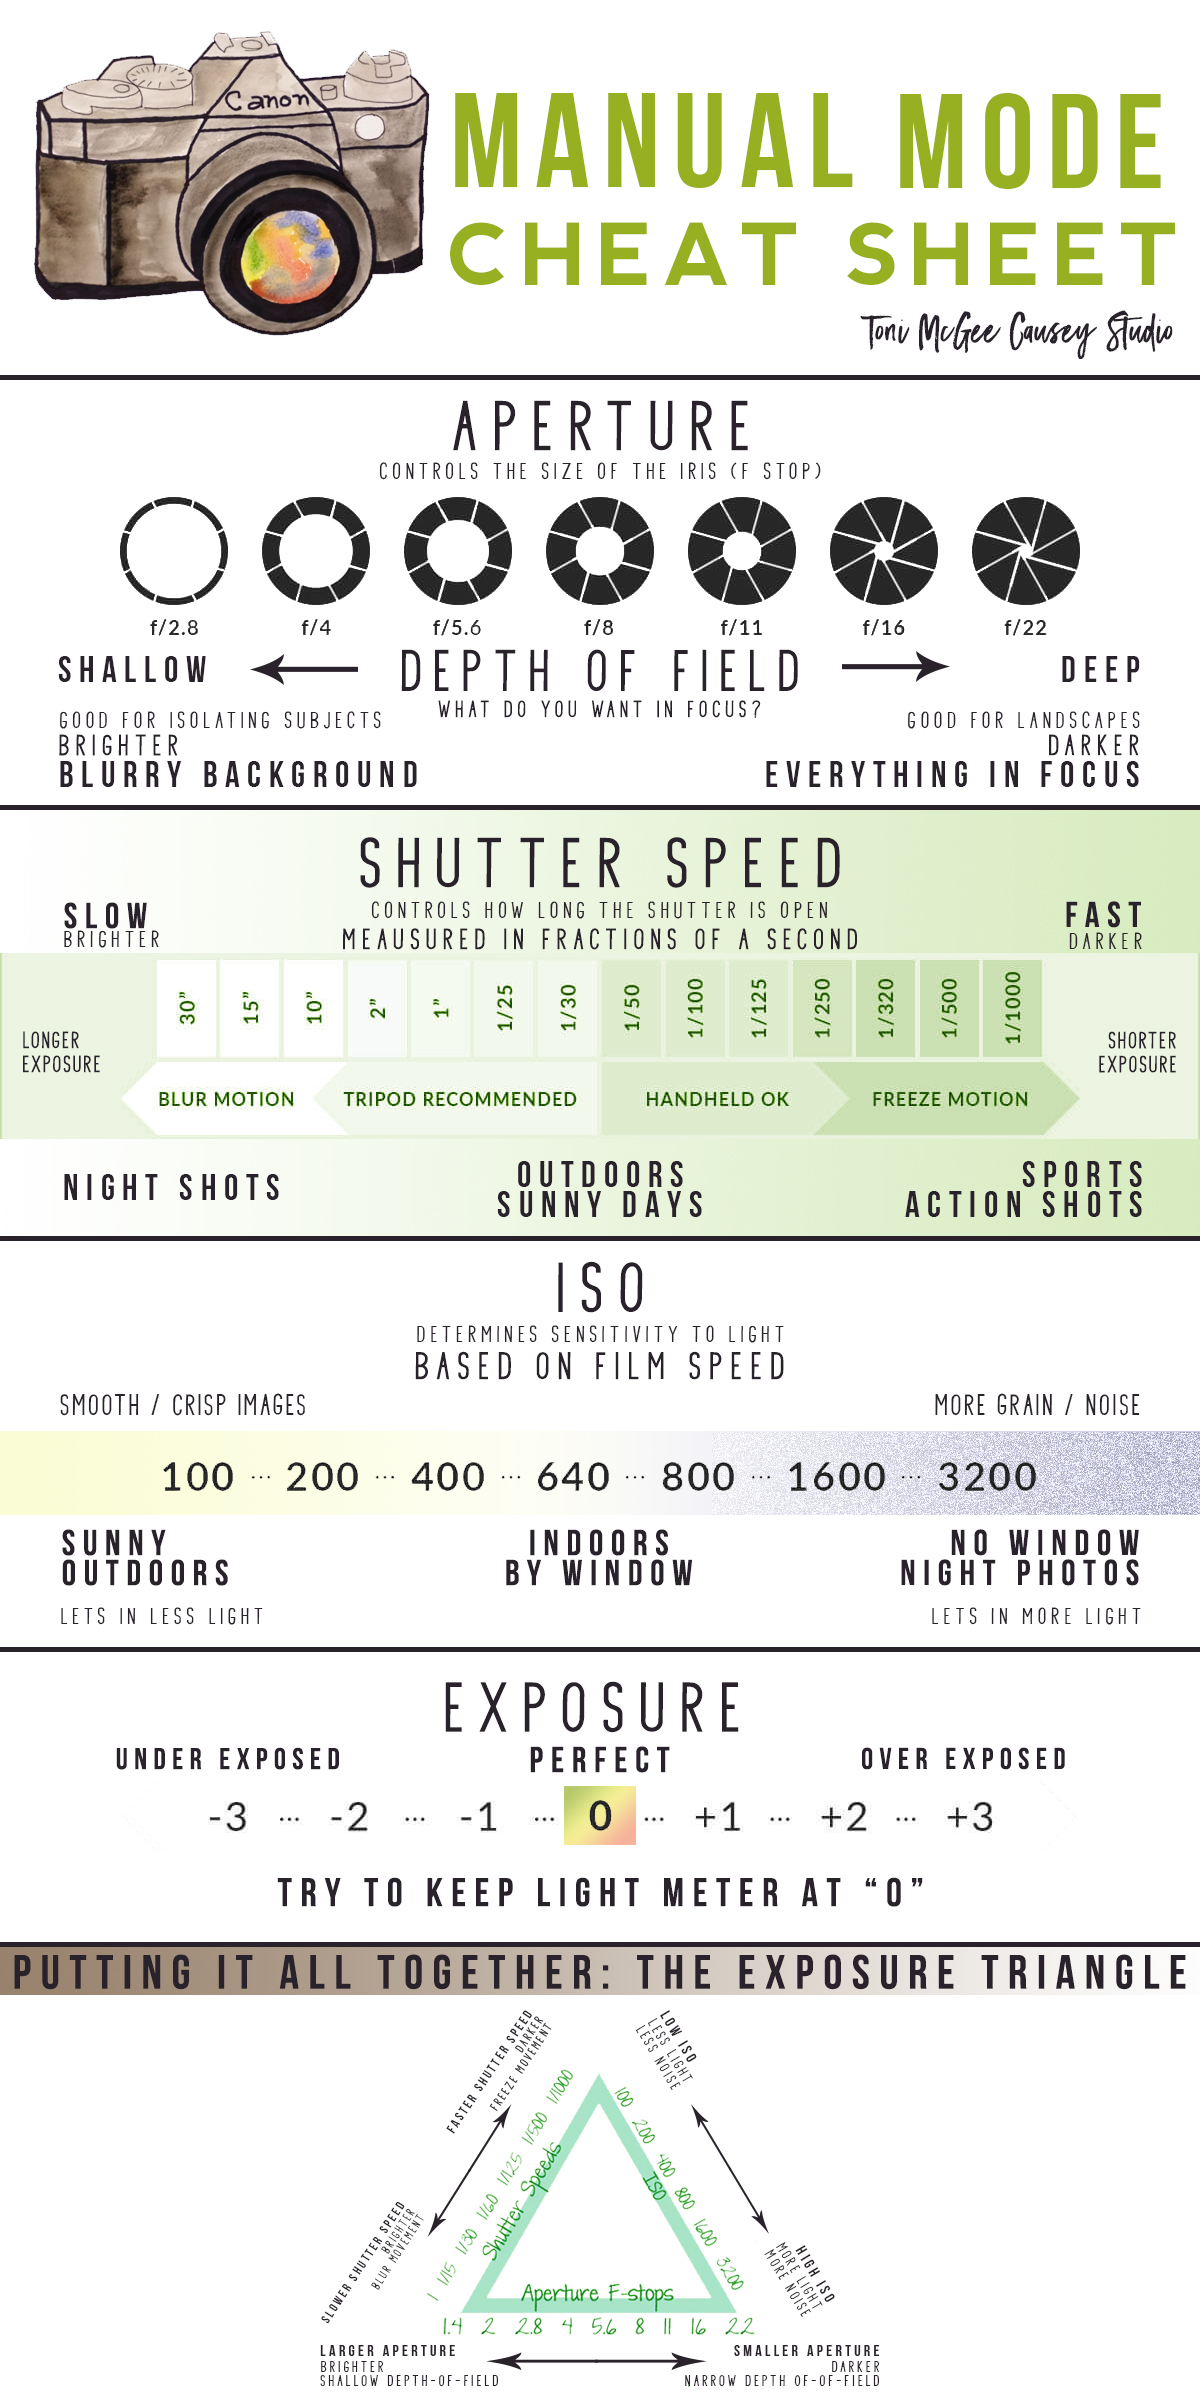
- Bright Daylight: Aperture f/8-f/11 (landscapes), Shutter Speed 1/250 or faster, ISO 100-200
- Overcast Day: Aperture f/5.6-f/8, Shutter Speed 1/125, ISO 200-400
- Indoor (Good Light): Aperture f/2.8-f/5.6, Shutter Speed 1/60, ISO 400-800
- Indoor (Low Light): Aperture f/1.8-f/2.8, Shutter Speed 1/30 (tripod needed!), ISO 800-1600+ (noise reduction required)
Important Note: These are just starting points. Every situation is different, and you have to adjust accordingly. But having these numbers in my head helps me dial things in quicker instead of just flailing around in auto mode.
What’s Next? Definitely more practice! I want to get comfortable enough that I can adjust settings on the fly without having to think about it too much. I’m also planning on experimenting with different lenses and filters. The journey continues!
Biggest Takeaway: Don’t be afraid to experiment and mess up! That’s how you learn. And write stuff down! Your future self will thank you.
")


")


