
Okay, so the other day, I needed to figure out how to get my folks over to the US for a visit. It seemed daunting at first, but once I got into it, it wasn’t too bad. Here’s how I did it, step by step:
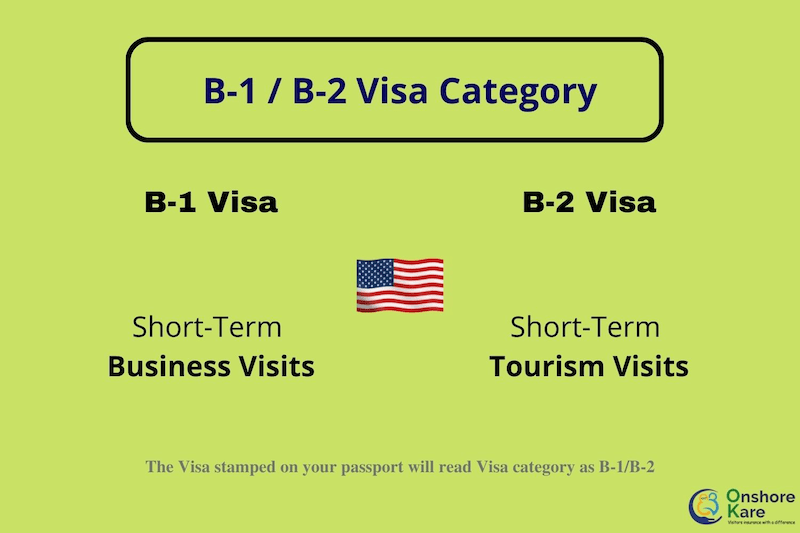
Figured Out Which Visa
First things first, I had to make sure they were applying for the right kind of visa. For family visits, it’s usually the B-2 visa, which is for tourism and visiting relatives. I checked to confirm this applied to their situation, since there are other B visas (like B-1 for business). We are good to go with B-2.
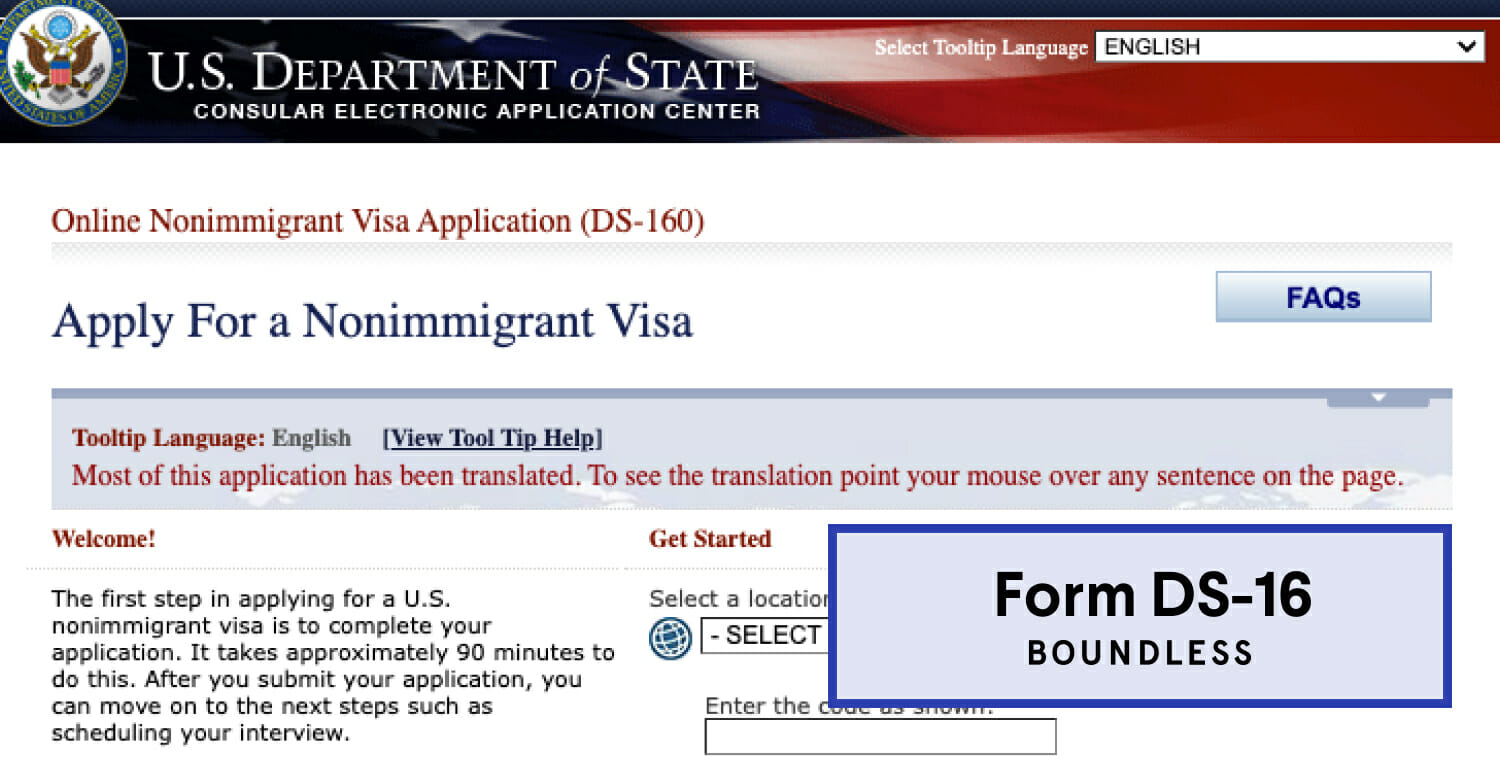
Started the DS-160 Form Online
This is the big one – the online Nonimmigrant Visa Application, form DS-160. I found the form online. It’s all online, which is handy. I made sure my parents had their passports, travel itinerary (even if it was tentative), and dates of their last five visits to the US (they’d been a couple of times before, thankfully, so we had that info). We also needed a digital photo that met all their requirements – it’s pretty specific, so I read those photo instructions carefully.
Filled Out the DS-160 (Very Carefully!)
This form is long, and you gotta be super accurate. No guessing! We took our time, going through each section. I had my parents sit with me, so I could ask them questions directly. It asks for EVERYTHING – personal info, passport details, travel plans, family info, past travel history, work history, education, even security questions. I double- and triple-checked everything before submitting each section. I made really sure about two things:
- Be honest: Seriously, no fudging the truth. It’ll only cause problems later.
- Be consistent: Made sure all the info matched across the entire form.
Once we finished, I made my parents print out the confirmation page. It has a barcode, and they’ll need that later.
Paid the Visa Fee
Yup, gotta pay to play. I checked the current fee. It’s per person, so I had to pay separately for each of my parents. I followed the instructions on that payment, choosing the one that worked best for us. I kept those receipts like gold – they are proof of payment, and they needed them for the next step.
Scheduled the Visa Interview
With the DS-160 done and the fee paid, it was time to schedule the interview. Because my parents are applying together, I was able to schedule them for the same interview slot. I logged into the system with their application information. Found a date and time that worked for everyone. I made a note of the appointment date, time, and location, printed out the appointment confirmation page, they’ll need that too.
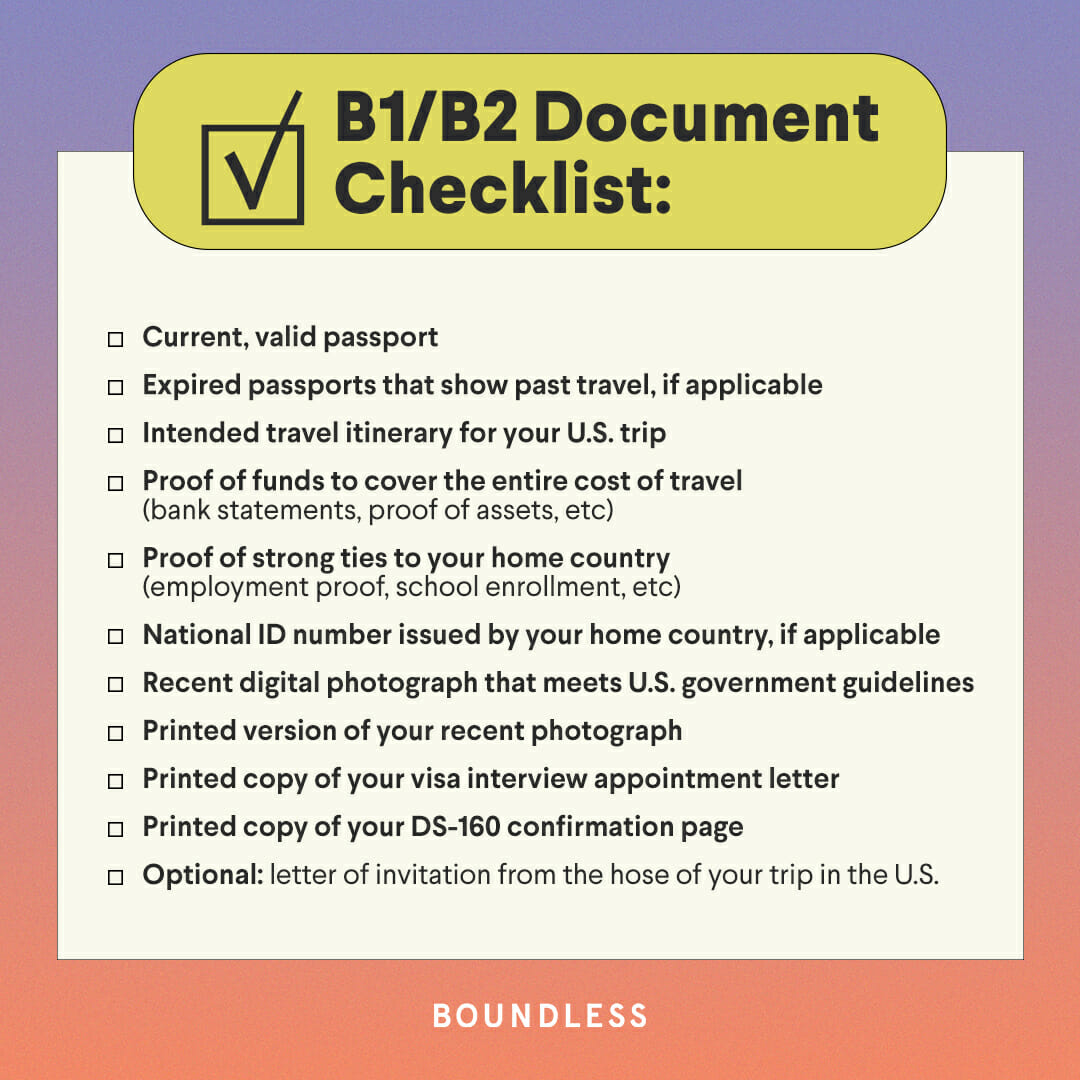
Gathered Supporting Documents
Even though the online application is detailed, they also want to see some supporting documents at the interview. I made a checklist and started gathering things:
- Passports: Of course!
- DS-160 Confirmation Page: The one with the barcode.
- Appointment Confirmation Page: We made a schedule and we printed it out.
- Visa Fee Receipts: Proof we paid.
- Photo: Even though we uploaded one, I had them bring a printed one just in case.
- Proof of Ties to Home Country: This is HUGE. They want to see that my parents have reasons to go back home after their visit. I gathered things like:
- Property deeds for their house.
- Bank statements showing their accounts.
- Letters from their employers (if they were still working).
- Anything that showed they had strong ties to their home country.
- Invitation Letter from Me: I wrote a letter explaining the purpose of their visit, how long they’d be staying, where they’d be staying (with me!), and that I’d be financially responsible for them during their trip.
- Proof of My Status in the US: I included a copy of my visa, and proof that I’m here legally.
- Bank Statements (Mine): To show I could actually afford to support them.
I organized all this stuff neatly in a folder for them to take to the interview.
Prepped My Parents for the Interview
This is probably the most nerve-wracking part. I told my parents to be polite, answer truthfully, and keep their answers concise. The consular officer mainly wants to make sure they aren’t planning to overstay their visa. We did a couple of mock interviews, where I asked them common questions like:
- “Why do you want to visit the US?”
- “How long will you be staying?”
- “Where will you be staying?”
- “Who is paying for your trip?”
- “What ties do you have to your home country?”
- “Have you visited the US before?”
I made sure they understood that the key was to demonstrate their strong ties to their home country and their intention to return after their visit.
The Interview
My parents went to their interview, armed with their documents and their preparation. It was relatively short. They were asked a few questions similar to what we’d practiced. They presented the documents when asked. And… they got approved!
After Approval of the Visa
After a anxious wait, the visa were issued. We received their passports with the shiny new visas inside. I checked the visas immediately to make sure all the information was correct – name spellings, dates, everything. Now, they can finally make plan to visit me!
It was a bit of a process, but being organized and following the steps carefully made it manageable. I hope this helps anyone else going through the same thing!


")


