")
Okay, so I needed to get a visitor visa for Canada, and let me tell you, it was a bit of a process. But I figured it out, and I’m gonna walk you through exactly what I did, step-by-step. Hopefully, this helps someone else out there!
Figuring Out If I Even Needed a Visa
First things first, I had to check if I even needed a visa. Turns out, it depends on your citizenship. I’m from a country that requires a visa, so, yep, I needed one. I just did a simple check based on my citizenship.
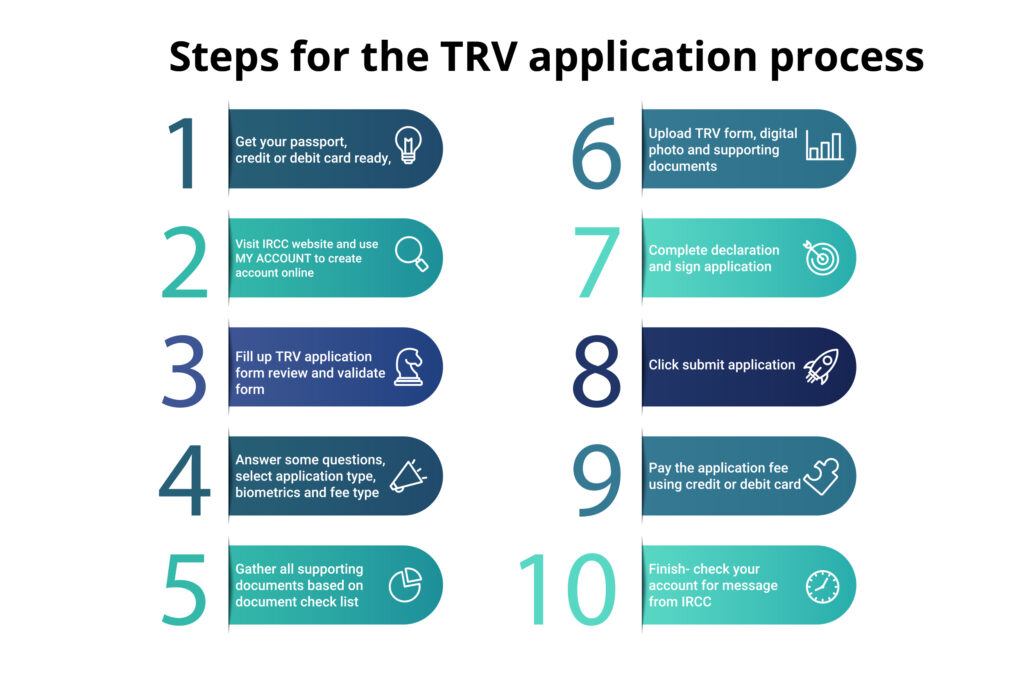
Gathering All My Documents
This was probably the most time-consuming part. I needed a TON of stuff. Here’s a basic rundown of what I collected:
- My Passport: Obviously, right? Made sure it was valid for at least six months after my planned trip.
- Photos: Specific size and format. Had to get these done professionally at a photo shop.
- Proof of Funds: Bank statements, pay stubs, anything that showed I could afford the trip and wouldn’t be, you know, stuck in Canada. I went back about six months with my bank statements.
- Travel Itinerary: A rough outline of my plans. Didn’t need confirmed bookings, just a general idea of where I wanted to go and what I wanted to do.
- Letter of Invitation (Optional): I was visiting family, so I got a letter from them stating they’d be hosting me. If you’re staying in a hotel, you probably won’t need this, but proof of your accommodation is necessary.
- Ties to My Home Country: This is important! They want to make sure you’re actually going to leave Canada. I included my employment letter, proof of my house ownership, and even a letter from my local community group saying I’m an active member. Anything to show I have a life to get back to.
Filling Out the Application Forms
I had to fill it out online. It was LONG. Lots of questions about my background, travel history, family, everything. Be prepared to spend some serious time on this. Triple-check everything! A tiny mistake can cause delays, or even get your application rejected.
I took screenshots of the progress of each section of the form.
Paying the Fees
Yep, gotta pay to apply. I paid online with my credit card. The fees can change, so I had to double-check the current amount.
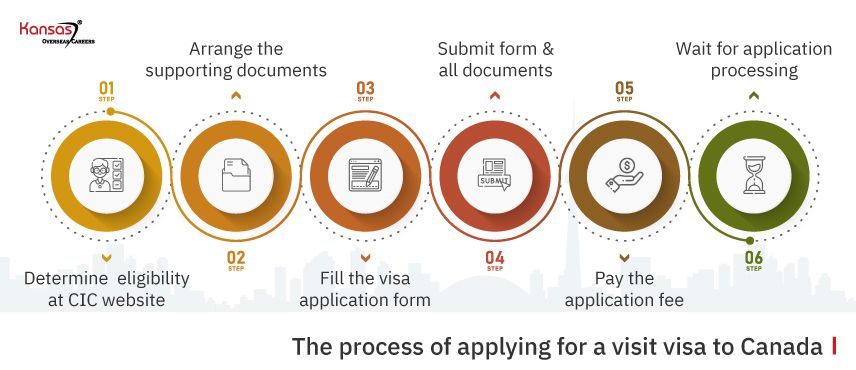
Submitting My Application
Once I had everything filled out and all my documents scanned and uploaded, I hit that submit button. I might have held my breath a little. Then, I got a confirmation email with an application number. I printed that out and kept it safe.
Biometrics (Fingerprints and Photo)
After submitting, I got an instruction letter telling me I needed to give my biometrics. I booked an appointment at the nearest Visa Application Centre (VAC). I went there, got my fingerprints and photo taken, and that was that.
Waiting…and Waiting…
This is the hardest part! The waiting game. Processing times can vary wildly. I checked the status online using my application number, but honestly, it didn’t change much. I just had to be patient (which is not my strong suit!).
Getting the Decision
Finally, I got an email! It told me my application was processed. And… I got approved! I had to send in my passport, and I received my visa in some days.
So, that’s my experience. It wasn’t exactly a walk in the park, but it was definitely doable. Just be organized, be patient, and double-check everything. Good luck!


")


