
Alright, so today I’m gonna walk you through how I finally managed to delete images from my SD card. It sounds simple, right? But trust me, it was a bit of a journey.
It all started when my camera started flashing the “memory card full” warning. Classic! I had tons of photos and videos from a recent trip, and I needed to clear some space. So, I popped the SD card out of my camera, grabbed my trusty card reader, and plugged it into my laptop.
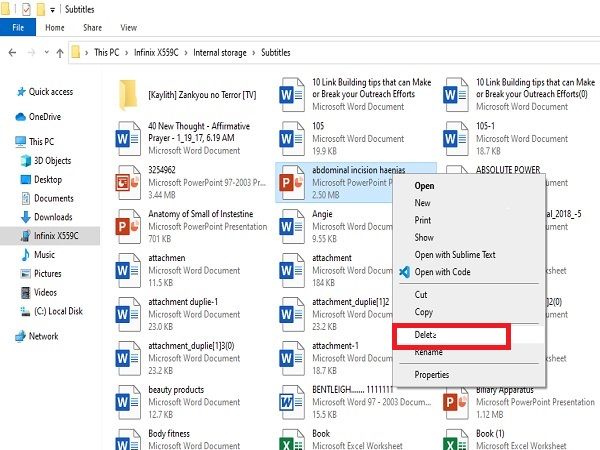
First things first, I opened up the file explorer. I found the SD card, saw all my precious memories (taking up way too much space!), and thought, “Okay, let’s get rid of the junk.” I started selecting the photos and videos I didn’t want – blurry shots, duplicates, that kind of stuff. Then, I hit the delete key. Easy peasy, I thought.
But here’s where things got weird. The files seemed to disappear from the folder, but the available space on the SD card didn’t change! What the heck? I checked the recycle bin – nothing there. I refreshed the folder, and guess what? The files were back! It was like they were mocking me.
I tried deleting them again, same result. I tried dragging them to the recycle bin, nope. I even tried right-clicking and selecting “delete,” still nothing. I was starting to get seriously frustrated.
Okay, time for some troubleshooting. I figured maybe the SD card was write-protected. You know, that little switch on the side? I checked it, and it was definitely in the unlocked position. So, that wasn’t the problem.
Next, I thought maybe it was a problem with the card reader. I tried a different card reader, plugged it into a different USB port, still no luck. The files just wouldn’t stay deleted.
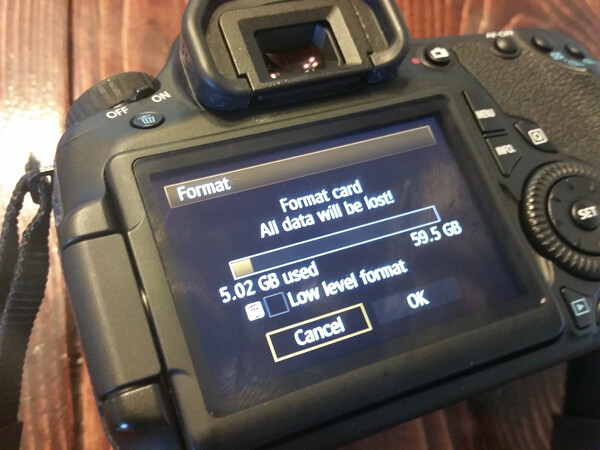
Alright, time to bring out the big guns. I remembered reading something about using a disk utility to format the SD card. Formatting basically wipes the entire card clean, which is a bit drastic, but I was desperate.
I fired up my computer’s disk management tool. I located the SD card, right-clicked on it, and selected “Format.” I made sure to choose the right file system (FAT32, since that’s what my camera uses) and unchecked the “Quick Format” option. I figured a full format would be more thorough. Then, I clicked “Start” and waited.
The formatting process took a while, but finally, it was done. I checked the SD card again, and it was completely empty! Success! Or so I thought…
I popped the SD card back into my camera, took a few test photos, and then tried deleting them directly from the camera. And guess what? Same problem! The photos seemed to delete, but they were still taking up space, and they reappeared after a refresh.
I was about to lose it. But then, I had a hunch. Maybe the problem wasn’t with the SD card itself, but with the camera’s file system. I dug through the camera’s settings and found an option to “Optimize the file system” or something similar. It sounded promising, so I gave it a shot.
The camera whirred and clicked for a few minutes, and then it was done. I took another test photo, and this time, when I deleted it from the camera, it actually stayed deleted! The available space increased, and the photo didn’t reappear. Finally!
So, what did I learn from all this? First, always double-check the basics, like the write-protect switch. Second, don’t be afraid to try different methods of deleting files. And third, sometimes the problem isn’t with the SD card itself, but with the device using it.
Hope this helps someone else avoid the same headache I went through!
")


")


