Alright, so I’d been seeing all these fancy photos with cool shadow patterns, and folks were calling it “gobo photography.” Sounded complicated, like you needed a Hollywood budget or something. But I figured, hey, shadows are just light being blocked, right? How hard can it be? So, I decided to give this gobo portrait thing a shot myself, just to see what all the fuss was about.
Getting Started – The “What Do I Even Use?” Phase
First thing, I didn’t have any of those professional, laser-cut metal gobos. Not spending money on that until I knew if I even liked the effect. So, I rummaged around the house. My first brilliant idea? Venetian blinds. Yeah, classic. Then I found an old lace curtain my grandma gave me, a bit dusty, but perfect for some texture. I even eyed a colander for a polka-dot vibe, but figured that might be too cliché.
For lighting, I just grabbed my trusty old speedlight. The one that’s been dropped a few times but still kicks. I knew I needed a hard light to get crisp shadows, so no softbox today. I figured I’d just zoom the flash head in tight or use a snoot if I could find the one I made out of black cardboard years ago.
The Actual Fumbling Around – My Process
So, I set up in my living room. Cleared some space, much to the cat’s annoyance. The initial attempts were, let’s be honest, a bit of a mess.
- I tried holding a piece of cardboard with random holes cut into it between the flash and my brave volunteer (my long-suffering partner). The shadows were blurry, or the pattern was too big, or just plain ugly.
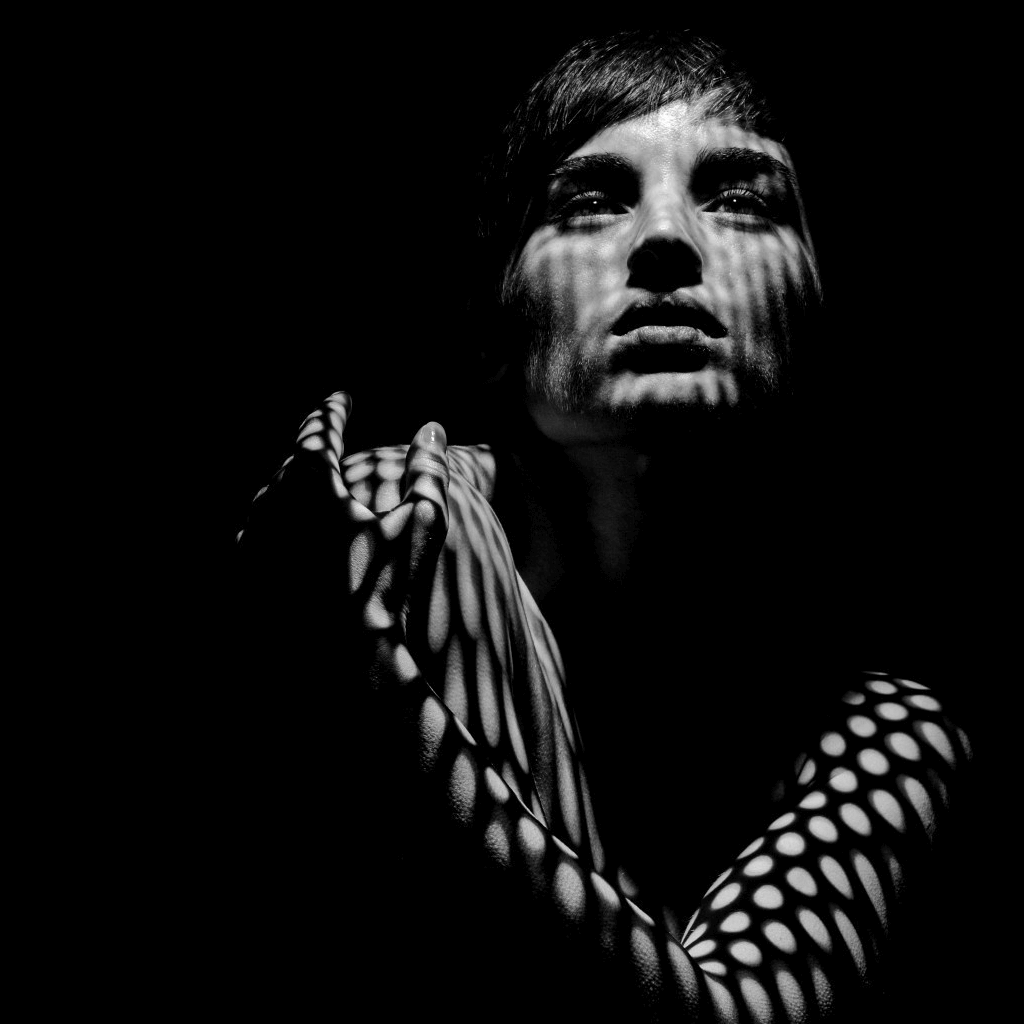
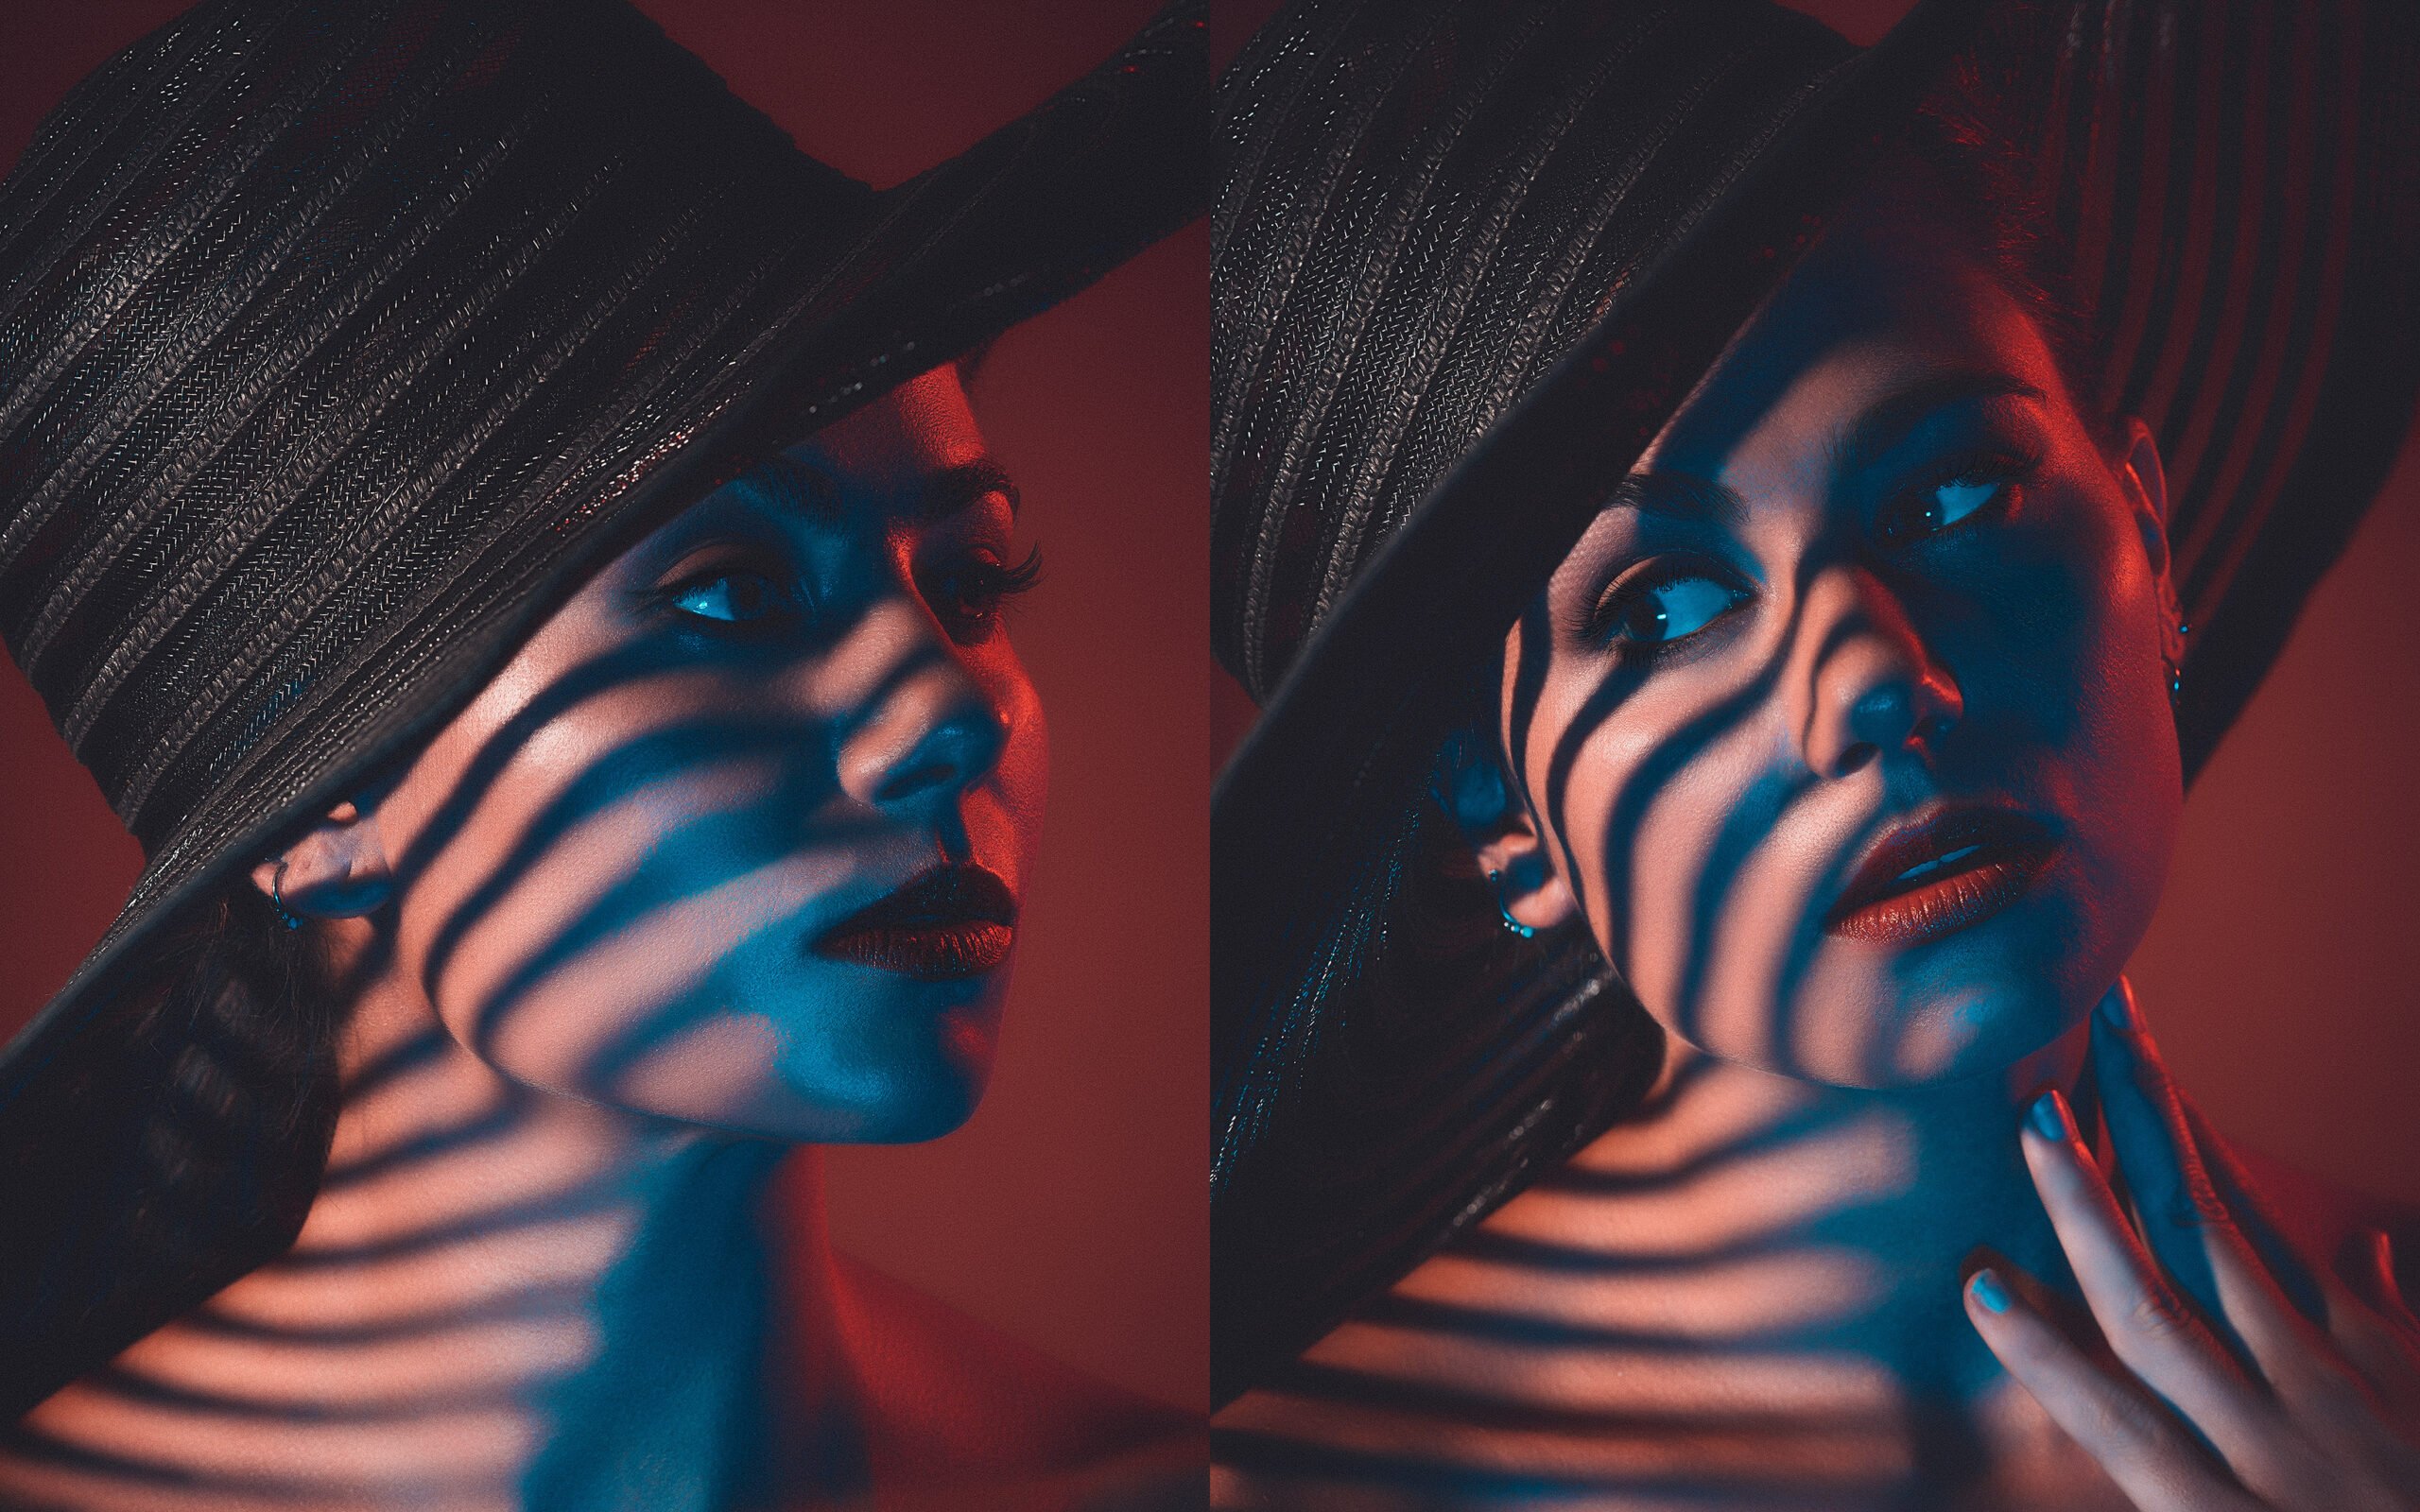
- Then I remembered the lace curtain. I draped that over a light stand, trying to get it somewhat taut. This was better! The intricate patterns started to show up.
- Positioning was key, I quickly found out. Moving the light closer to the gobo (the lace, in this case) made the shadow pattern larger and softer on the subject. Moving the light further away from the gobo, and the gobo closer to the subject, made the shadows sharper and more defined. This took a lot of back-and-forth.
- I had the flash off-camera, obviously, triggered wirelessly. I played around with the flash power a lot. Too much, and the subject was blown out; too little, and the shadows just disappeared into mush.
The biggest headache? Keeping the darn gobo still if it wasn’t something I could easily clamp. The lace curtain kept swaying if there was even a hint of a breeze (or a curious cat brushing past). I ended up using a bunch of clothespins and some string to make it behave.
I also quickly learned that the distance of the subject from the background mattered. If they were too close to a wall, the gobo pattern would splash all over the background too, which was sometimes cool, sometimes just messy. I preferred it when the pattern was mostly on the subject, making them pop.
So, What Happened in the End?
After a good hour or two of tinkering, moving things an inch here, an inch there, I actually got some shots I didn’t hate! The lace curtain was the winner for me. It created these really delicate, almost painterly shadows that looked pretty neat on a portrait.
What I figured out:
- You don’t need fancy gear. Seriously. Cardboard, lace, even leaves from a plant could work if you’re creative.
- A hard light source is your friend for this. No diffusion, or very minimal.
- Distance is everything: light to gobo, gobo to subject, subject to background. Tiny changes make a big difference.
- Patience. Lots of it. It’s not a point-and-shoot technique. You gotta fiddle.
It’s definitely something I’ll play with again. It’s a fun way to add some drama or texture without needing a ton of props or complicated setups once you get the hang of the light-gobo-subject dance. Next time, I might try making some more intentional patterns out of black foam board. Or maybe I’ll just stick to the lace, it was surprisingly effective for something I found in a storage box.


