
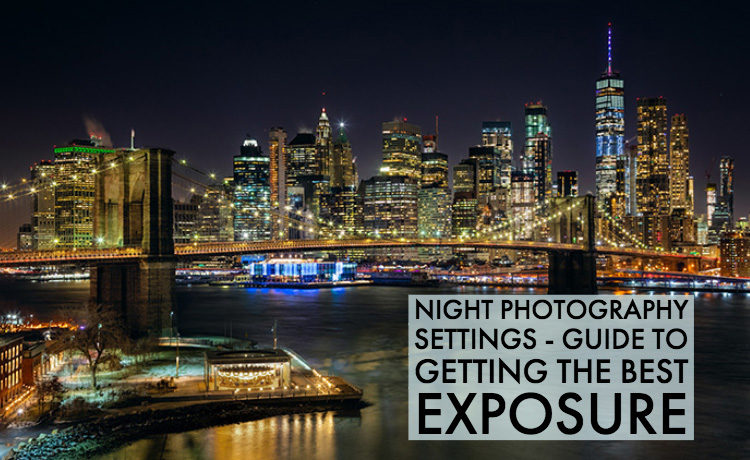
Alright, so I figured I’d talk a bit about my adventures with long exposure night time photography. You see those cool shots, silky water, light trails from cars, and you think, “Yeah, I can do that. Just leave the camera open longer, right?” Well, let me tell you, it’s a bit more involved than just that. It’s a real learning curve, or at least it was for me.
First things first: Stability is King
The very first thing I learned, the hard way, of course, was about keeping the camera still. Super still. I mean, rock solid still. I tried propping my camera on a beanbag on a wall once. Disaster. Any little wobble during those long seconds, and your picture is just a blurry mess. So, I went out and got myself a decent tripod. Didn’t break the bank, but something sturdy. I quickly realized that pressing the shutter button with my finger, even gently, could shake things. So, I started using the camera’s self-timer, or a remote shutter release. That made a huge difference right away. No more shaky starts to my exposures.
Battling the Darkness: Focus and Composition
Okay, so camera’s steady. Next challenge: seeing what the heck I’m actually pointing my camera at. It’s dark! My camera’s autofocus would just hunt and hunt, buzzing annoyingly, and then give up. So, I switched to manual focus. My technique? I’d try to find the brightest distant light source in my scene, like a streetlight or a bright window, and manually focus on that. Sometimes I’d even bring a powerful flashlight and shine it on something in the foreground to get my focus locked, then switch the flashlight off before taking the shot. It felt a bit like fumbling around, but I got better at it. Composing the shot was also tricky. The viewfinder is dark, the live view screen can be noisy and dim. I learned to take a few quick, high ISO test shots at shorter exposures just to see if my framing was okay before committing to a long wait.
The Juggling Act: Settings, Settings, Settings
Then came the actual exposure settings. This is where I spent most of my time just experimenting.
- ISO: I learned to keep this as low as possible, usually ISO 100 or 200 on my camera, to avoid noisy, grainy pictures. Night shots are dark enough without adding digital noise.
- Aperture: For those starry starbursts from streetlights, I found out I needed a smaller aperture, like f/8 or f/11, even f/16. For just general landscape stuff at night, I might open it up a bit more, but not too much, because I still wanted a good chunk of the scene in focus.
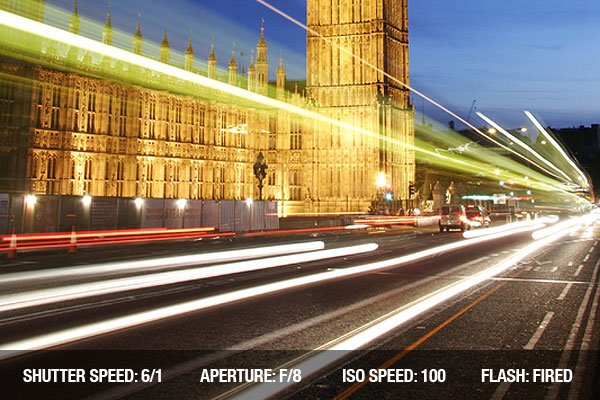
- Shutter Speed: This was the big variable. For car light trails, I’d start with something like 10 to 30 seconds. For really dark scenes, or trying to get star trails, I pushed it to minutes, using the “Bulb” mode on my camera. This mode basically keeps the shutter open for as long as I hold the remote button down, or until I press it again.
I remember one night I was down by the river, trying to get the reflections of the city lights on the water. I must have taken twenty shots. First one, too dark. So I increased the shutter speed. Next one, sky looked okay, but the water was blown out, too bright. So I adjusted the aperture a bit, maybe fiddled with the ISO. It was a lot of back and forth. I’d take a shot, wait, look at the result on the little screen, grunt, change something, and try again. It’s not like daytime photography where you can just click away. Every shot is an investment in time.
Patience, and Then Some More Patience
And that’s the biggest thing, really. Patience. You set up, you compose, you focus, you pick your settings, you take the shot… and then you wait. Sometimes for 30 seconds, sometimes for a couple of minutes. And if your camera has long exposure noise reduction turned on (which is usually a good idea), you wait again for the same amount of time while the camera processes the image. So a 2-minute exposure actually takes 4 minutes before you can even see if it worked. You gotta be prepared to stand around, often in the cold, just waiting. I started bringing a thermos of coffee on my night shoots. Highly recommend it.
When It Finally Clicks
But then, after all that fiddling and waiting, you nail one. You get that shot where the light trails are perfect, the stars are sharp (if you’re going for that), or the water looks like mist. That’s a really good feeling. It makes all the fumbling around worthwhile. I’m no pro, not by a long shot, but I’ve gotten some photos I’m really happy with. I learned to look for scenes with some kind of light source – car headlights, street lamps, moonlight, city glow. Complete darkness doesn’t make for very interesting long exposures unless you’re specifically doing astrophotography of deep sky objects, which is a whole other level I haven’t really dived into much.
So yeah, that’s been my journey with long exposure night photography. Lots of trial and error, a fair bit of frustration, but also some really rewarding moments. It’s definitely a different beast than snapping photos in broad daylight, but the results can be pretty magical when you get it right. It taught me a lot about how my camera actually works, too, beyond just hitting the auto button.
")


")


